How to Create an AWS S3 Bucket and an IAM User
This guide provides step-by-step instructions on creating an S3 bucket in AWS and an IAM user with appropriate permissions to access the bucket.
Before you begin
- You will need an AWS Account (Create one here)
- You need permissions in AWS to create an S3 bucket and an IAM user/policy.
Step 1: Create an S3 Bucket
- Navigate to S3
- Go to the AWS Management Console.
- In the Services menu, select S3 under Storage.
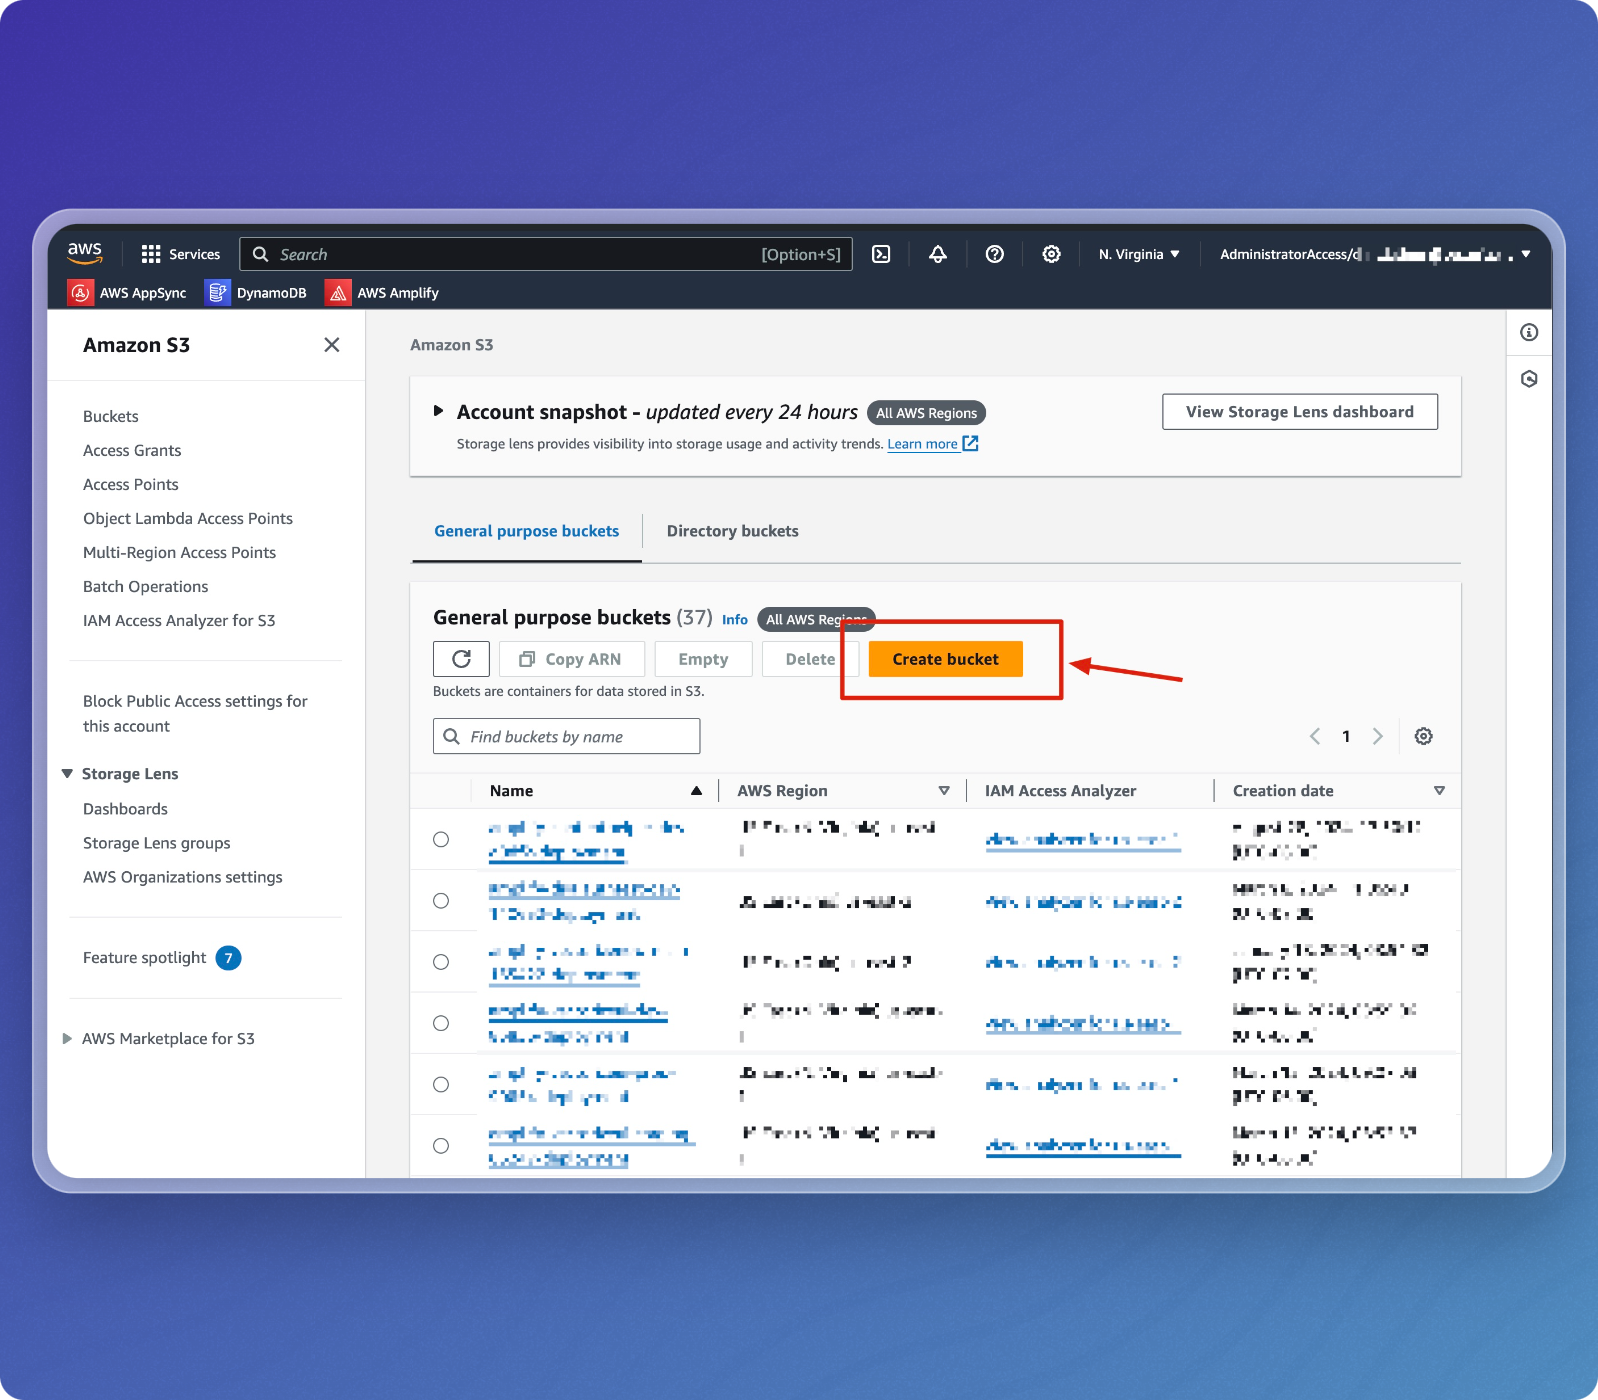
- Create a New Bucket
- In the Amazon S3 dashboard, click the Create bucket button.
-
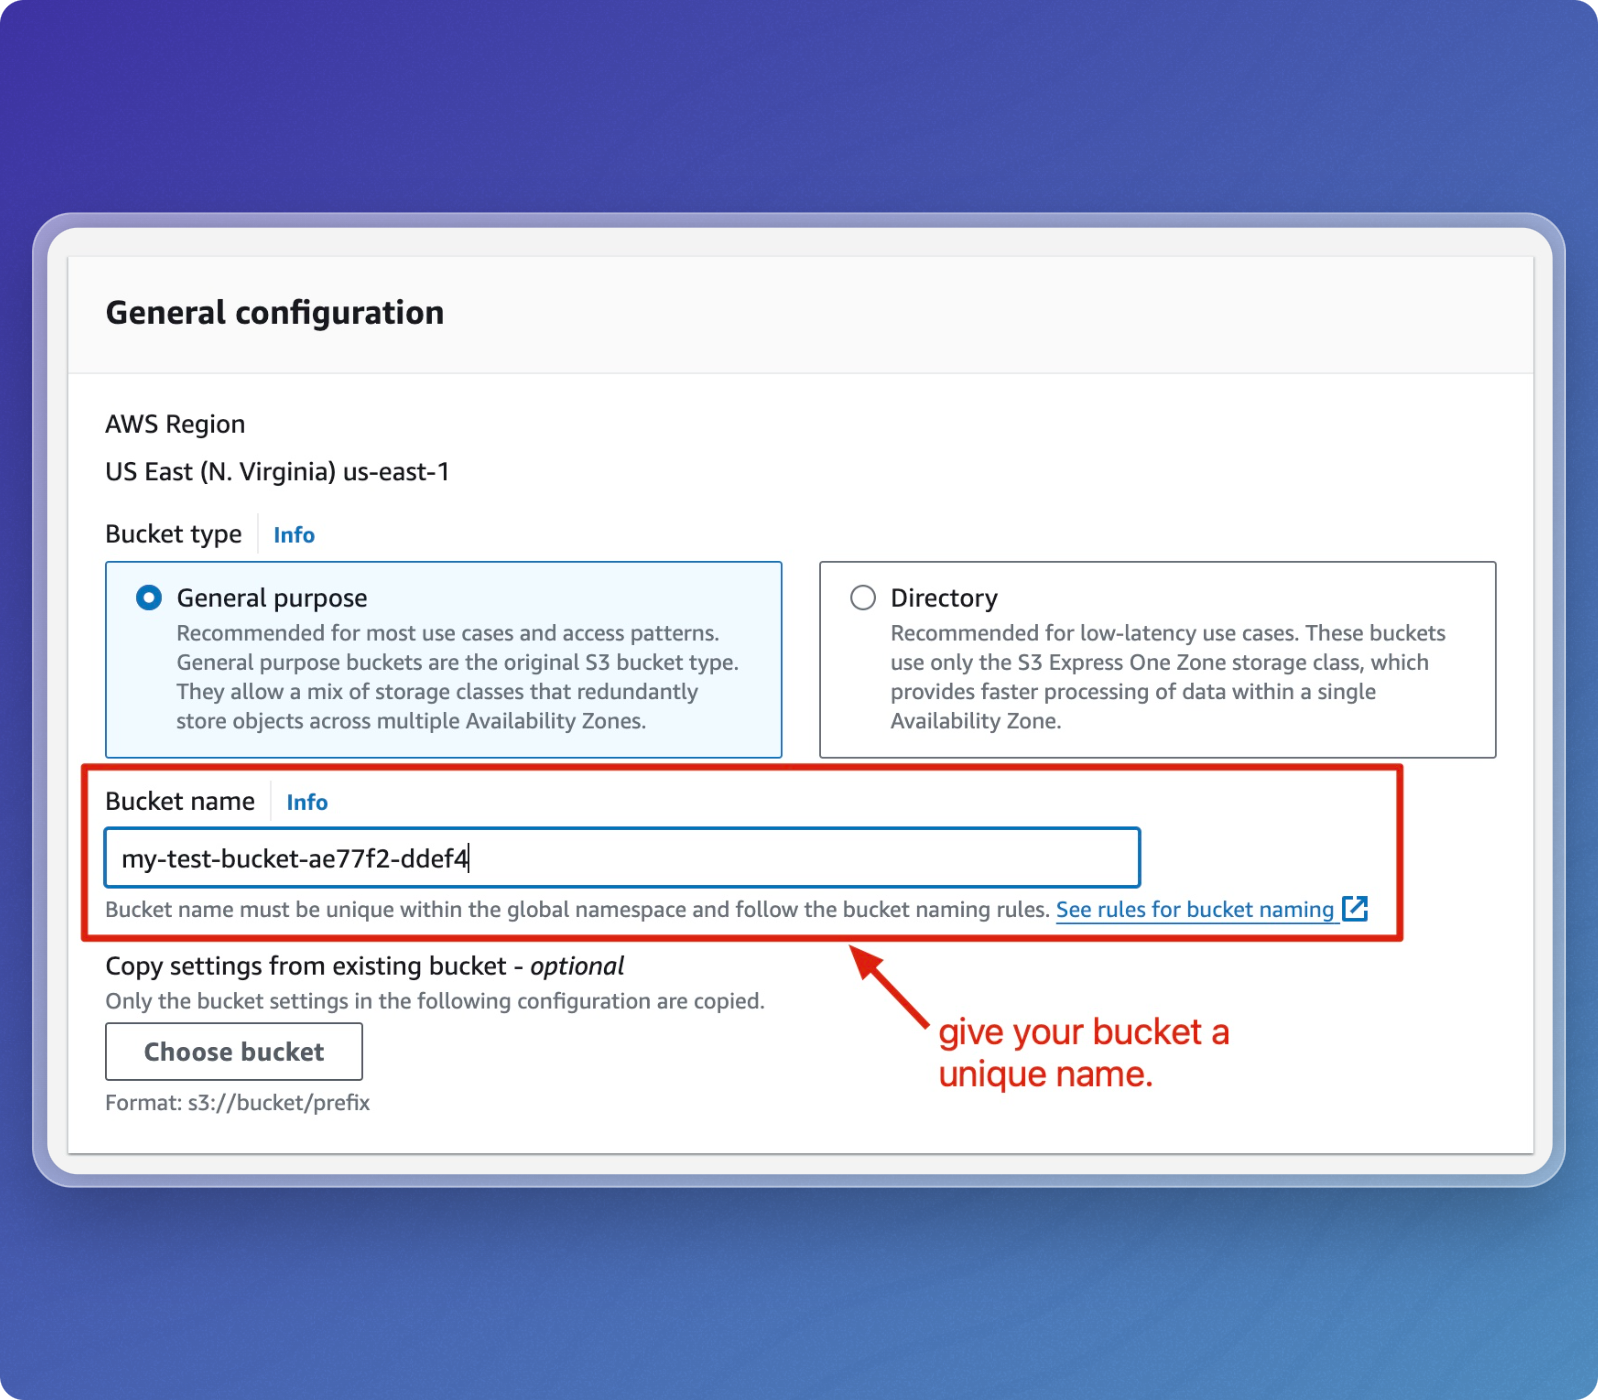
Configure Your Bucket
- Select the desired AWS Region.
- Choose General purpose as the Bucket type.
- Enter a unique Bucket name.
- Click Next to continue.
-
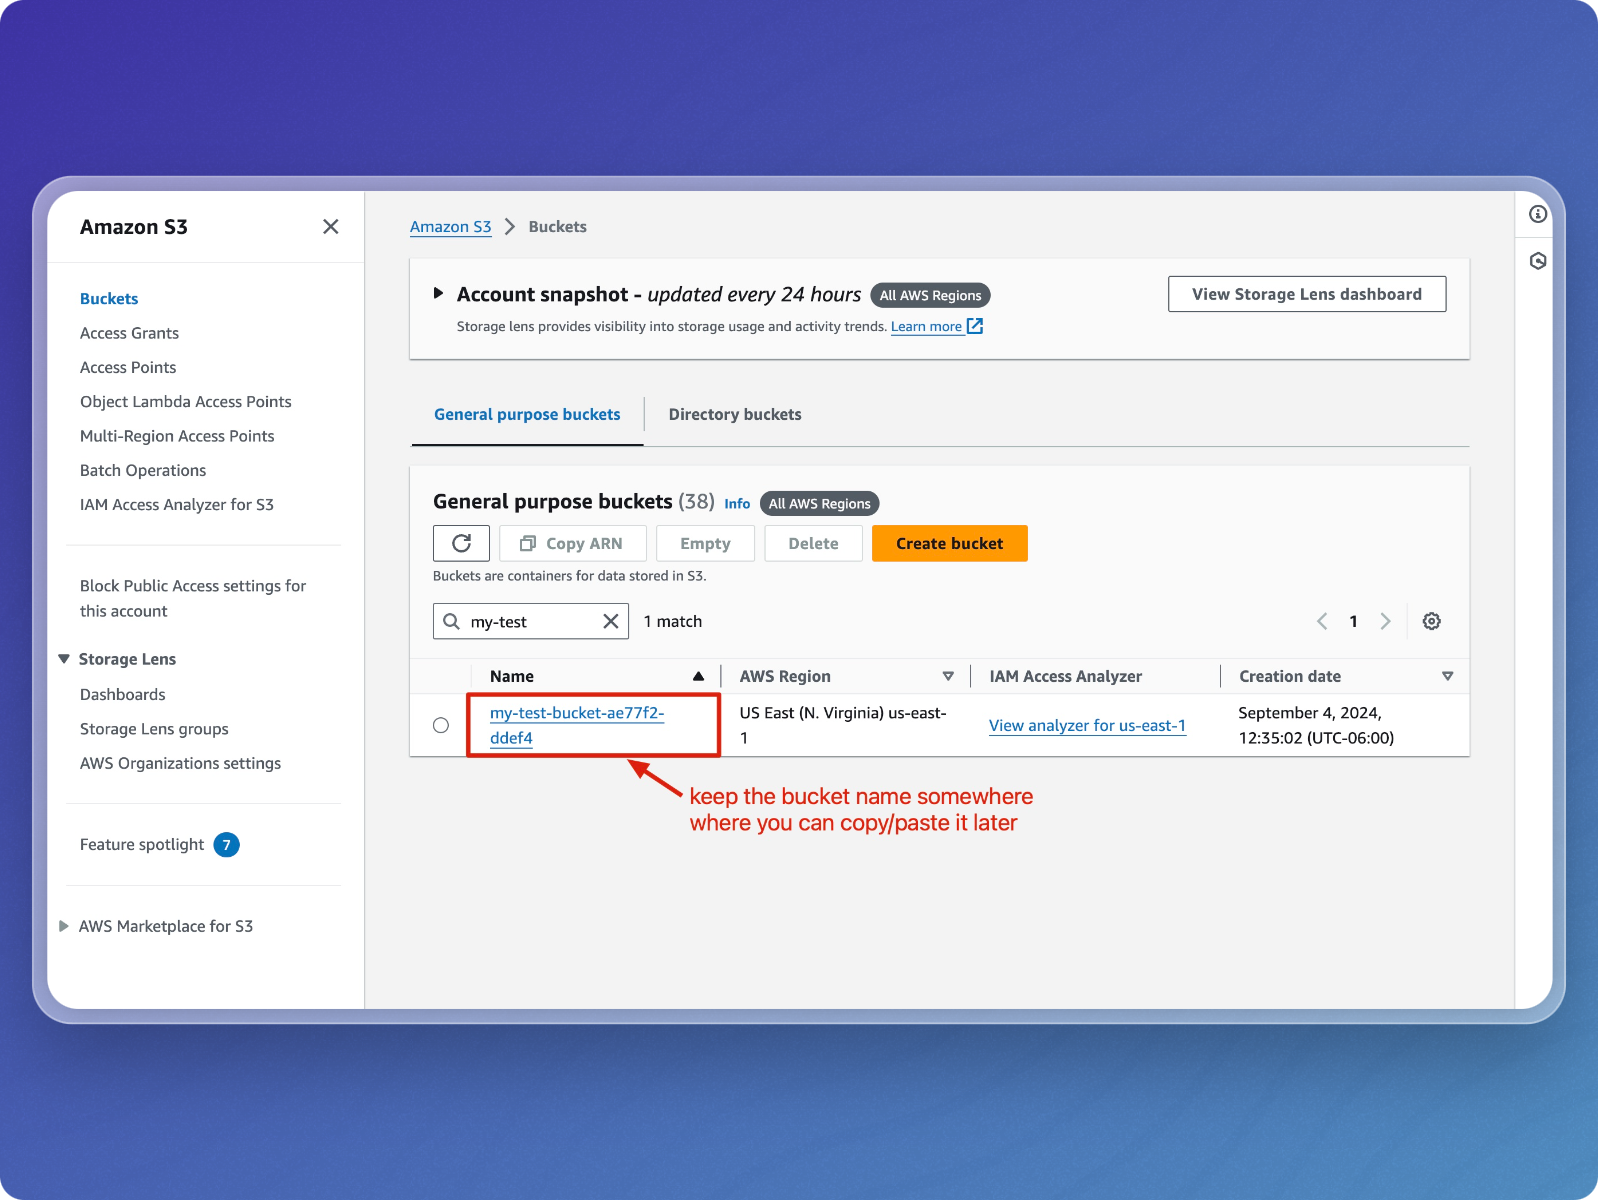
Review the Bucket
- After creation, the bucket will be listed in the General purpose buckets section.
- Click on the bucket name to view its details and configure additional settings.
Step 2: Create an IAM User and Policy
-
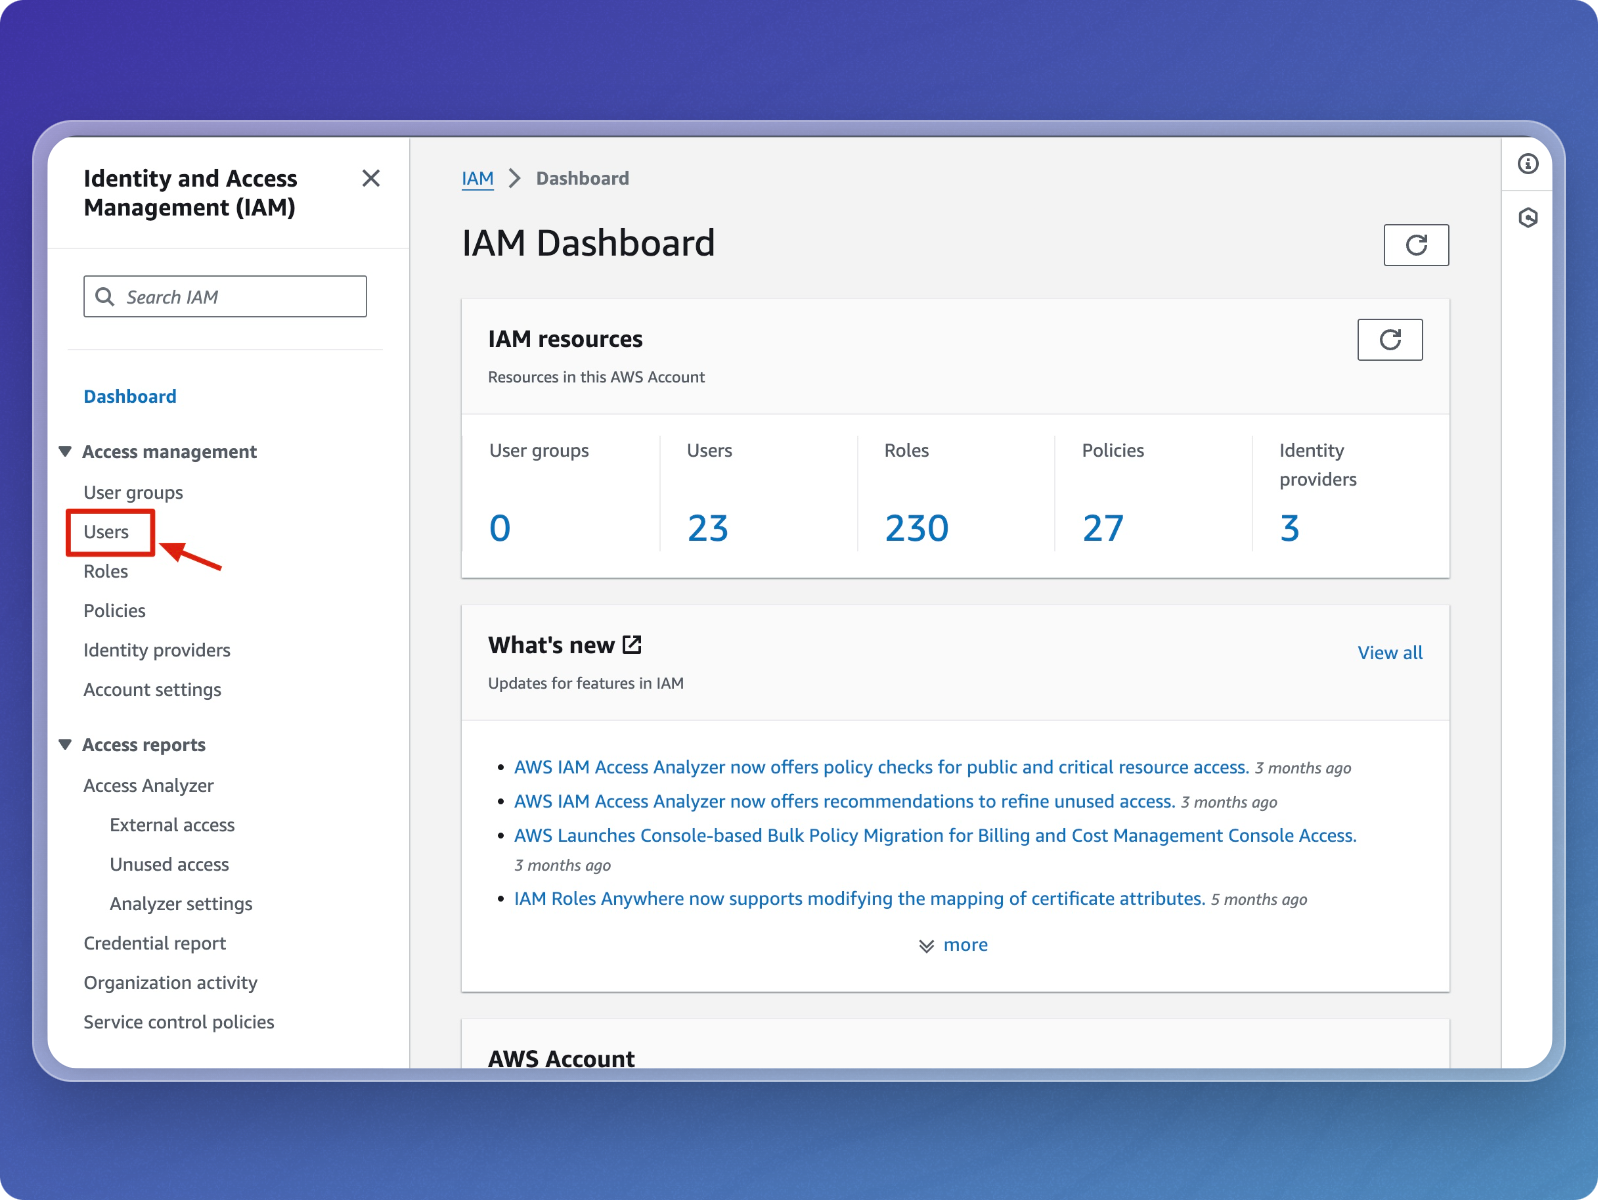
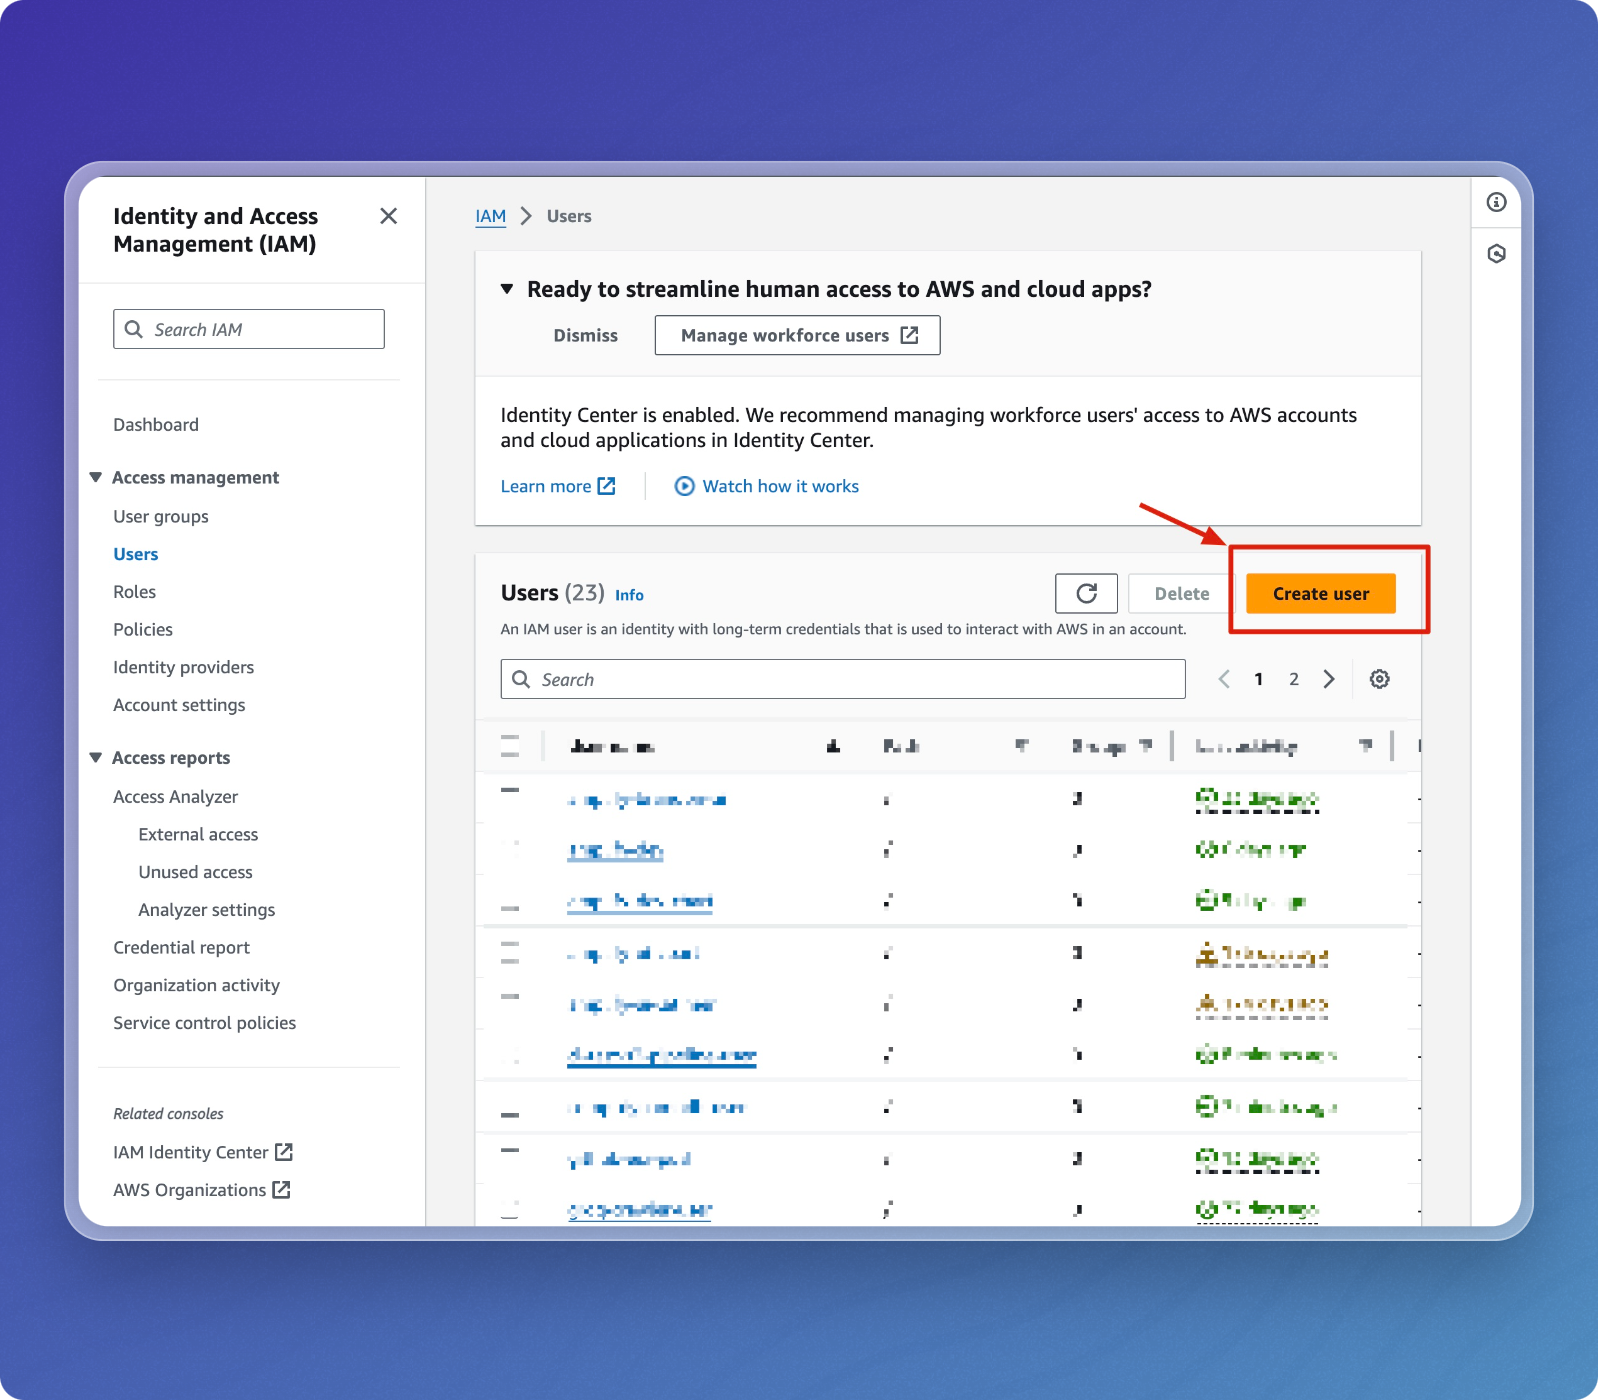
Navigate to IAM
- Go to the IAM Dashboard from the AWS Management Console.
- On the left-hand menu, select Users.
-
Create a New IAM User
- On the Users page, click Create user.
-
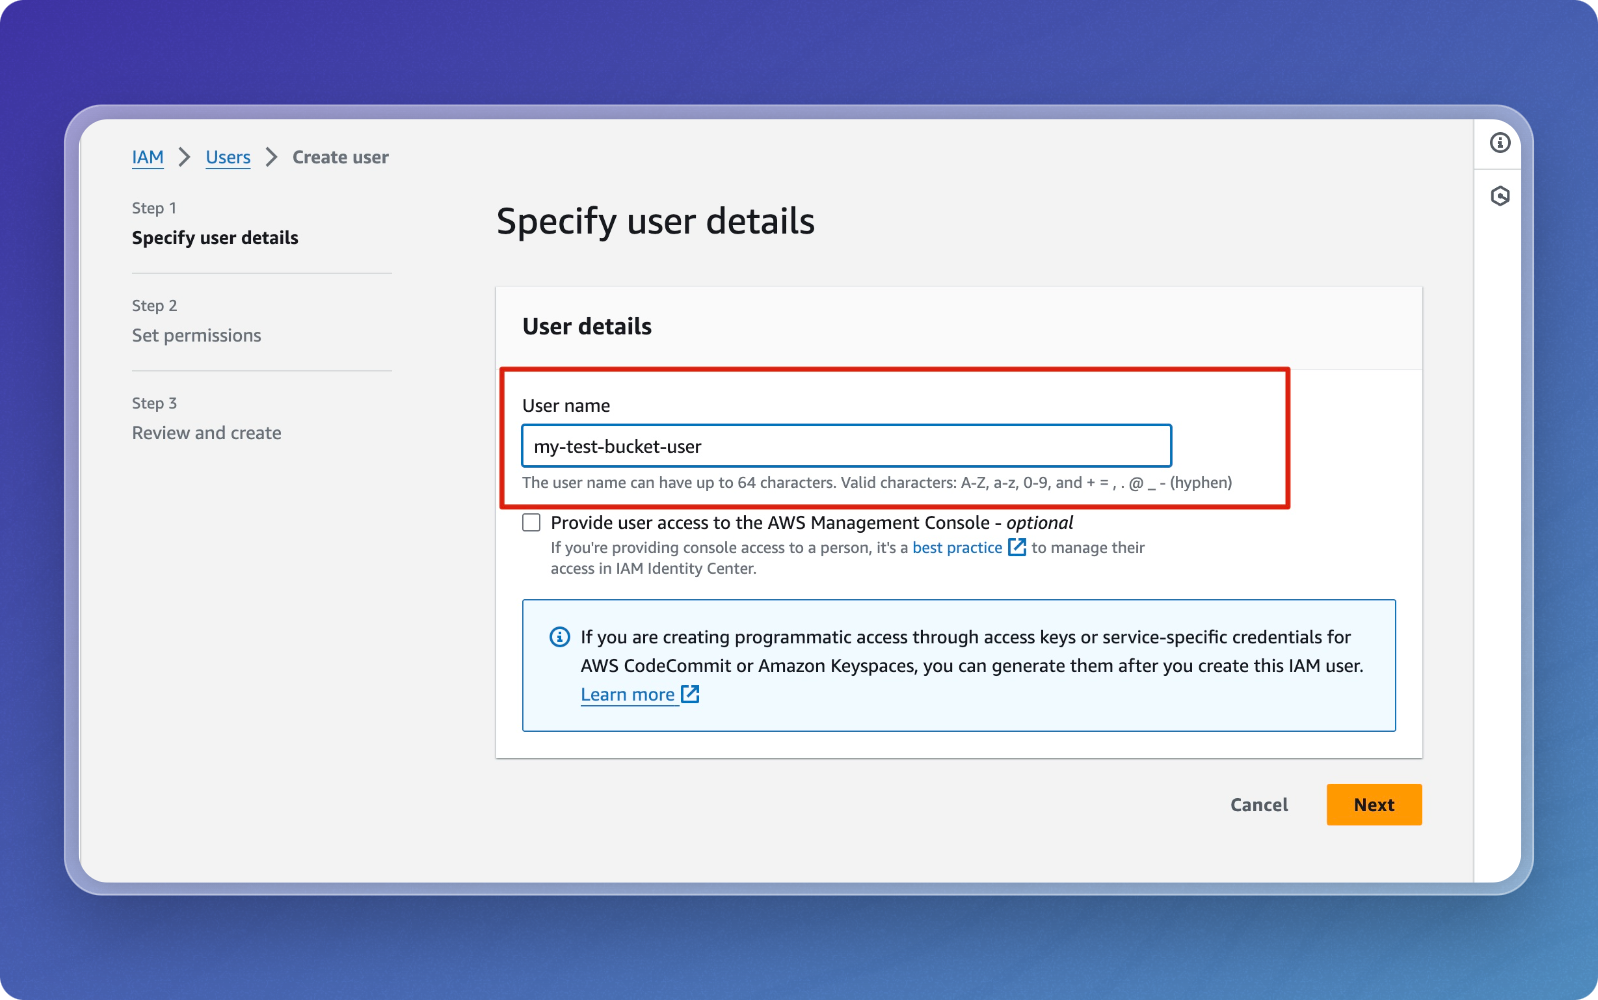
Define User Details
- Enter a User name (e.g.,
my-test-bucket-user). - Leave console access unchecked for programmatic access only.
- Click Next to continue.
- Enter a User name (e.g.,
-
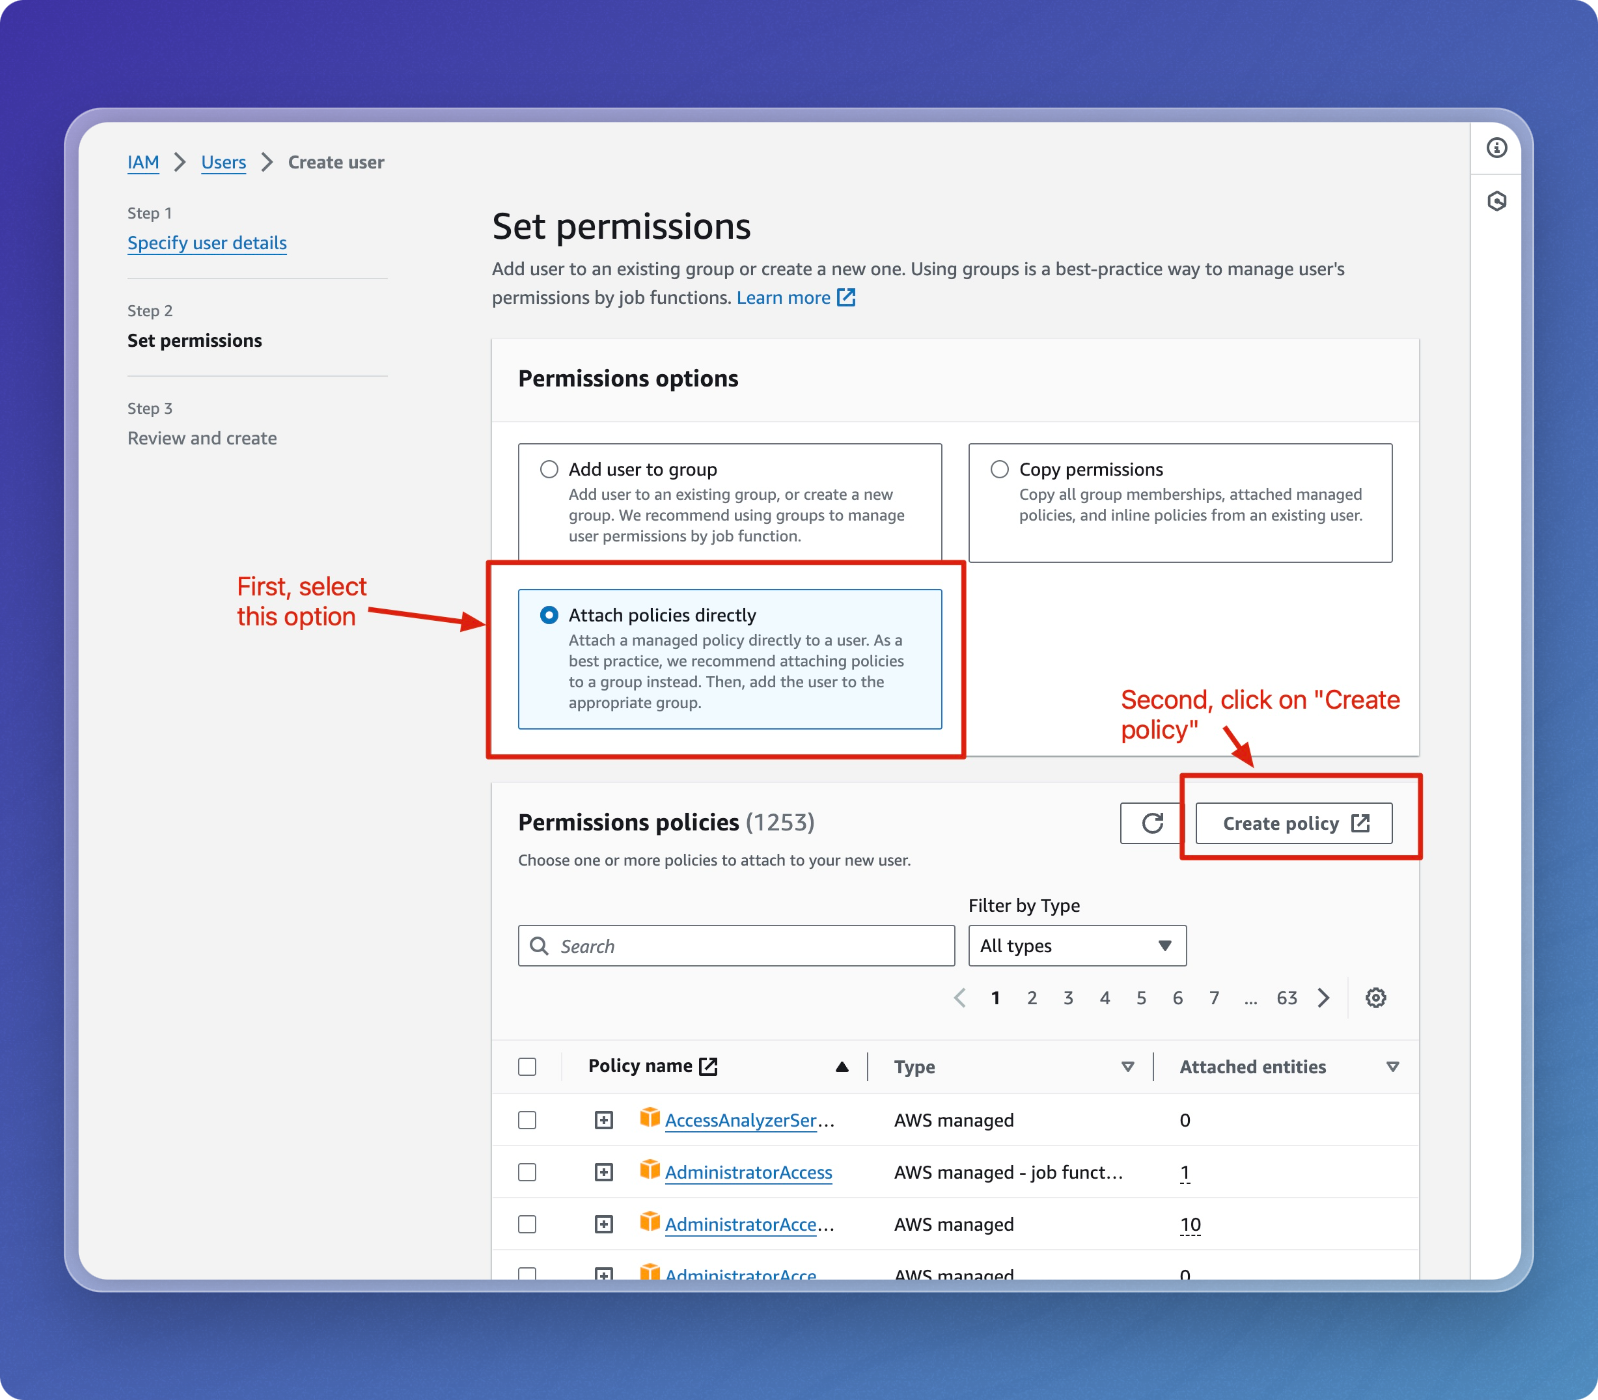
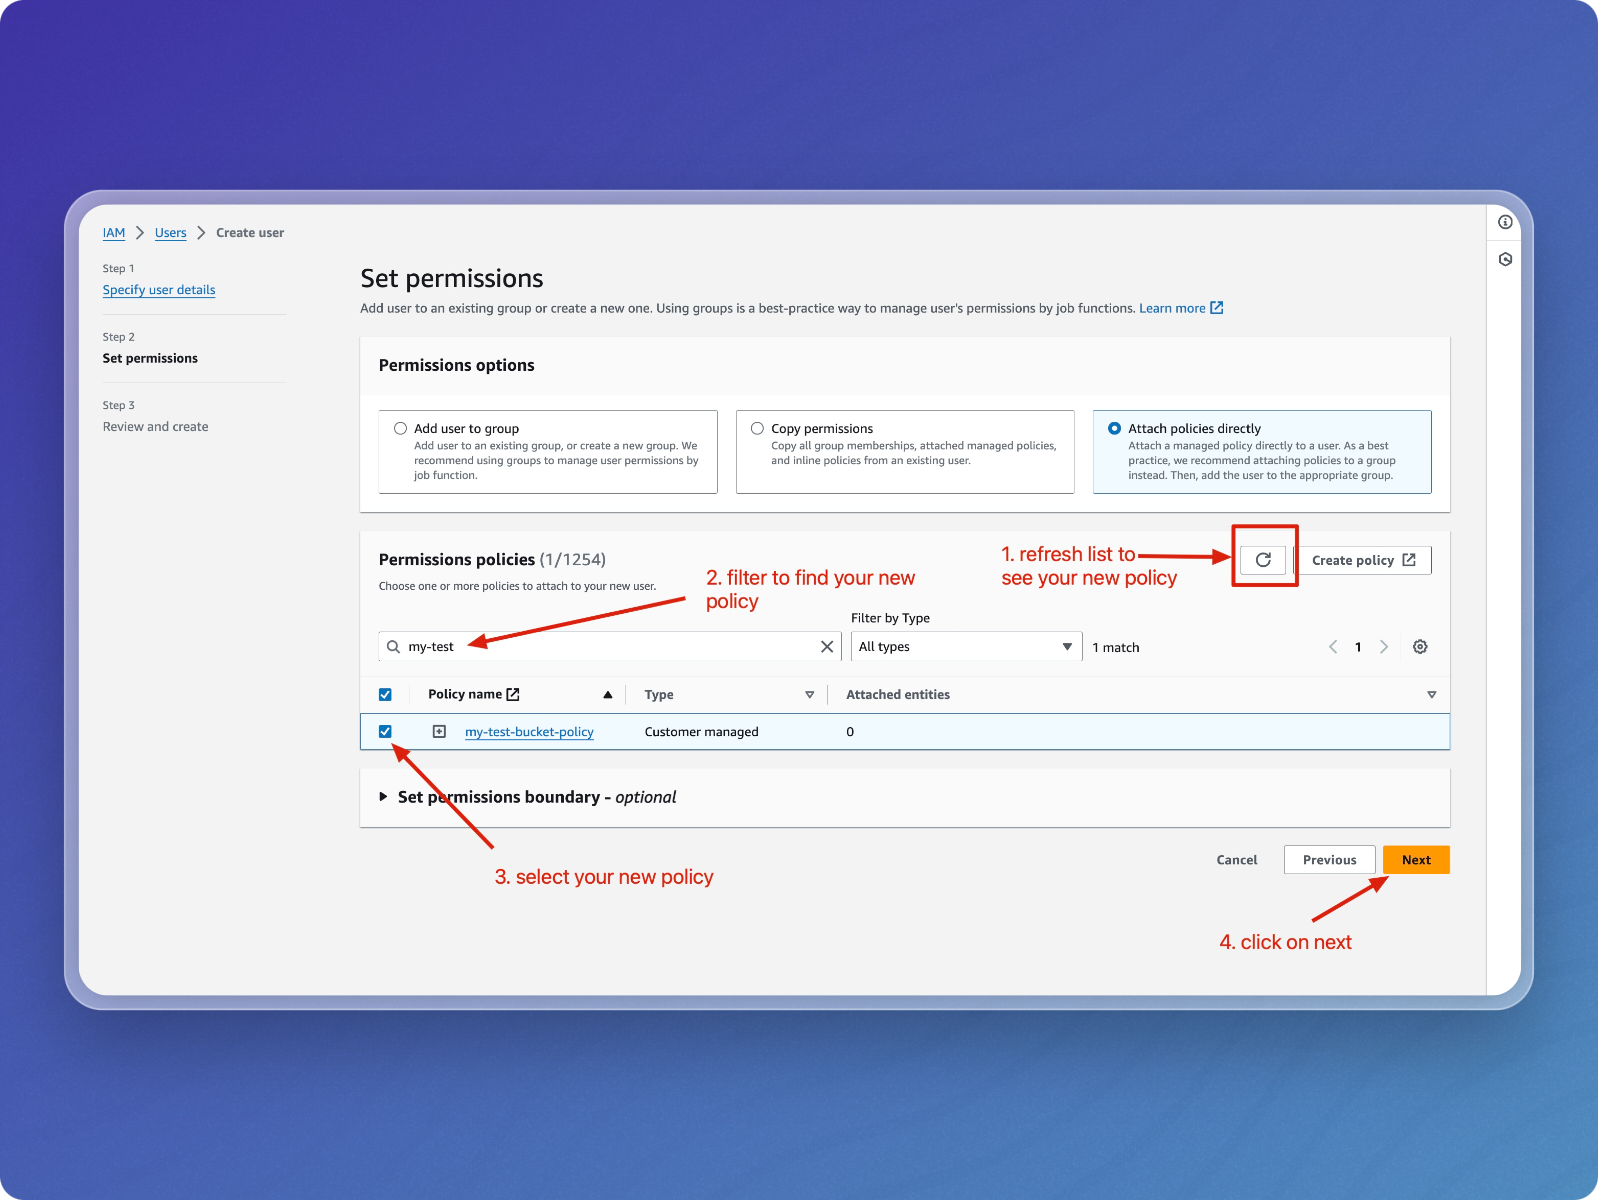
Set Permissions
- Under Set permissions, select Attach policies directly.
- Click Create policy to define a custom policy for S3 access.
-
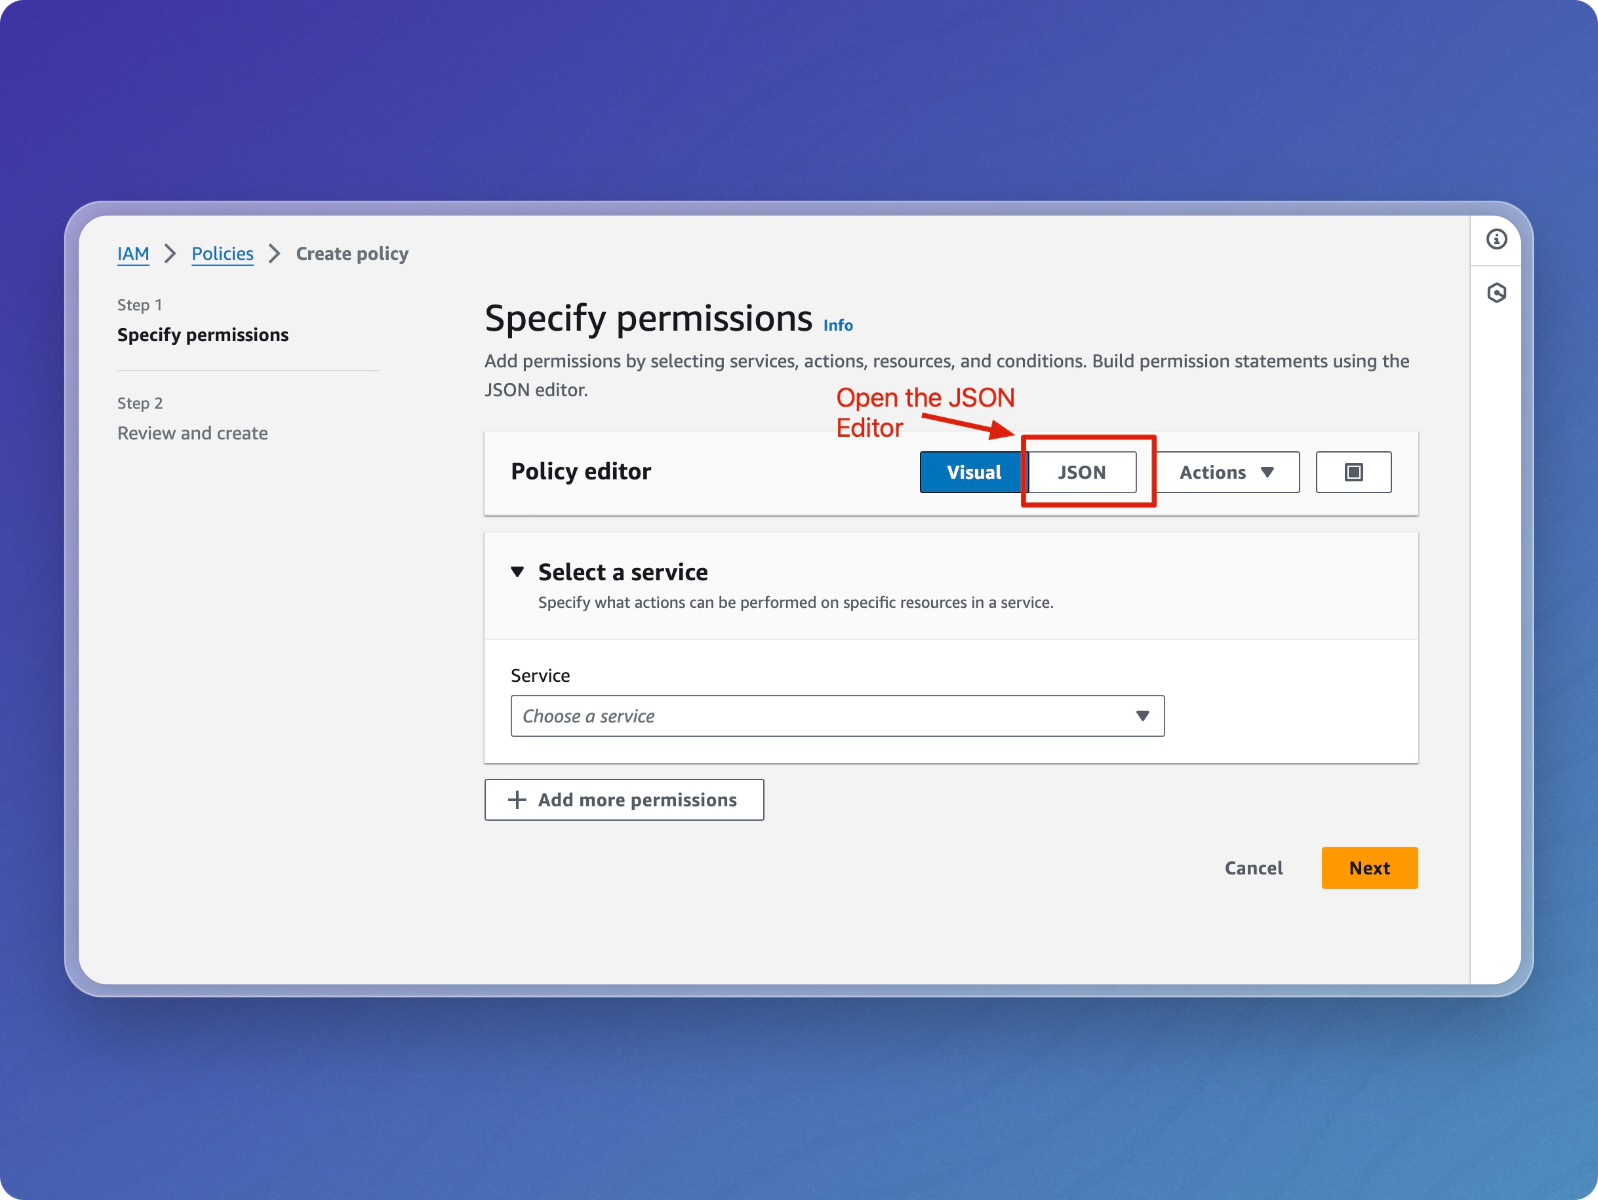
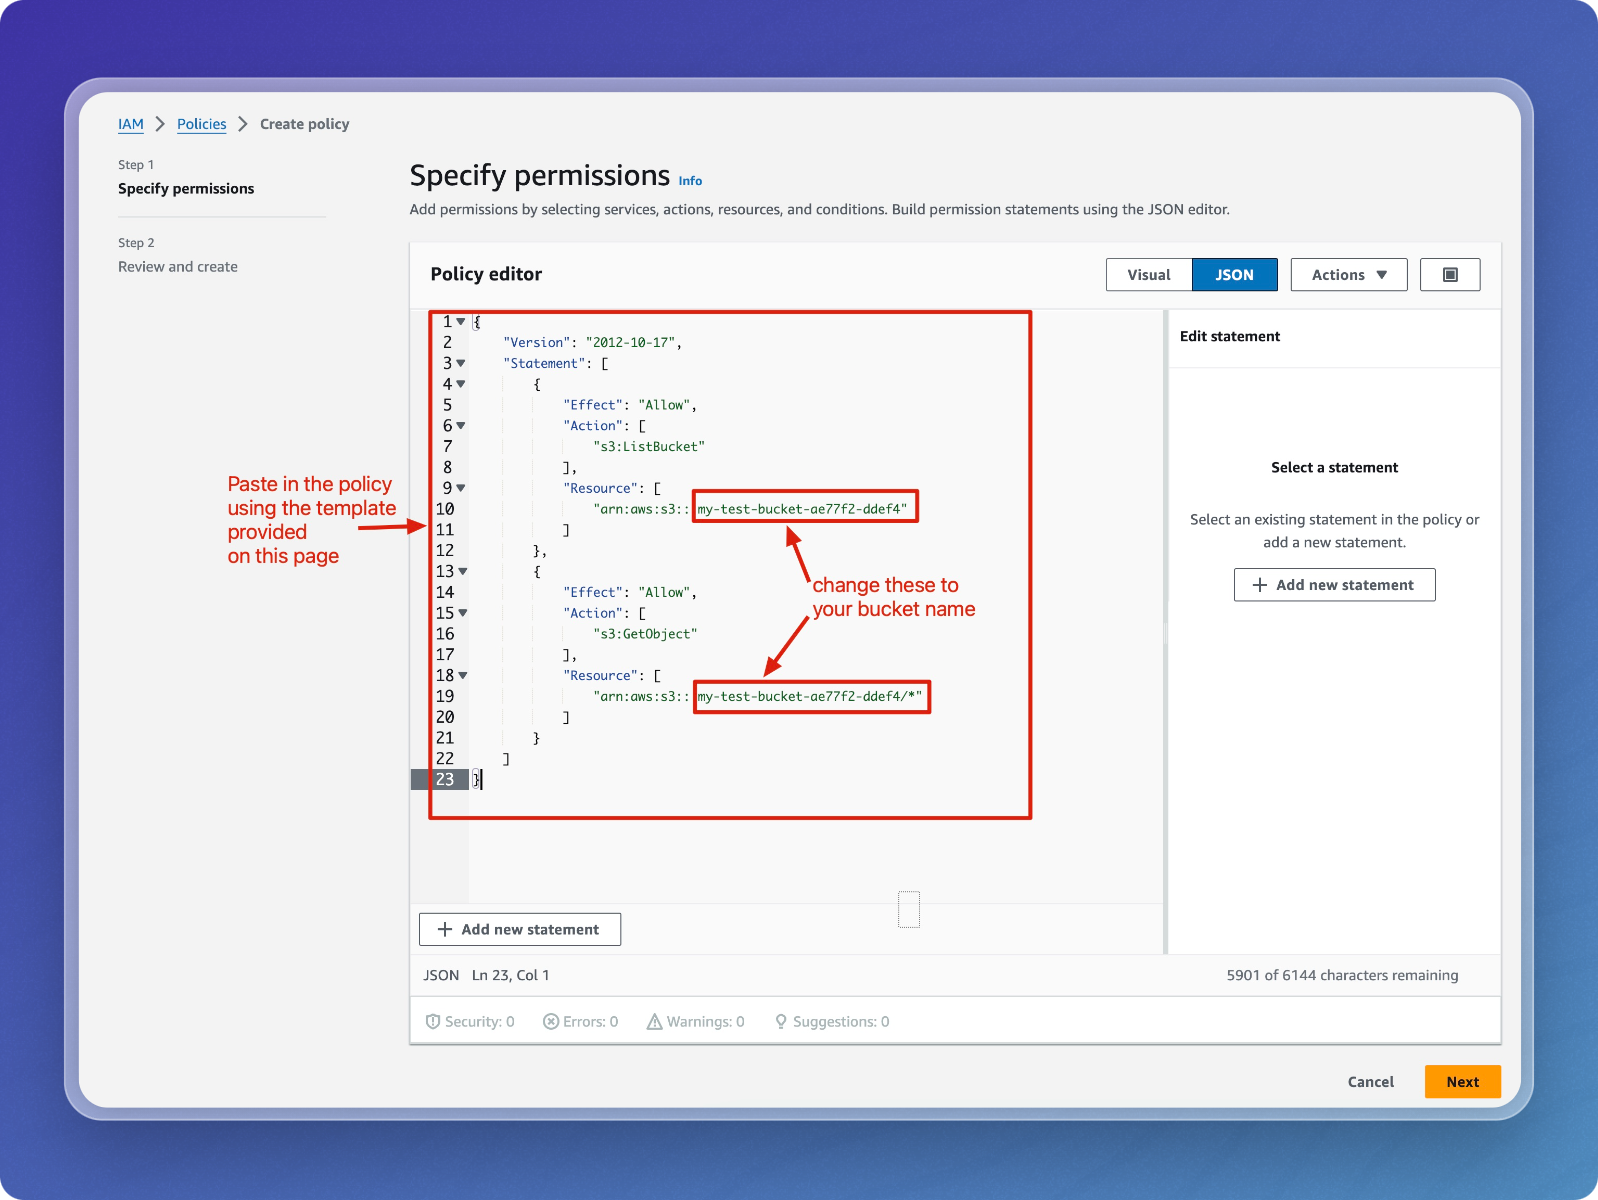
Define Permissions in the Policy
- Choose the JSON editor to define the policy.
-
Create the Policy
-
Name your policy (e.g.,
my-test-bucket-policy). -
Use the following JSON template, replacing
YOUR_BUCKET_NAMEwith your bucket name:{
"Version": "2012-10-17",
"Statement": [
{
"Effect": "Allow",
"Action": ["s3:ListBucket"],
"Resource": ["arn:aws:s3:::YOUR_BUCKET_NAME"]
},
{
"Effect": "Allow",
"Action": ["s3:GetObject"],
"Resource": ["arn:aws:s3:::YOUR_BUCKET_NAME/*"]
}
]
} -
Click Create policy to finalize.
-
-
Attach the Policy to the IAM User
- Go back to the Set permissions section for the user.
- Click the Refresh icon to load the newly created policy.
- Search for your new policy and check the box next to its name.
- Click Next to continue.
-
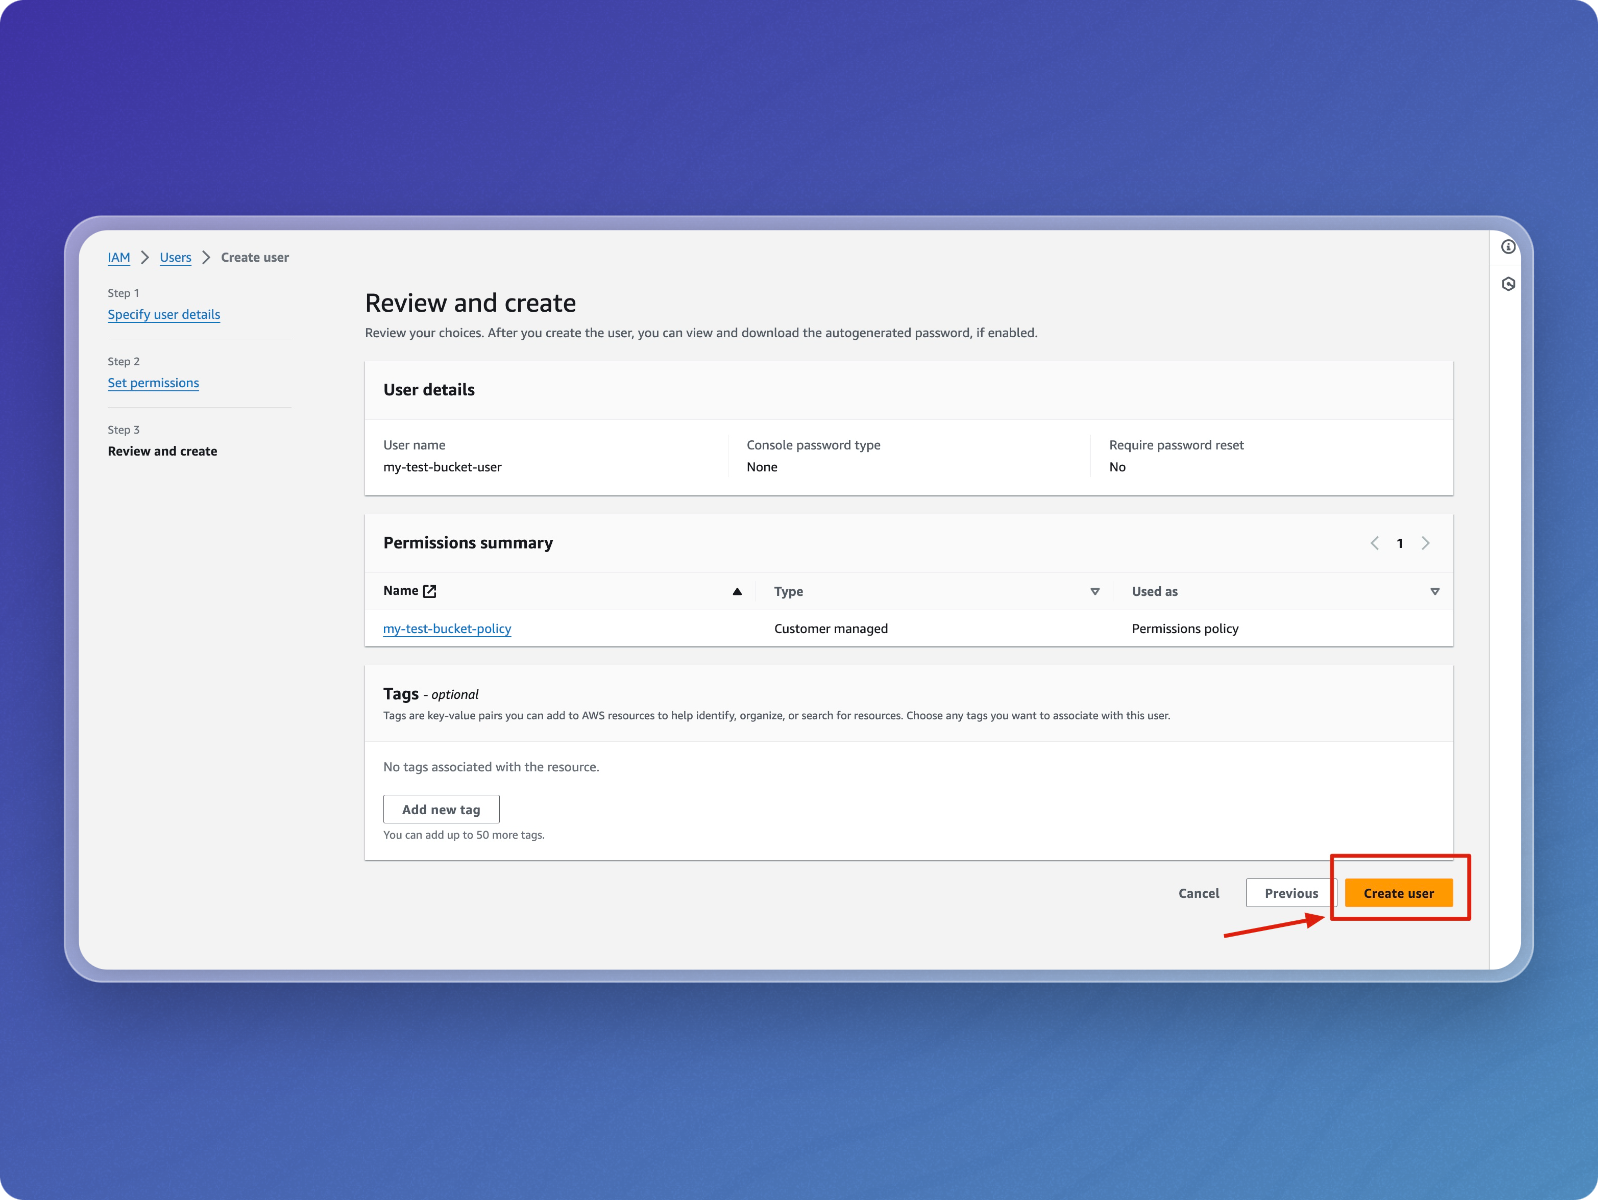
Review and Create the User
- On the Review and create page, check the details.
- Click Create user.
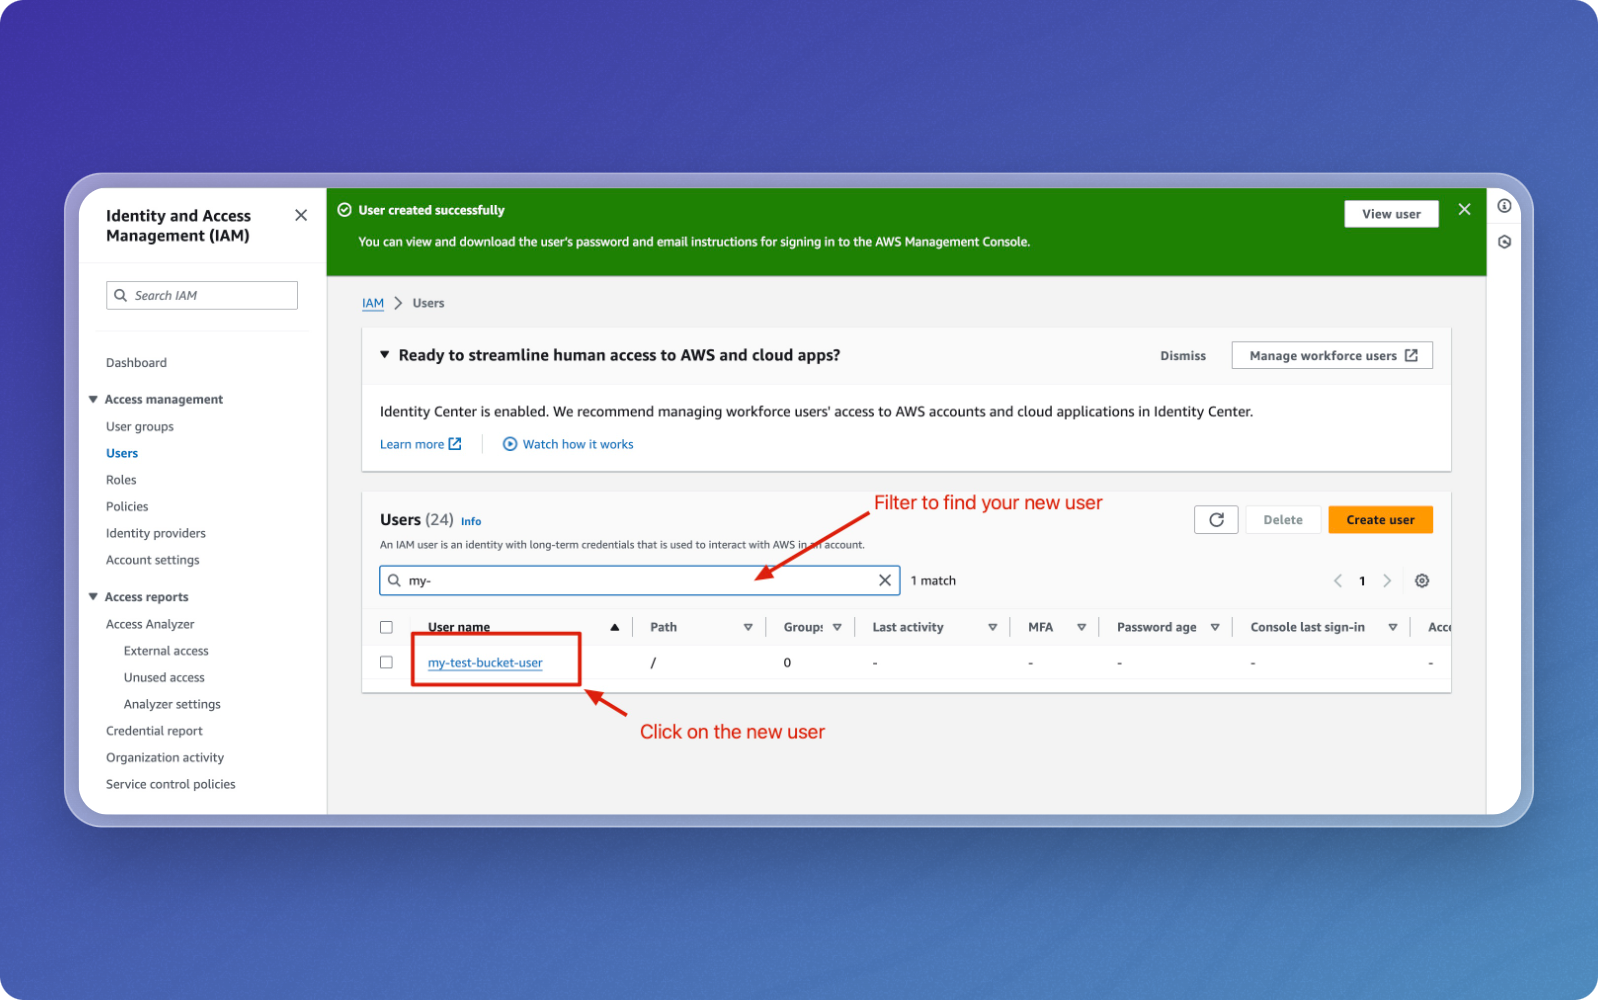
Step 3: Generate Access Keys
-
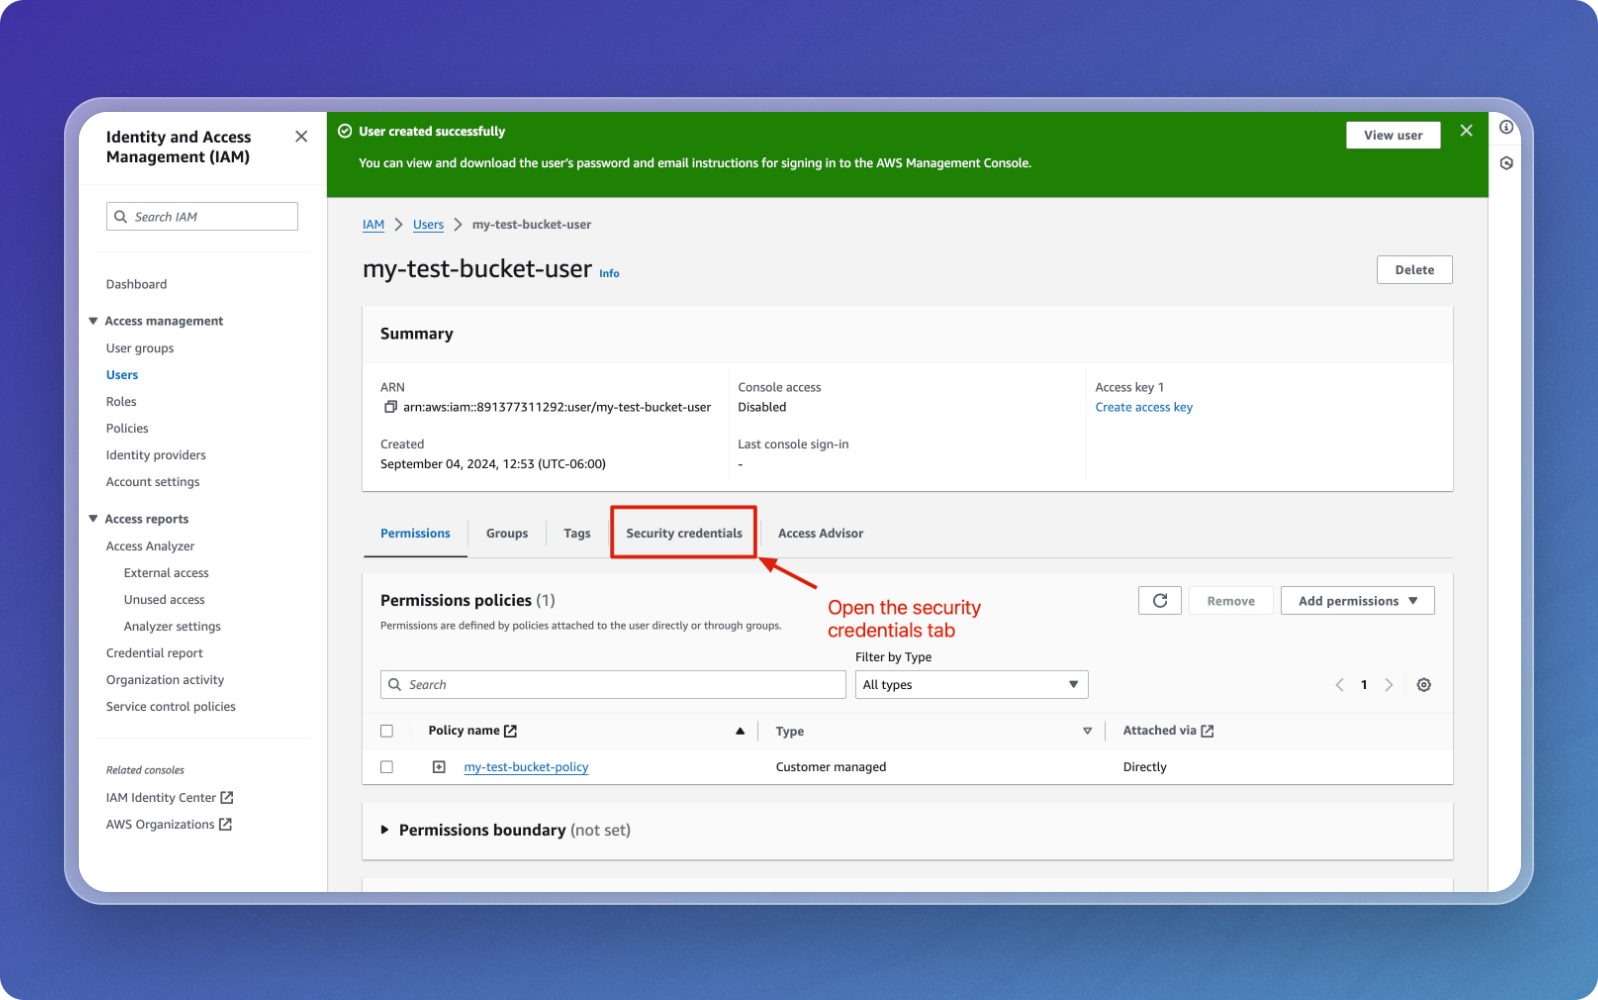
Find and Select the New User
- Use the Users search box to find your newly created user.
- Click on the user name to view the details.
-
Open the Security Credentials Tab
- Navigate to the Security credentials tab.
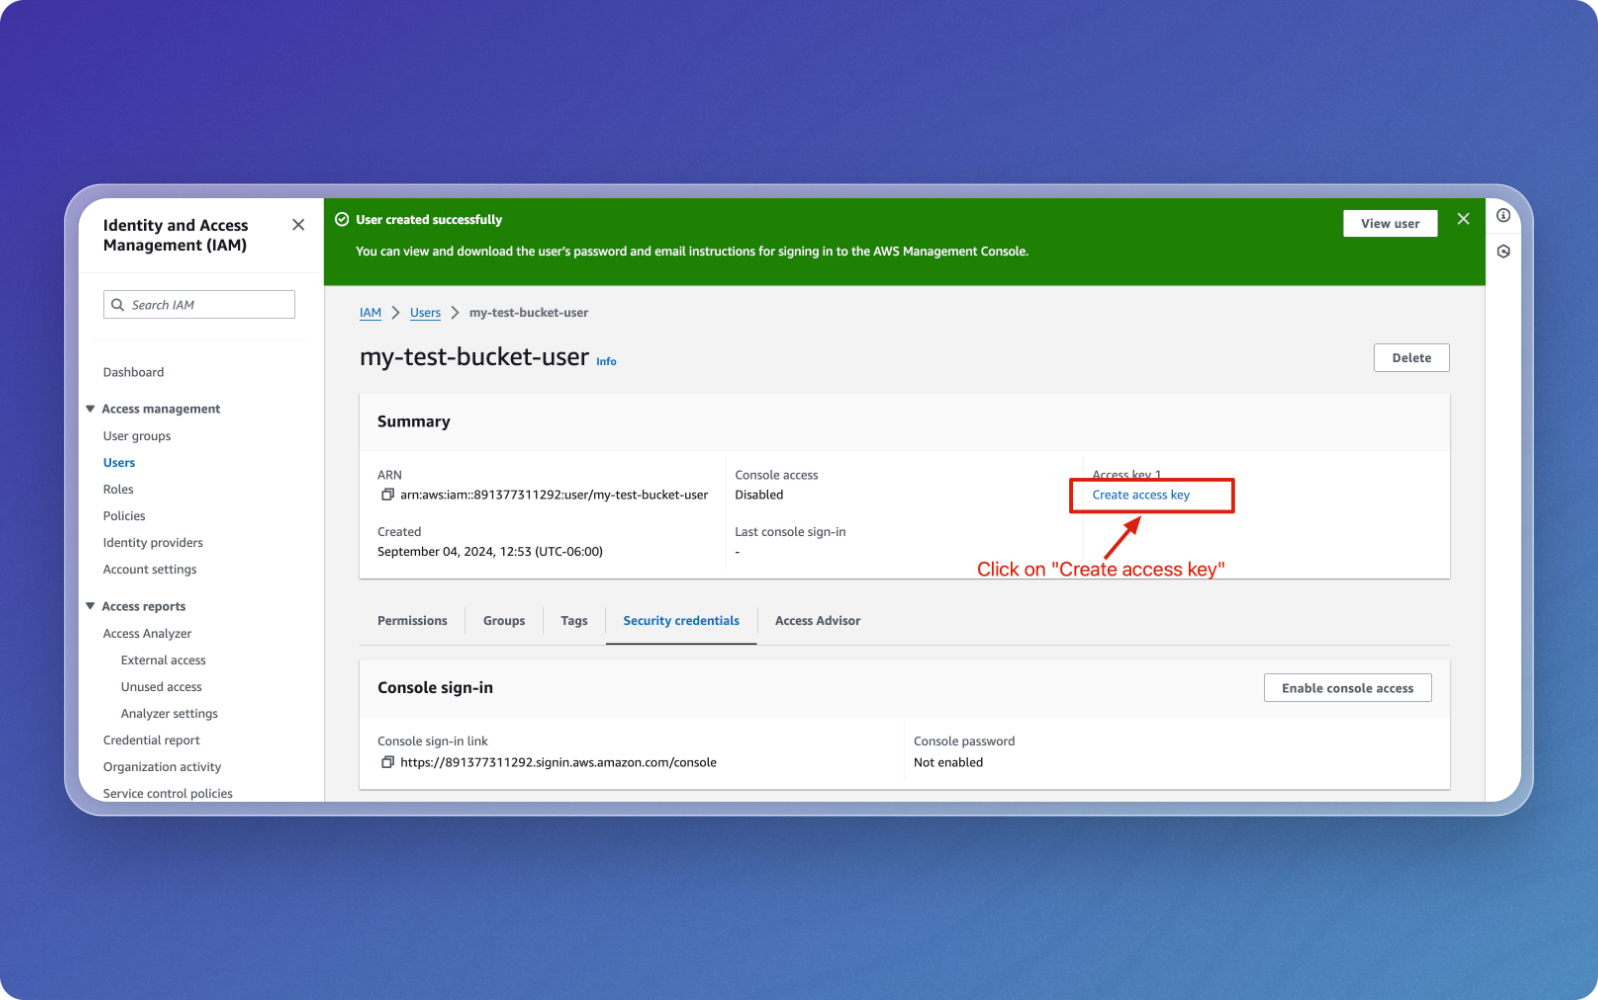
-
Create Access Keys
- Under Access keys, click on Create access key.
-
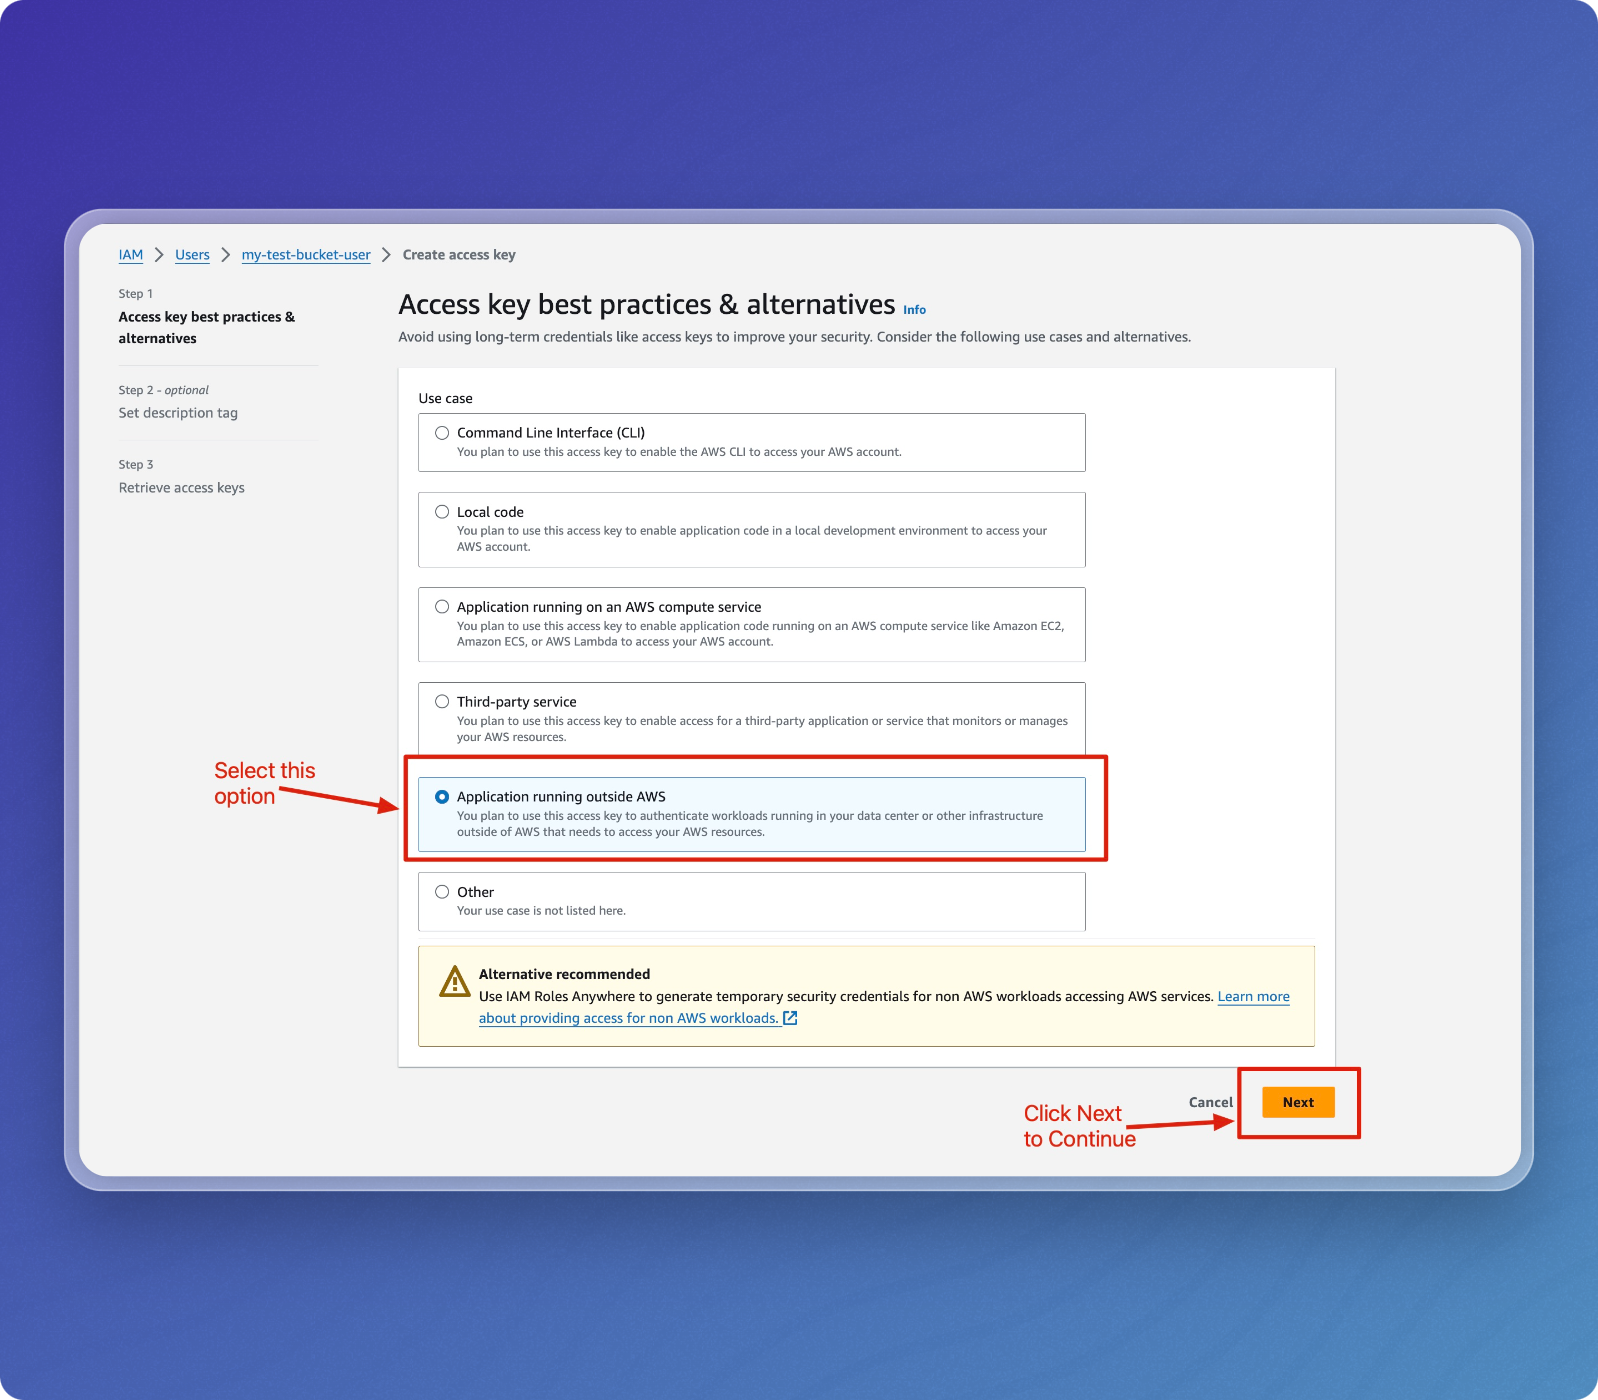
Choose Use Case for the Access Key
- Select the Application running outside AWS option.
- Click Next to continue.
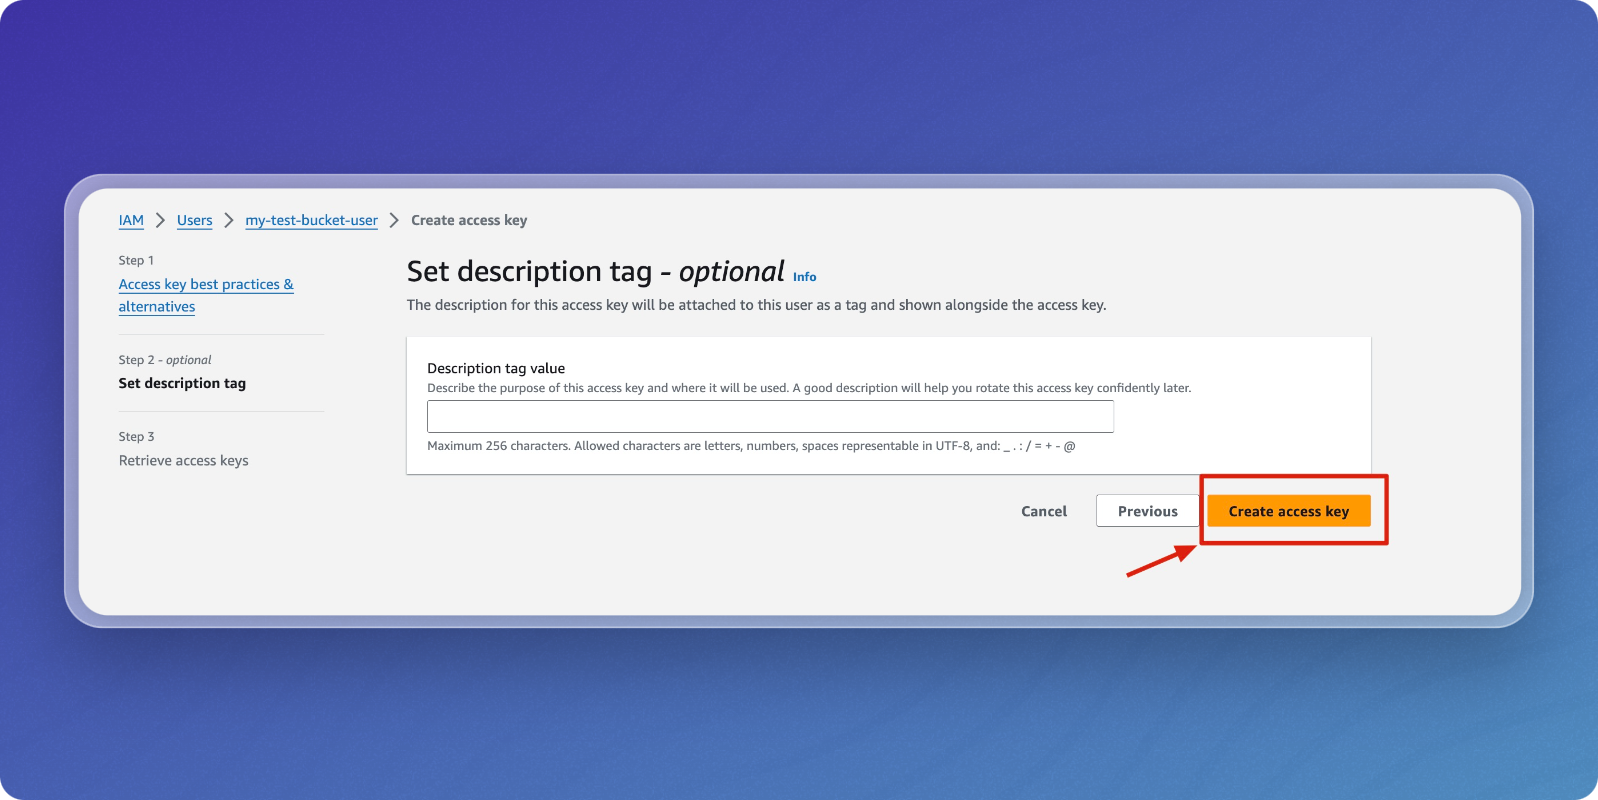
-
Set Description Tag (Optional)
- Optionally add a description for the access key.
- Click Create access key.
-
Retrieve and Store Access Keys
- Copy the Access key and Secret access key.
- Store them securely, as you will need these keys to access the S3 bucket programmatically.
- You can also download the keys as a CSV file.
- Click Done when finished.

Next Step: Configure your S3 Connector
You now have everything you need to configure an Amazon S3 connector.