How to Configure Azure Blob Storage
Approximate time to complete: 3 minutes, excluding prerequisites
This how to article provides step-by-step instructions for configuring Azure Blob Storage for use with a RAG pipeline.
Before you begin
Before starting, ensure you have access to the credentials, connection parameters, and API keys as appropriate for the following:
- An Azure account (Create one free here ↗)
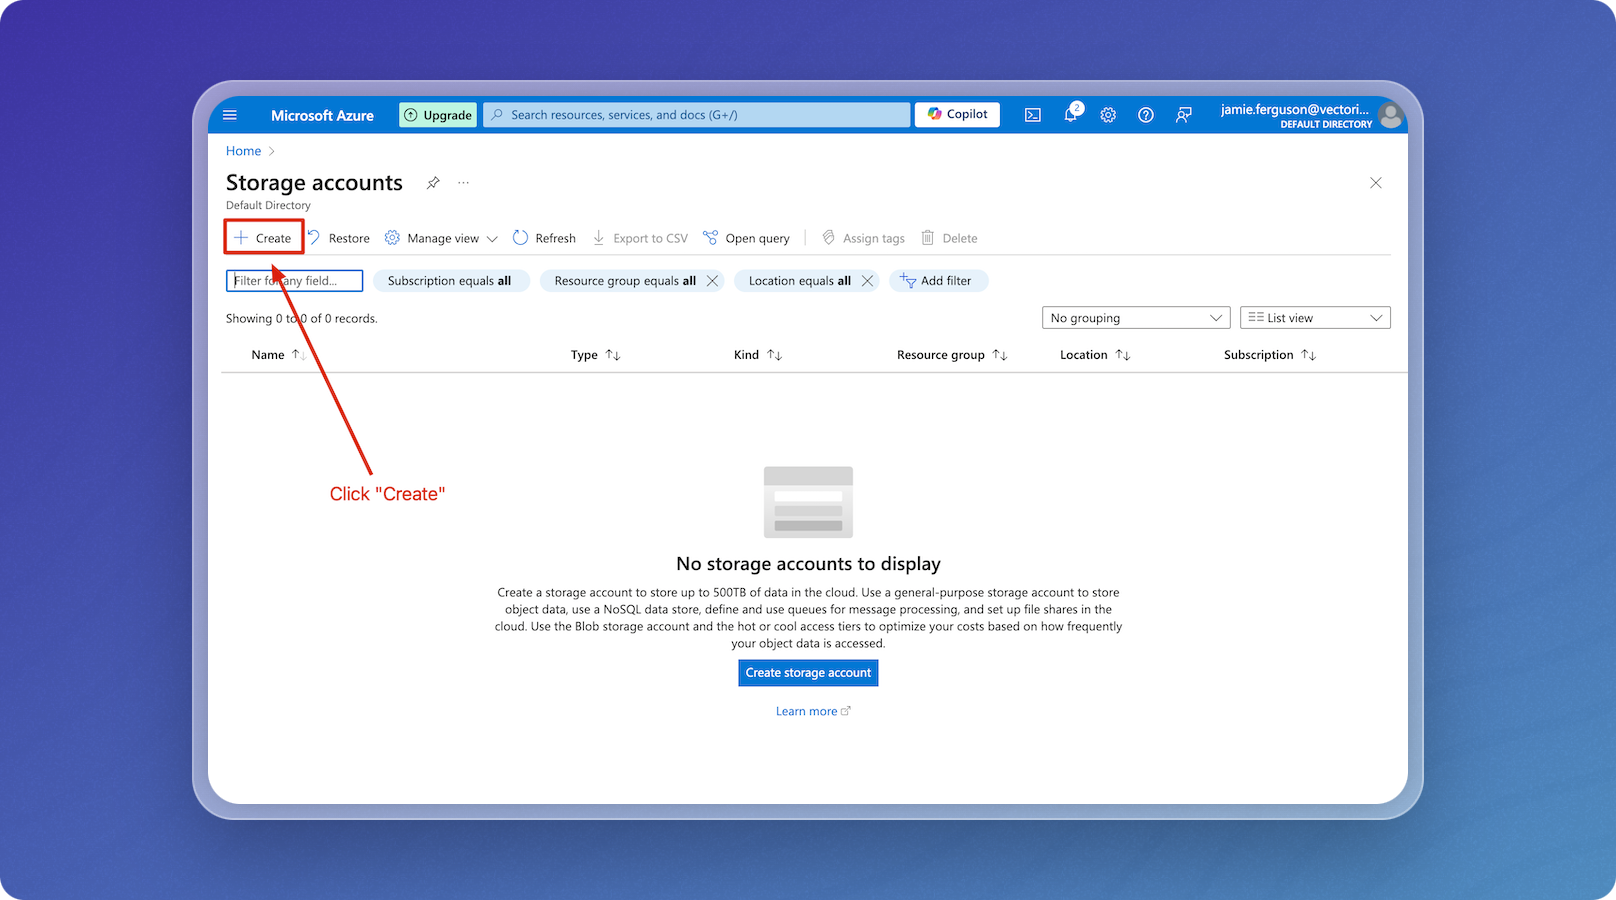
Step 1: Create an Azure Storage Account
-
Go to the Azure Portal.
-
Click Storage accounts, then click + Create.
-
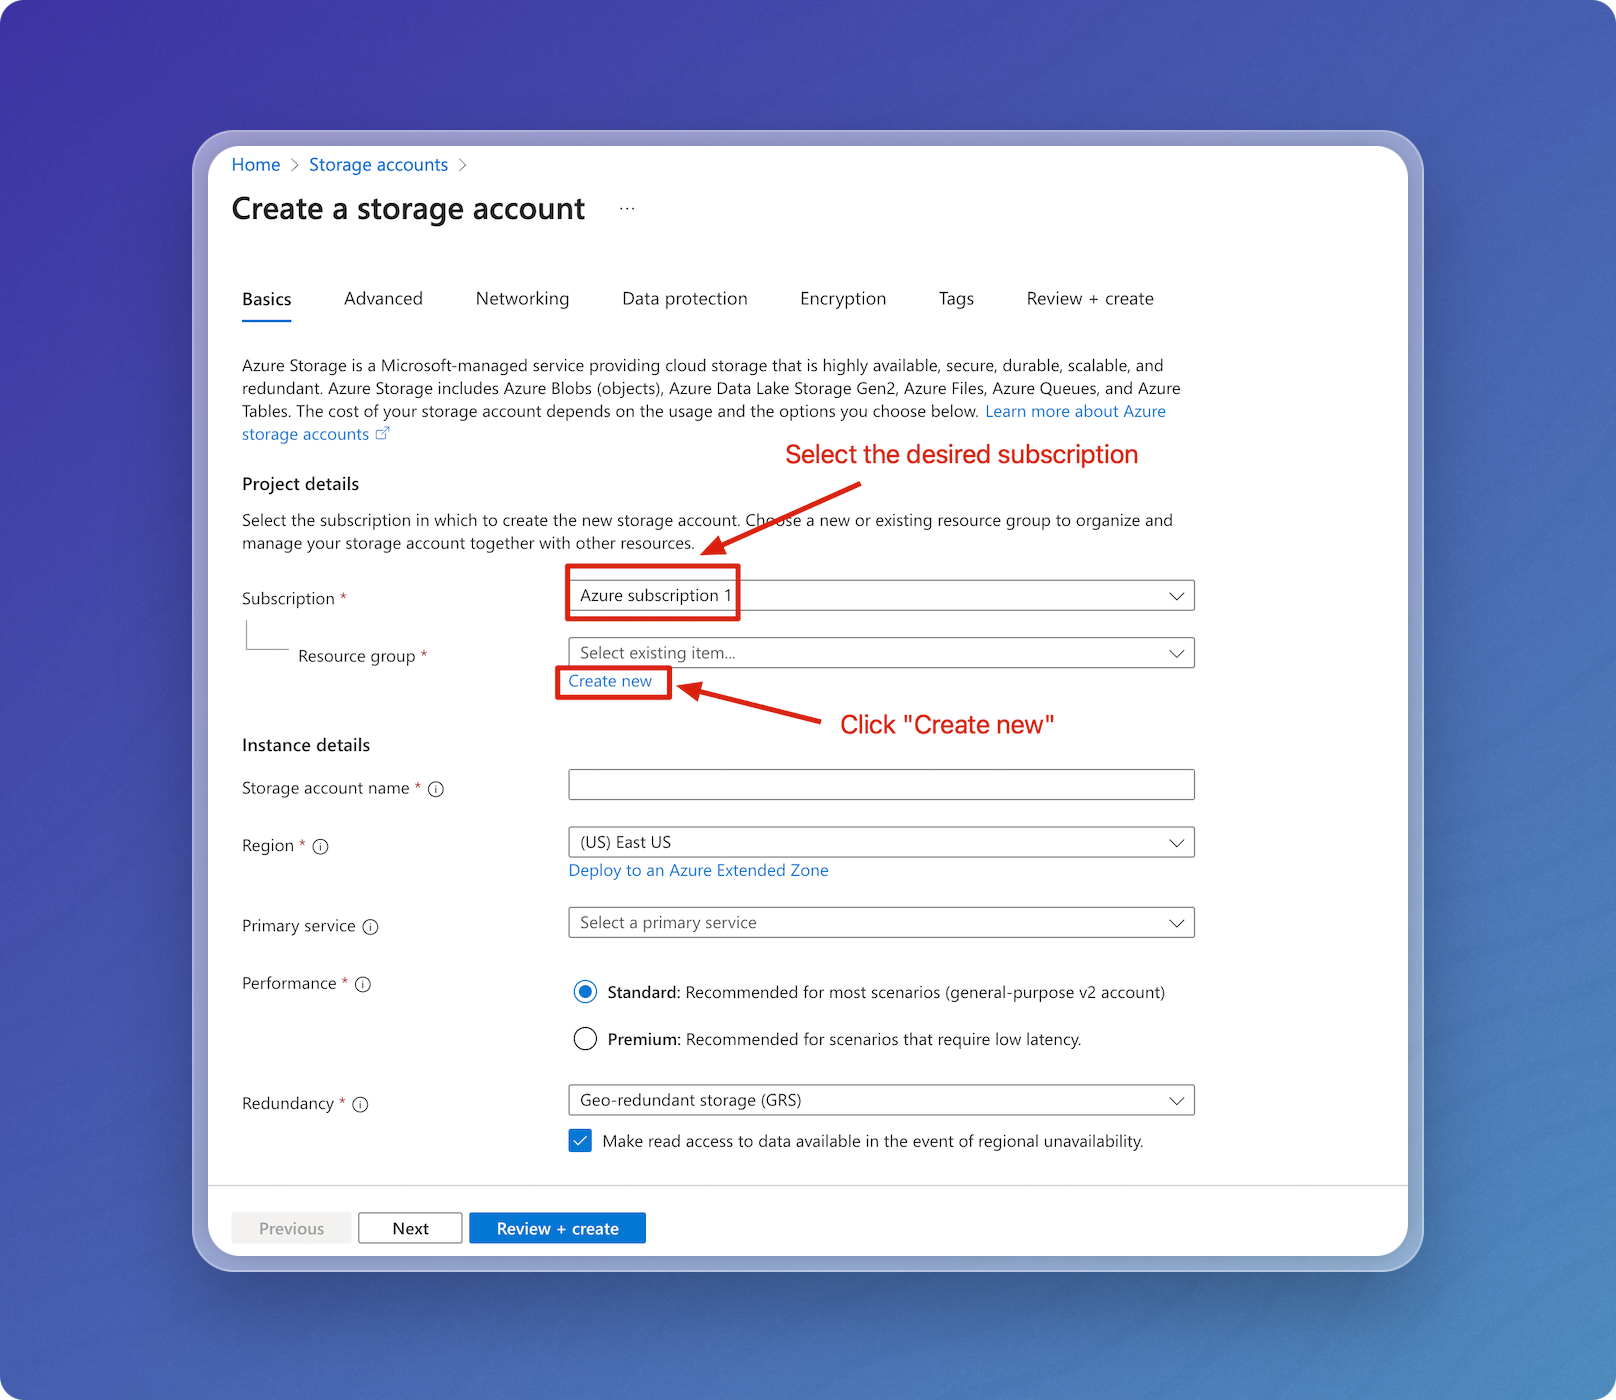
Select the subscription to use, then click Create new to create a resource group.
-
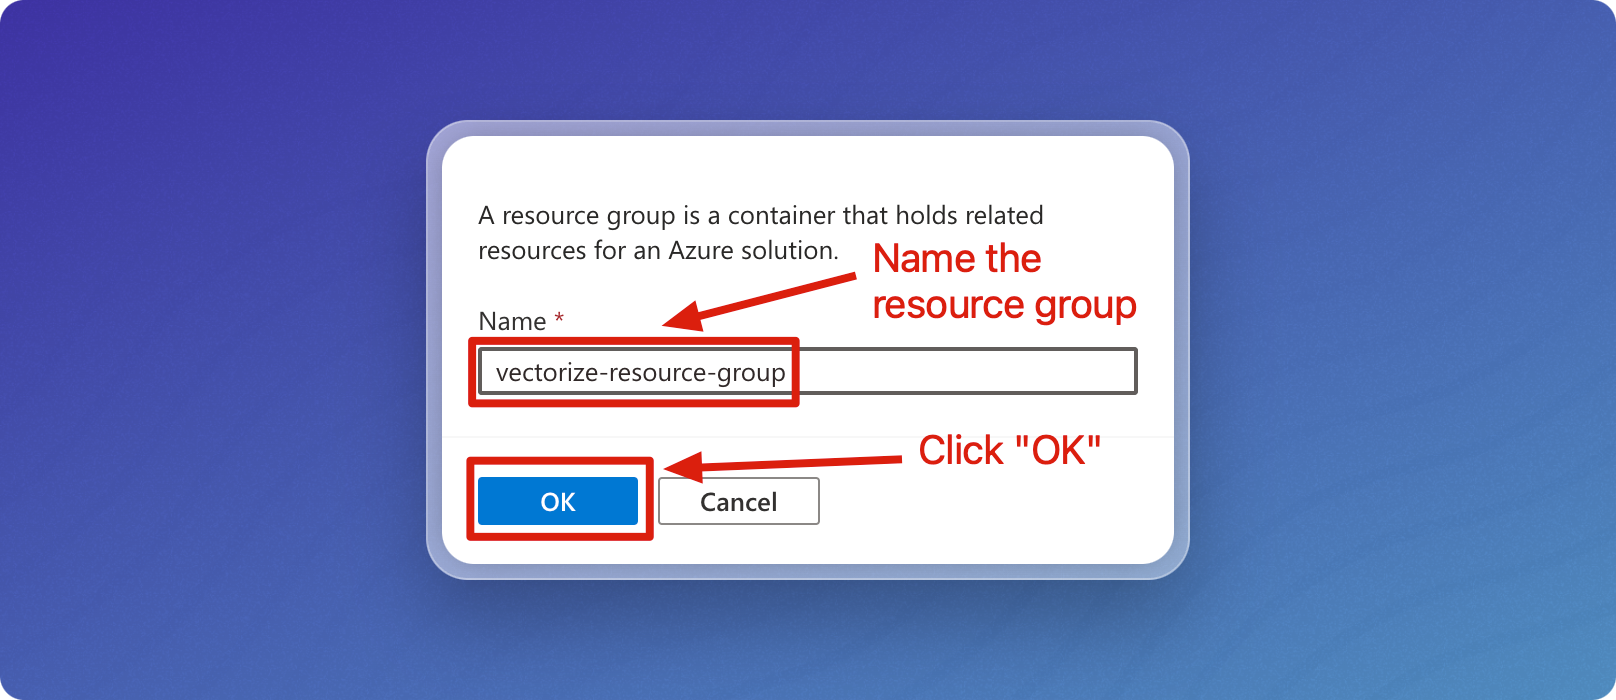
Name the resource group, then click OK.
-
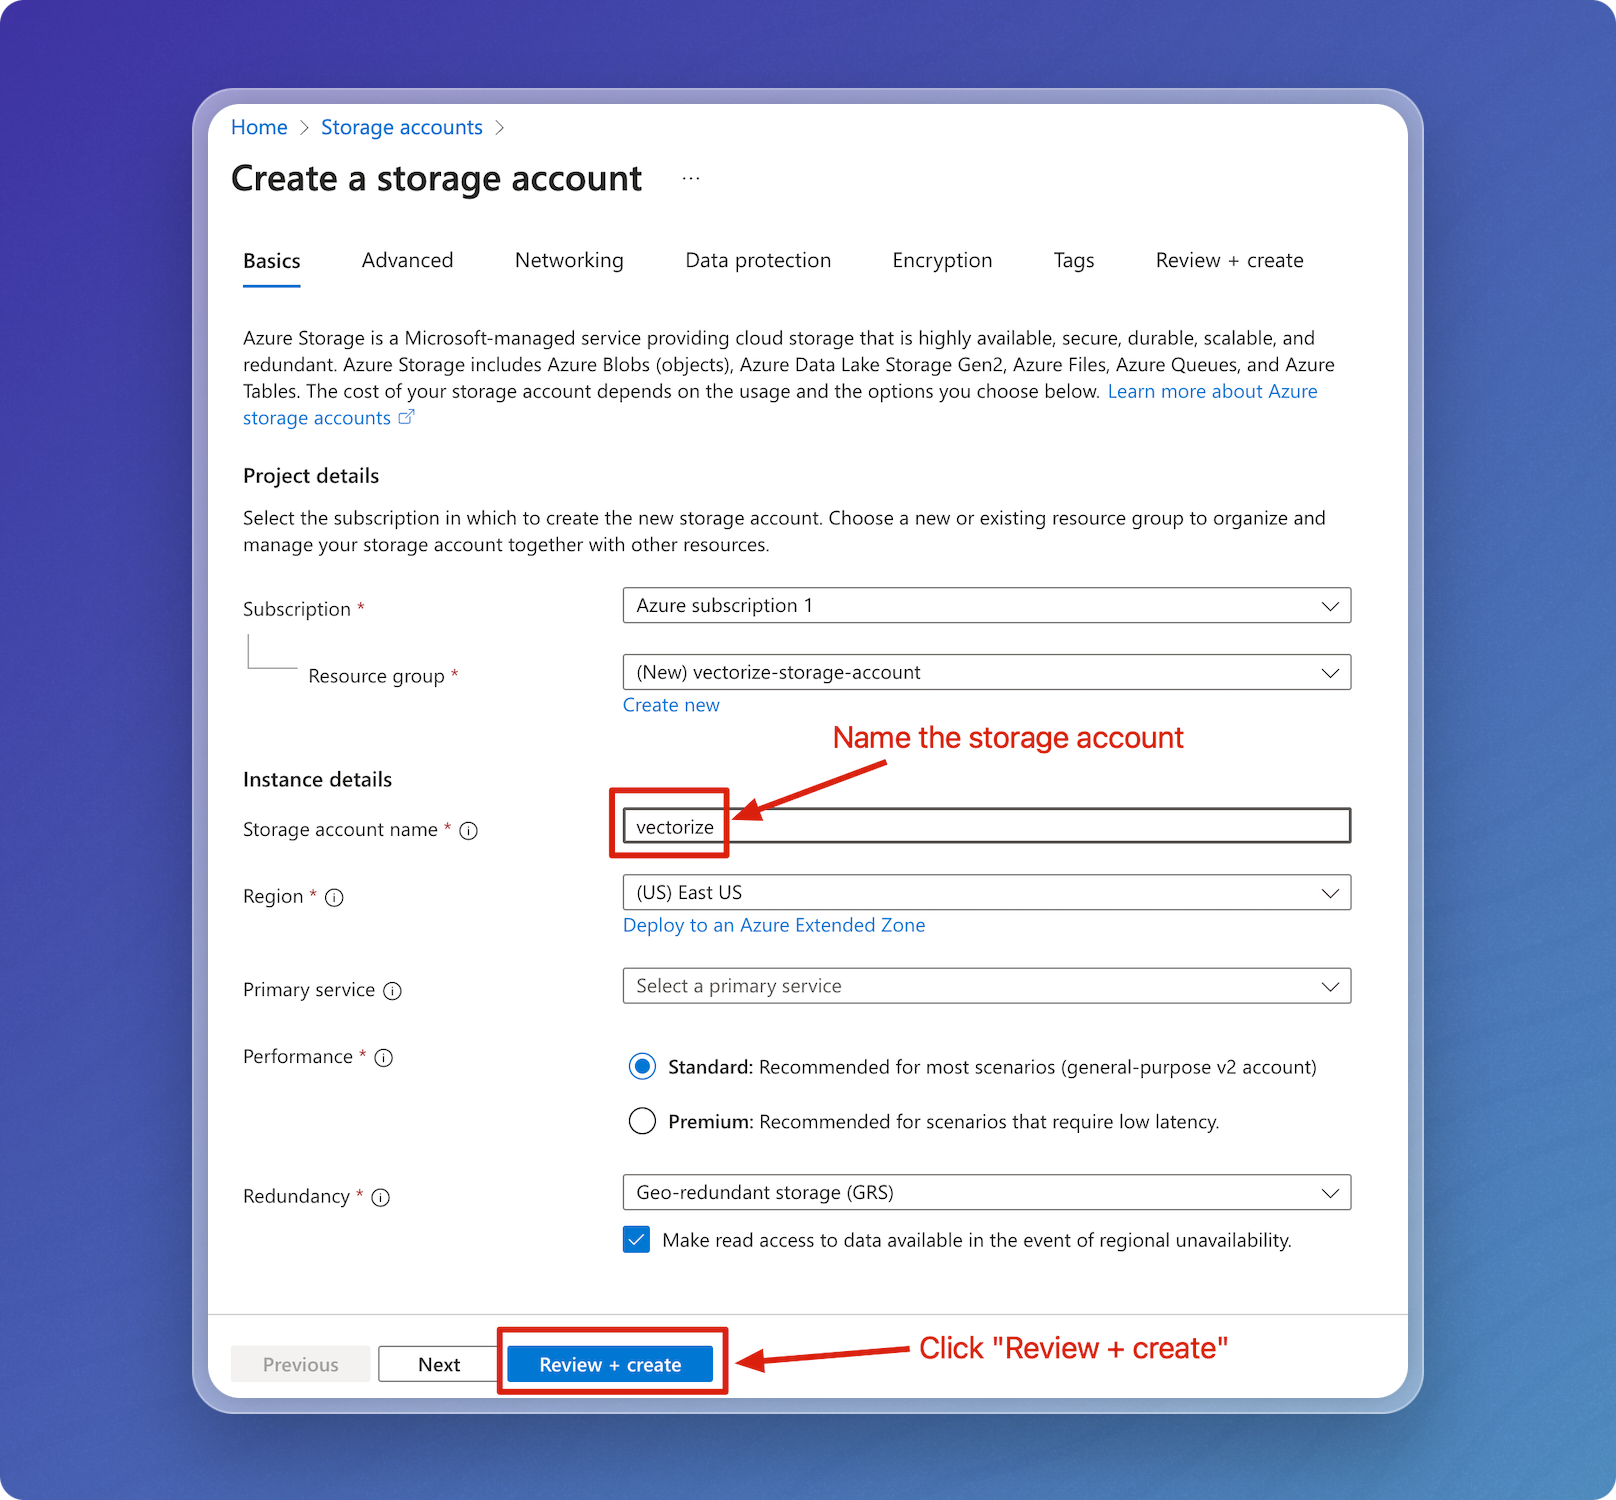
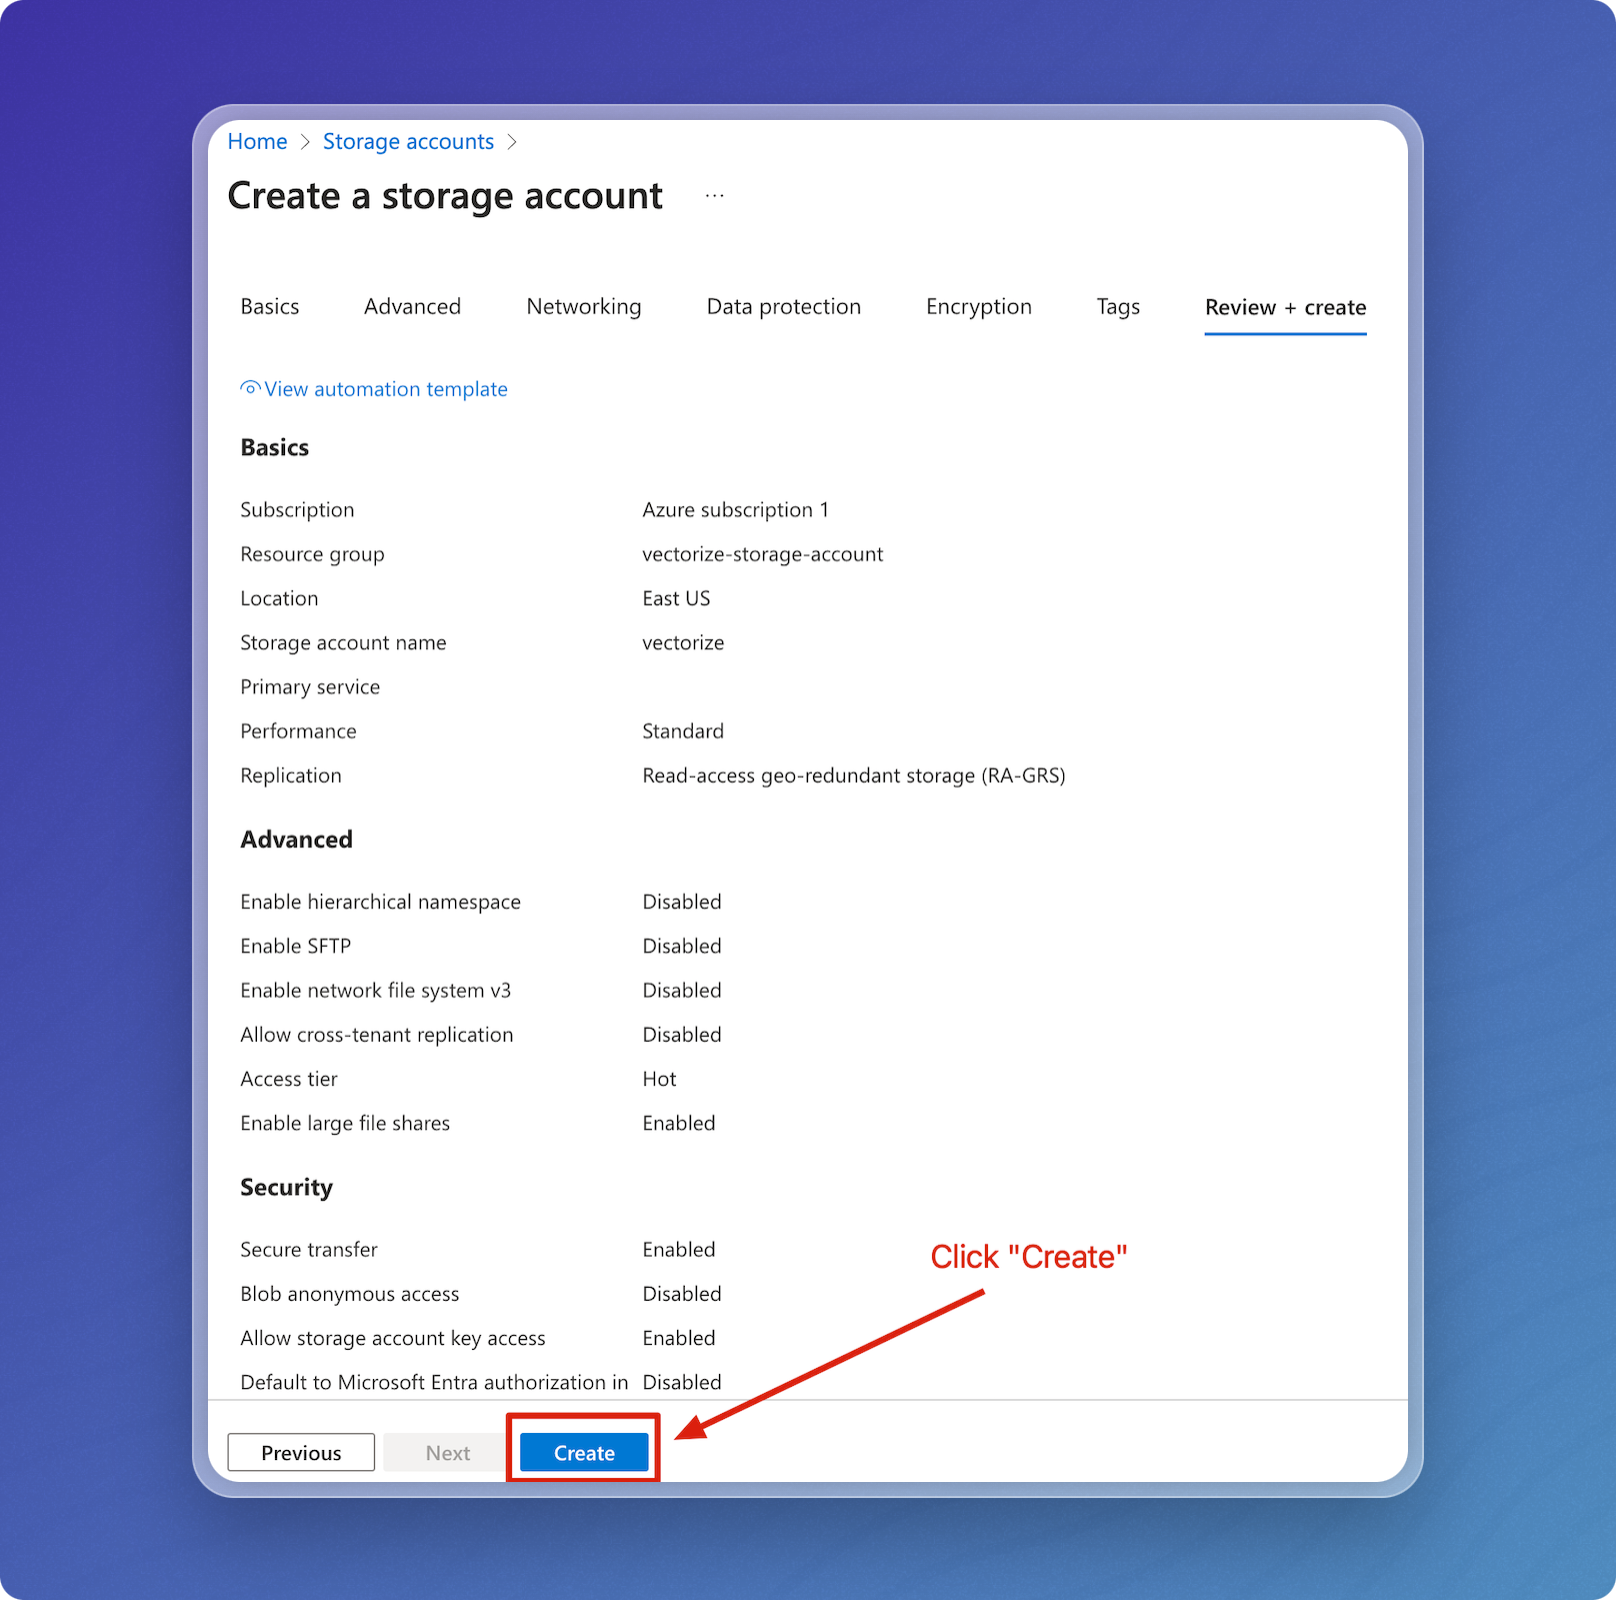
Name the storage account, adjust your region if needed, and then click Review + create.
The storage account name must be unique across Azure.
-
Verify that everything looks correct, then click Create.
-
Your storage account will be created and deployed. Click Go to resource.

Step 2: Create a Container
-
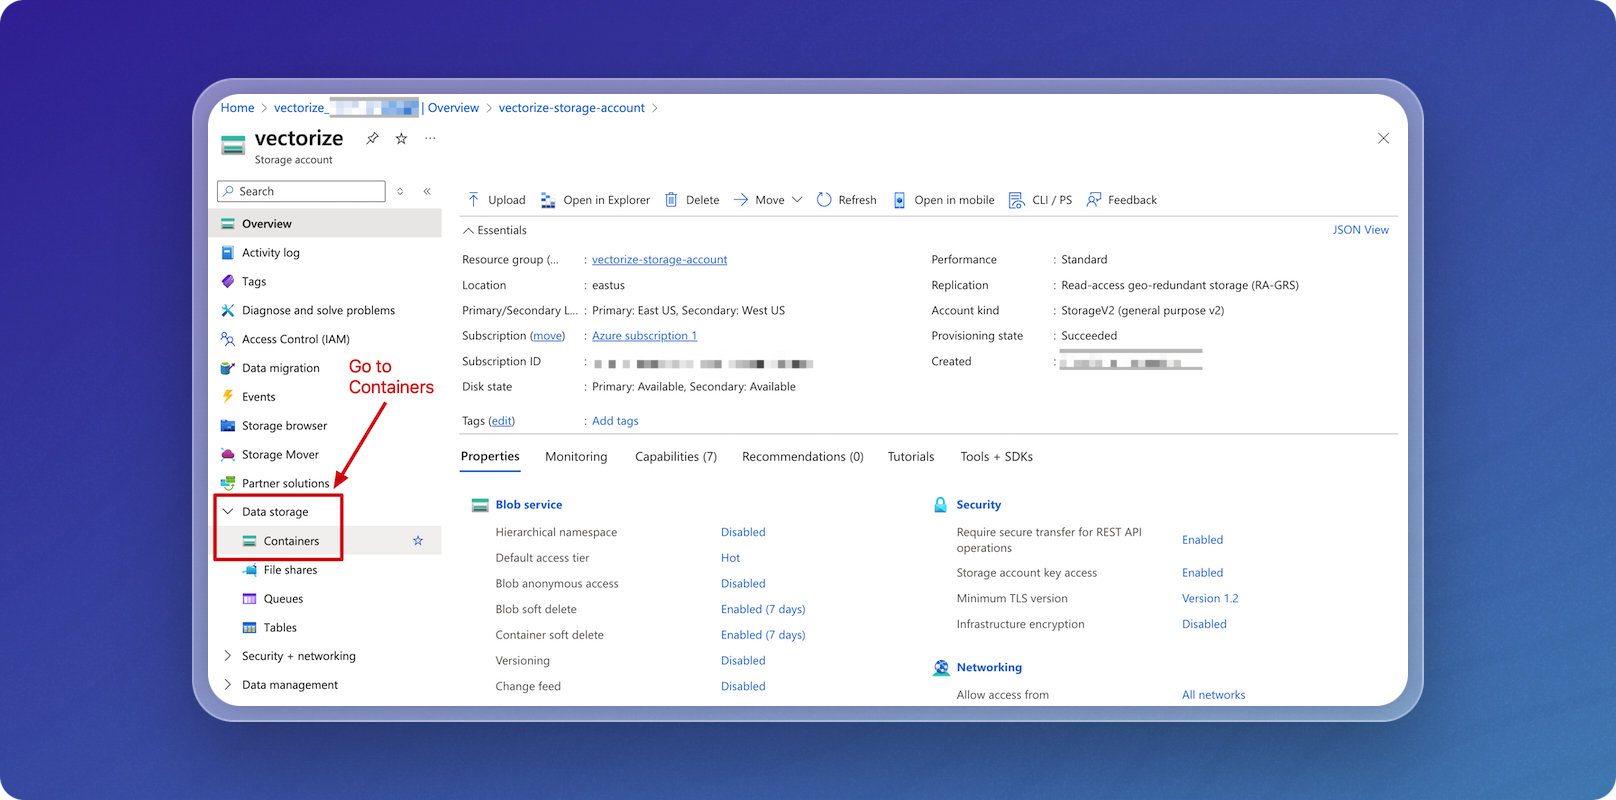
In the left-hand menu, select Data Storage, then Containers.
-
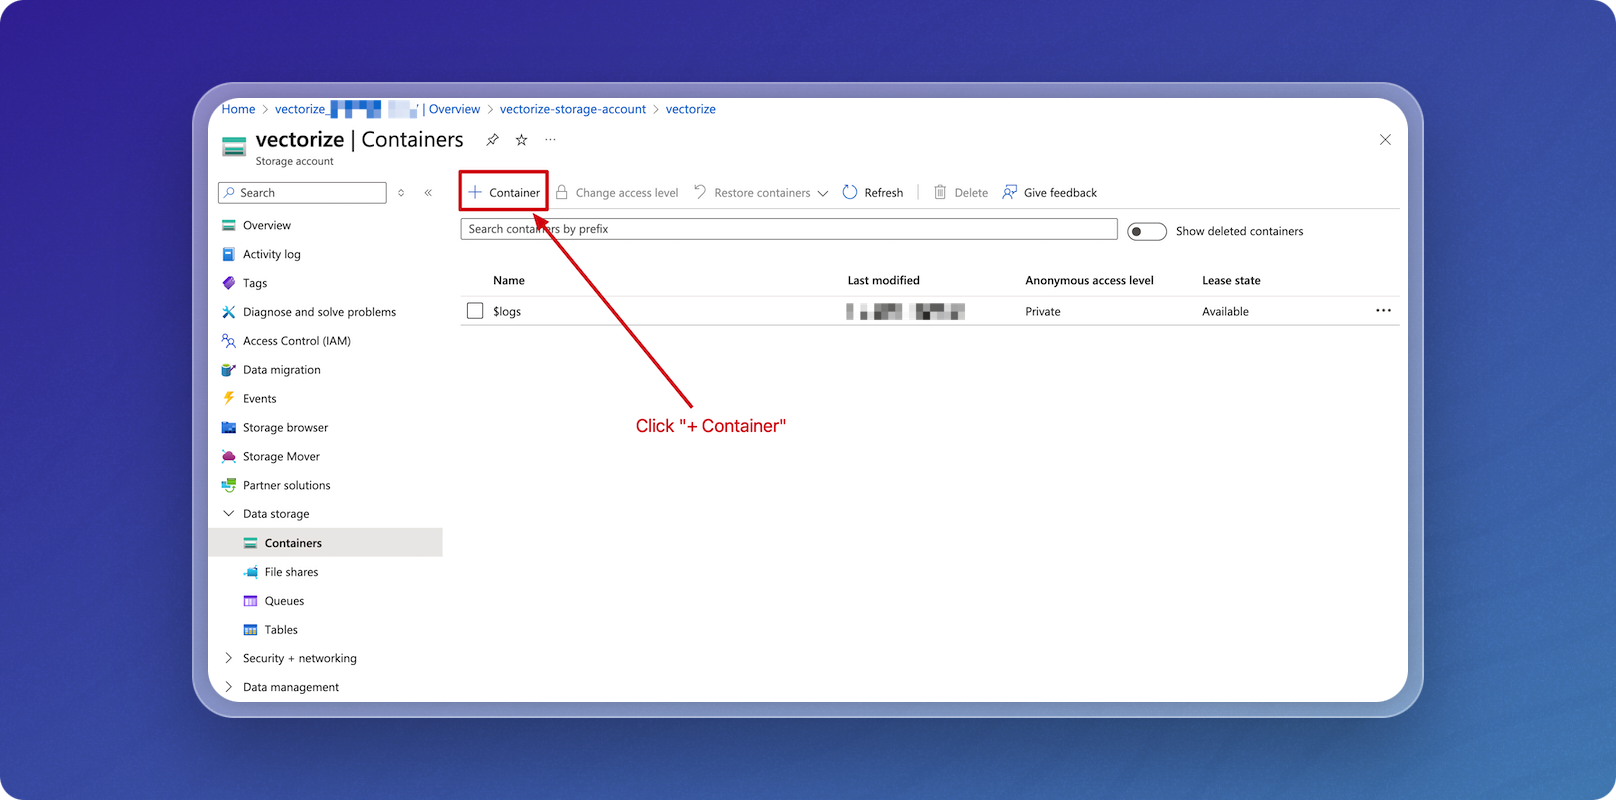
Click + Container.
-
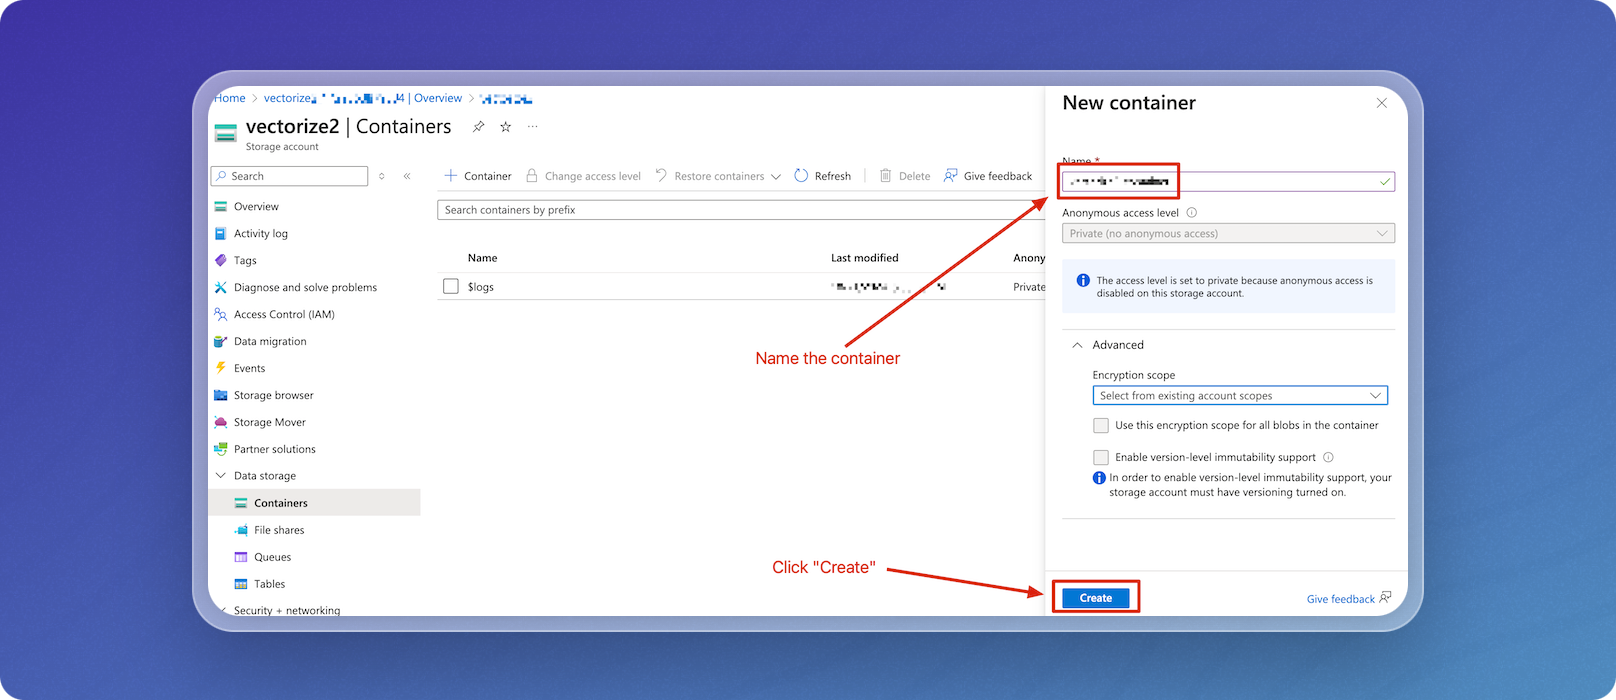
Name the container, then click Create.
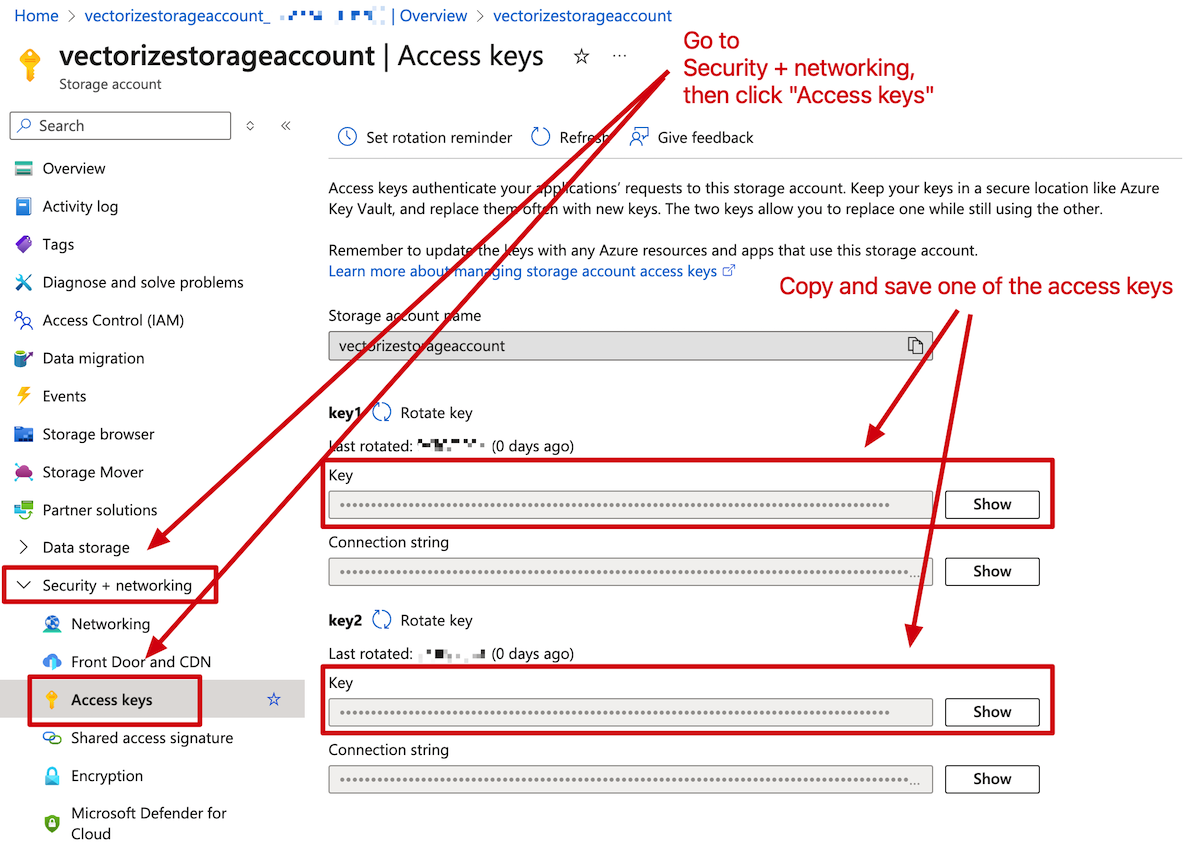
Step 3: Securely Save Storage Account Credentials
-
In the left-hand menu, select Security + Networking, then click Access keys.
Copy and securely save one of the access keys.
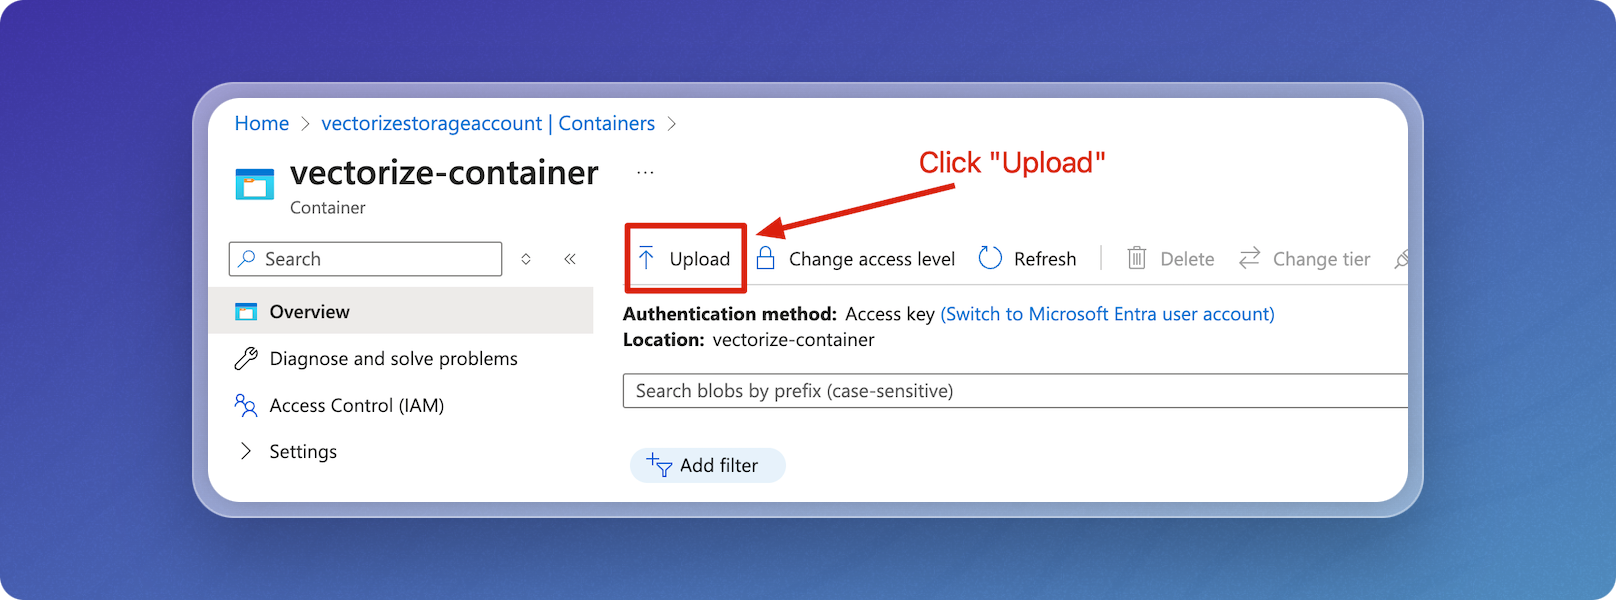
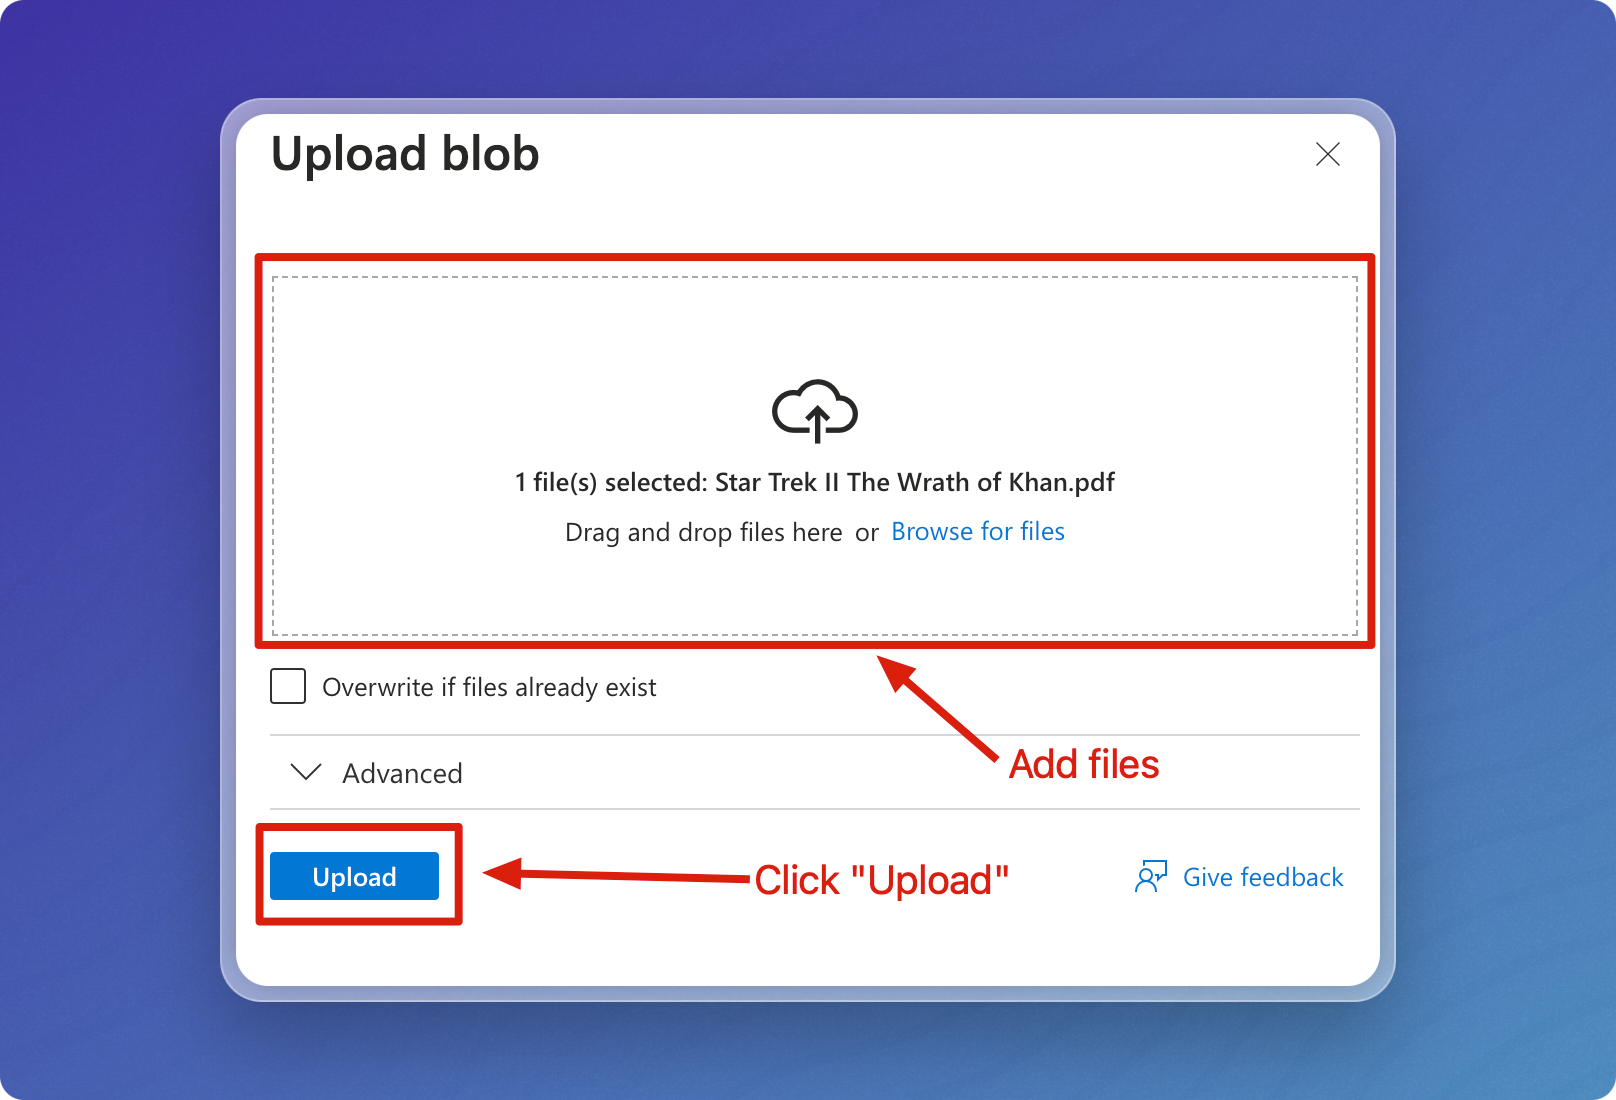
Step 4: Upload Data to the Blob Container
-
Go to your container in the storage account, then click Upload.
-
Select the files or folders you wish to upload, then click Upload.
How to create a folder in an Azure Blob Storage container
Azure Blob Storage is flat, meaning it doesn't technically support hierarchical folders like a file system, but you can simulate a folder structure by including the folder path in the blob name.
-
Install the Azure CLI
Install the Azure CLI by following the instructions here.
-
Log In to Azure
Open your terminal and log in to your Azure account. This will open a web browser for you to sign in. Once signed in, the CLI will be authenticated.
az login -
Create a Folder in the Blob Container
Create a "folder" by uploading an empty blob or a file with a "folder-like" path.
az storage blob upload \
--container-name <container-name> \
--name <folder-name>/file.txt \
--file /dev/null \
--account-name <storage-account-name>
Where:
Parameter Description container-name Name of your container. folder-name Name of the folder to create. storage-account-name Name of your storage account. If you provide the name of a real file, it will be uploaded to the folder. If the filename does not exit, an empty file with that name will be created.
-
Verify the Folder
After running the command, you can verify the folder-like structure by listing blobs in the container:
az storage blob list \
--container-name <container-name> \
--account-name <storage-account-name> \
--output table
Example output:
Name                                                      Blob Type    Blob Tier    Length    Content Type     Last Modified              Snapshot
--------------------------------------------------------  -----------  -----------  --------  ---------------  -------------------------  ----------
a-midsummer-nights-dream.pdf                 BlockBlob    Hot          572679    application/pdf  2024-10-01T00:06:01+00:00
hamlet.pdf                                   BlockBlob    Hot          1120385   application/pdf  2024-10-01T00:06:01+00:00
king-lear.pdf                                BlockBlob    Hot          1004332   application/pdf  2024-10-01T00:06:00+00:00
macbeth.pdf                                  BlockBlob    Hot          629283    application/pdf  2024-10-01T00:06:00+00:00
the-taming-of-the-shrew.pdf                  BlockBlob    Hot          698328    application/pdf  2024-10-01T00:06:00+00:00
the-two-gentlemen-of-verona.pdf              BlockBlob    Hot          576548    application/pdf  2024-10-01T00:06:00+00:00
startrek/Star Trek II The Wrath of Khan.pdf  BlockBlob    Hot          684071    application/pdf  2024-10-02T20:05:57+00:00