How to Create a GCP Service Account for use with Google Drive
Approximate time to complete: 5-7 minutes, excluding prerequisites
This how to article gives you step-by-step instructions for creating a Google Drive service account with credentials in Google Cloud Platform. It will also show you how to Integrations Overview from Vectorize to Google Drive as part of a RAG pipeline.
Before you begin
Before starting, ensure you have access to the credentials, connection parameters, and API keys as appropriate for the following:
- A Vectorize account (Create one free here ↗)
- A GCP Cloud Account (Create one free here ↗)
Enable the Google Drive API
-
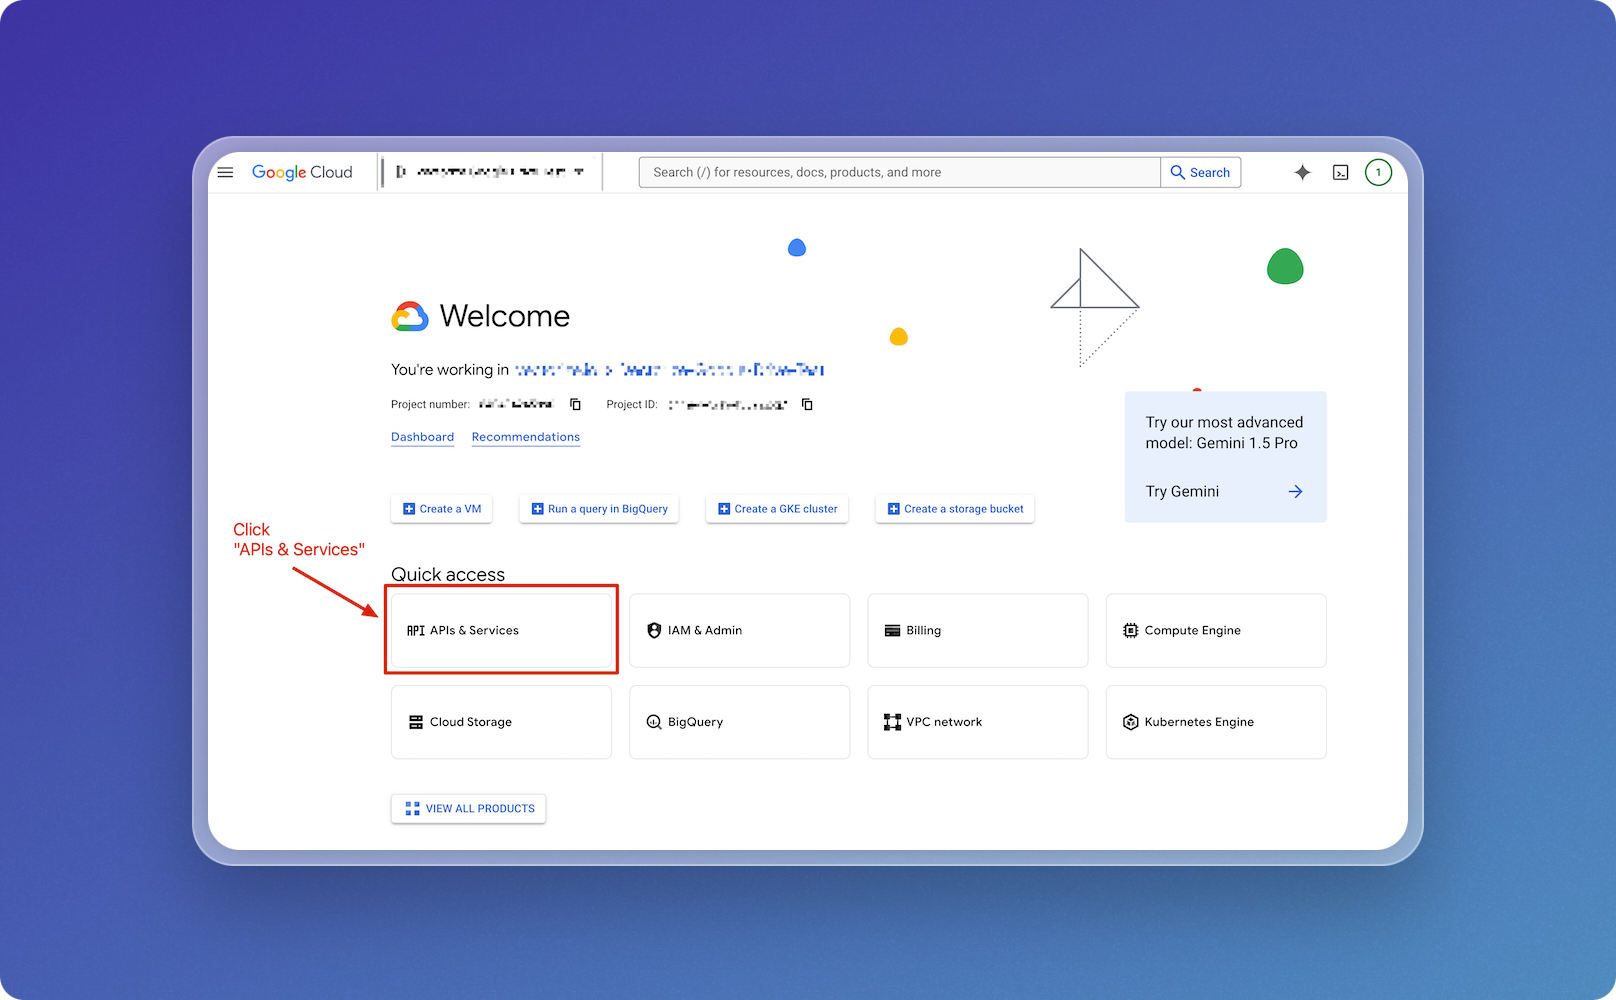
Open Google Cloud Console
- Navigate to the Google Cloud Console.
- Make sure you are working in the correct project.
-
Go to APIs & Services
- From the dashboard, locate the "APIs & Services" option in the quick access section.
- Click on APIs & Services.
-
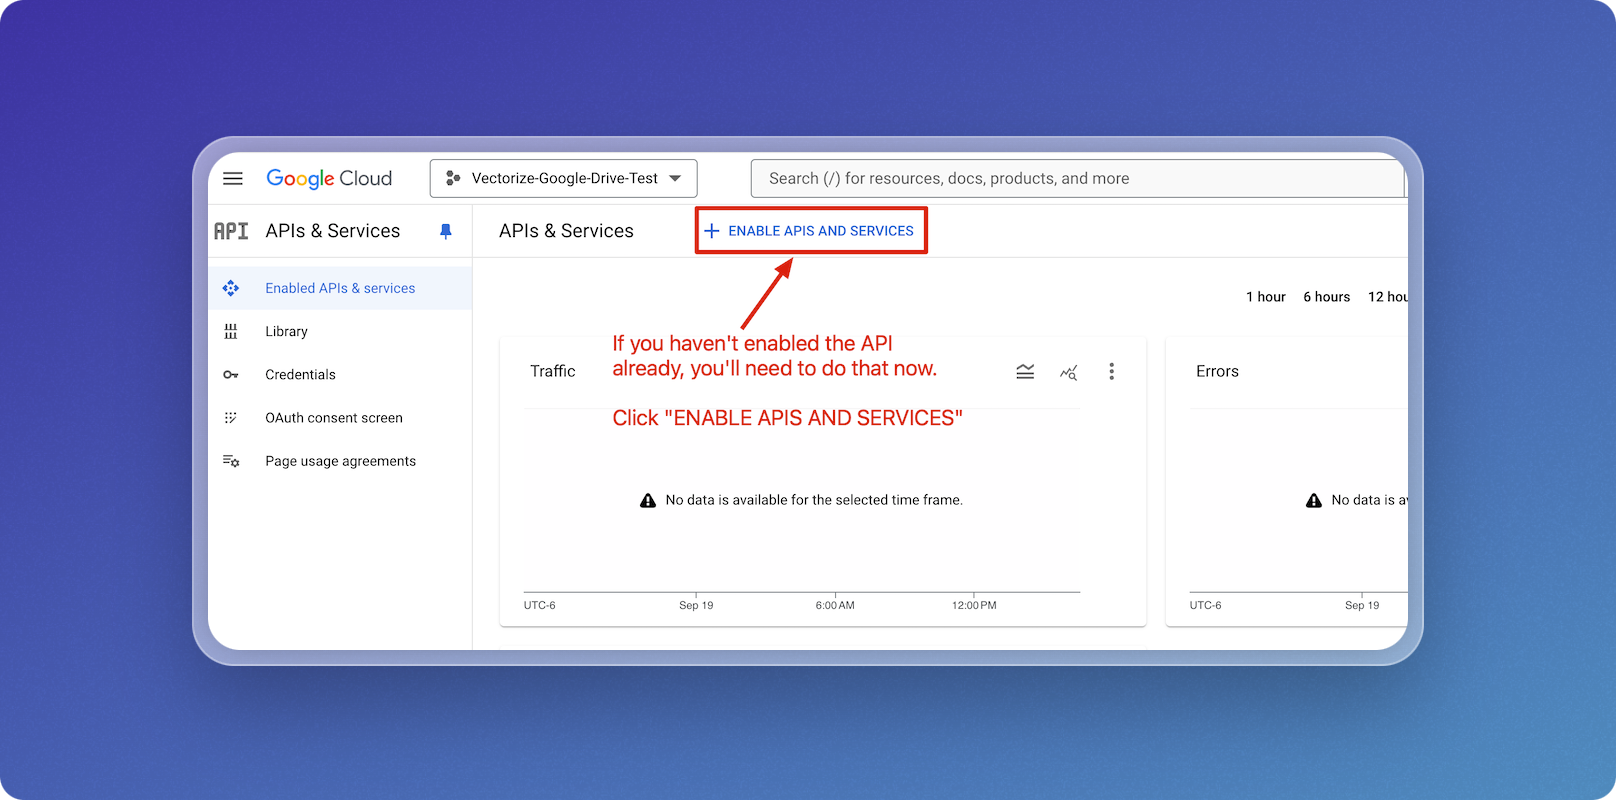
Enable Cloud Storage API
- Click on ENABLE APIS AND SERVICES.
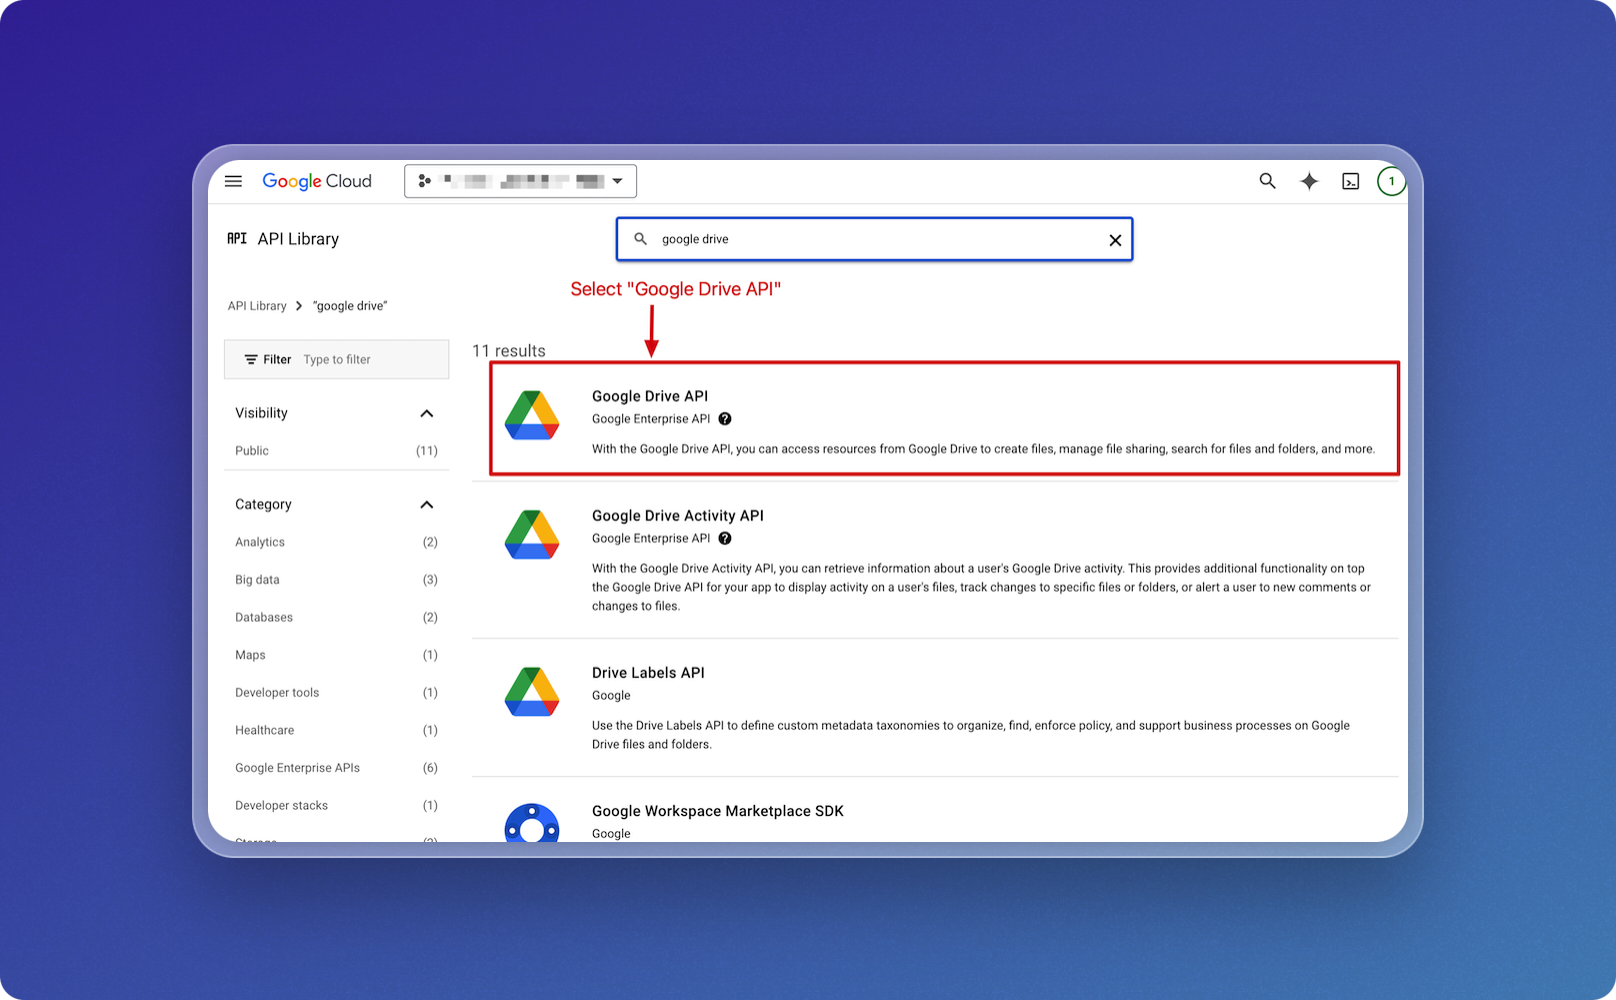
- In the API library, use the search box and type Google Drive to locate the API.
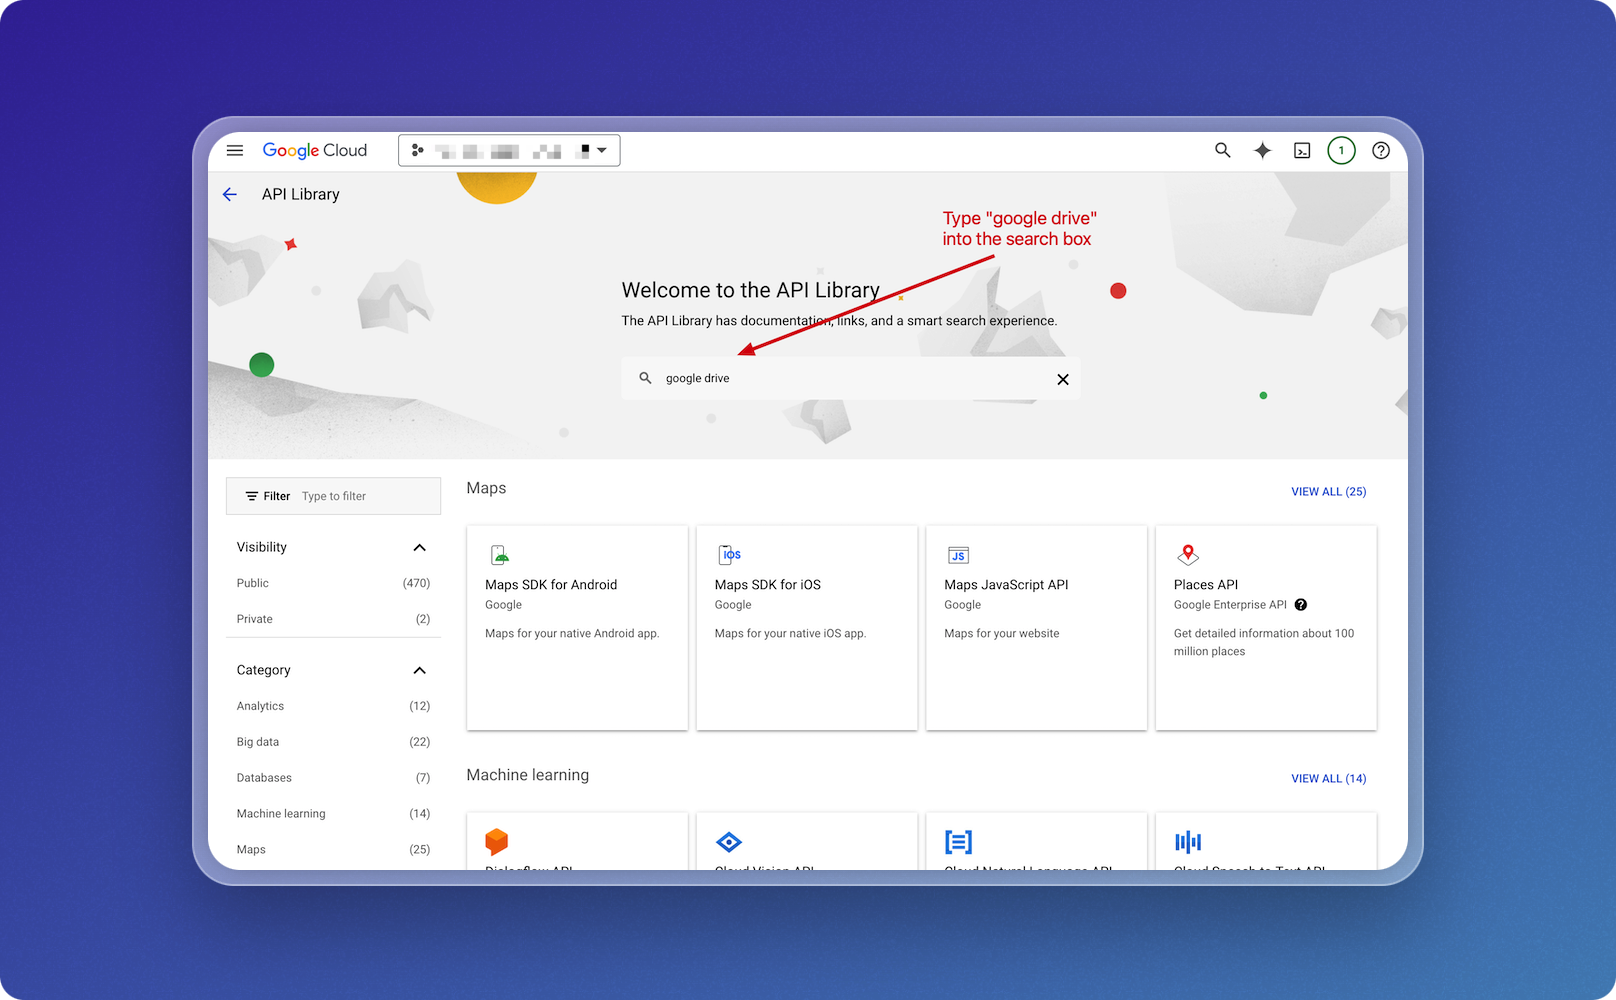
- From the search results, click on the Google Drive option from Google Enterprise API.
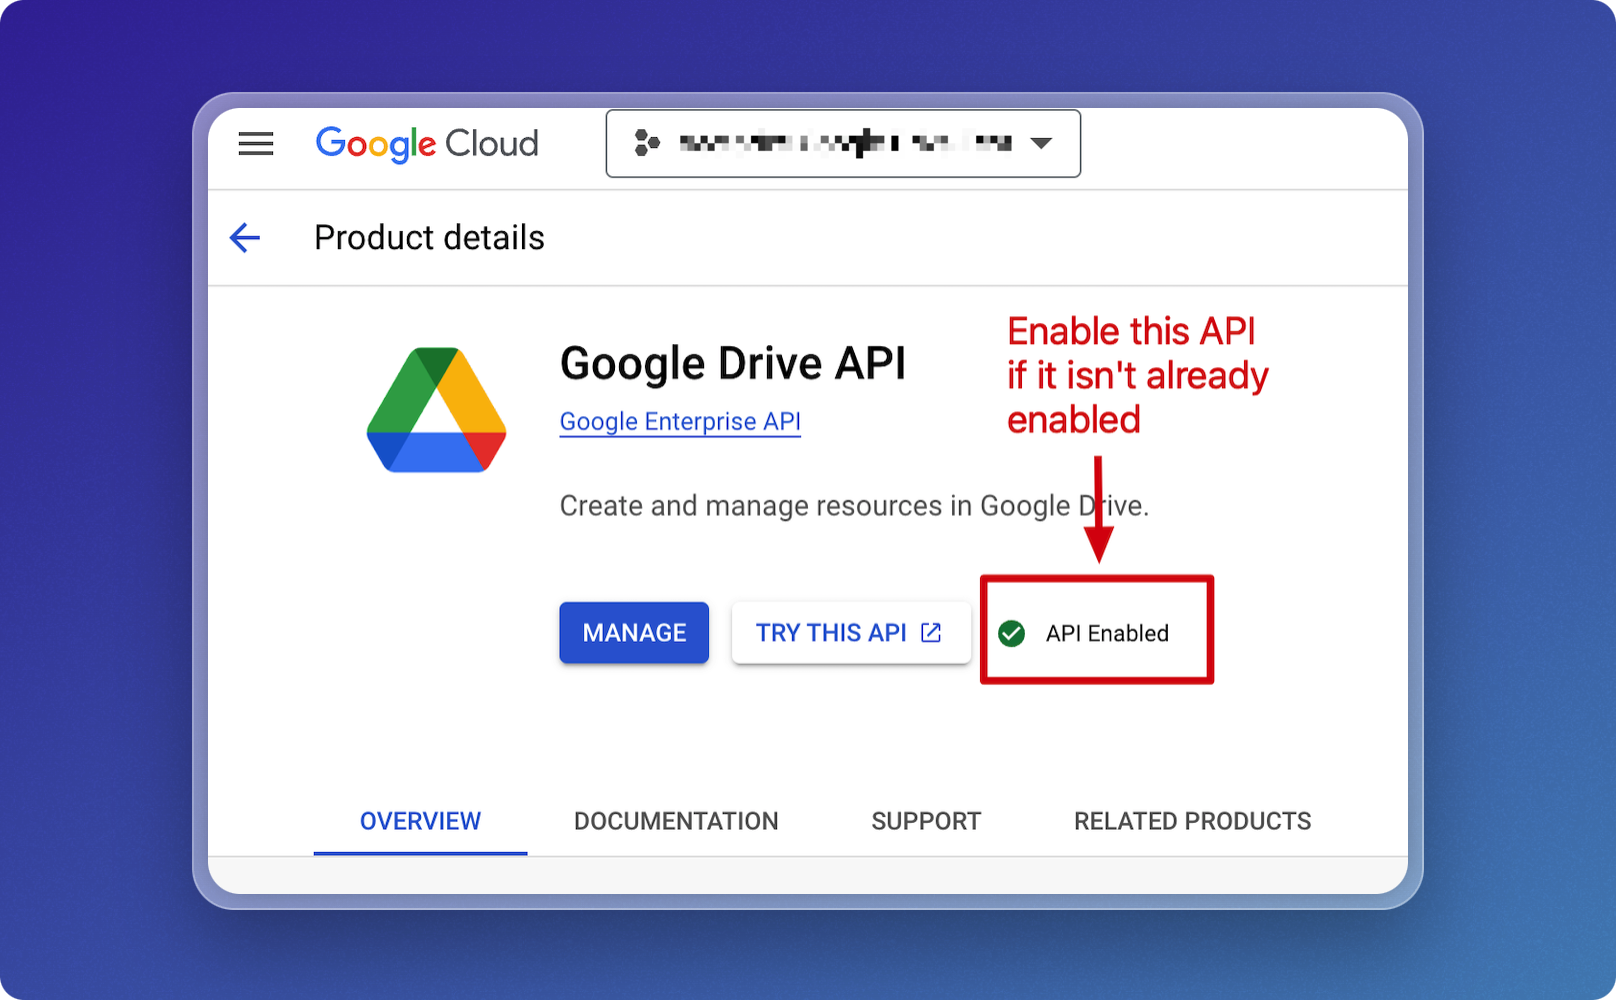
- On the Google Drive API details page, click ENABLE.
- If the API is already enabled, you can go to the next step.
Set Up the Service Account
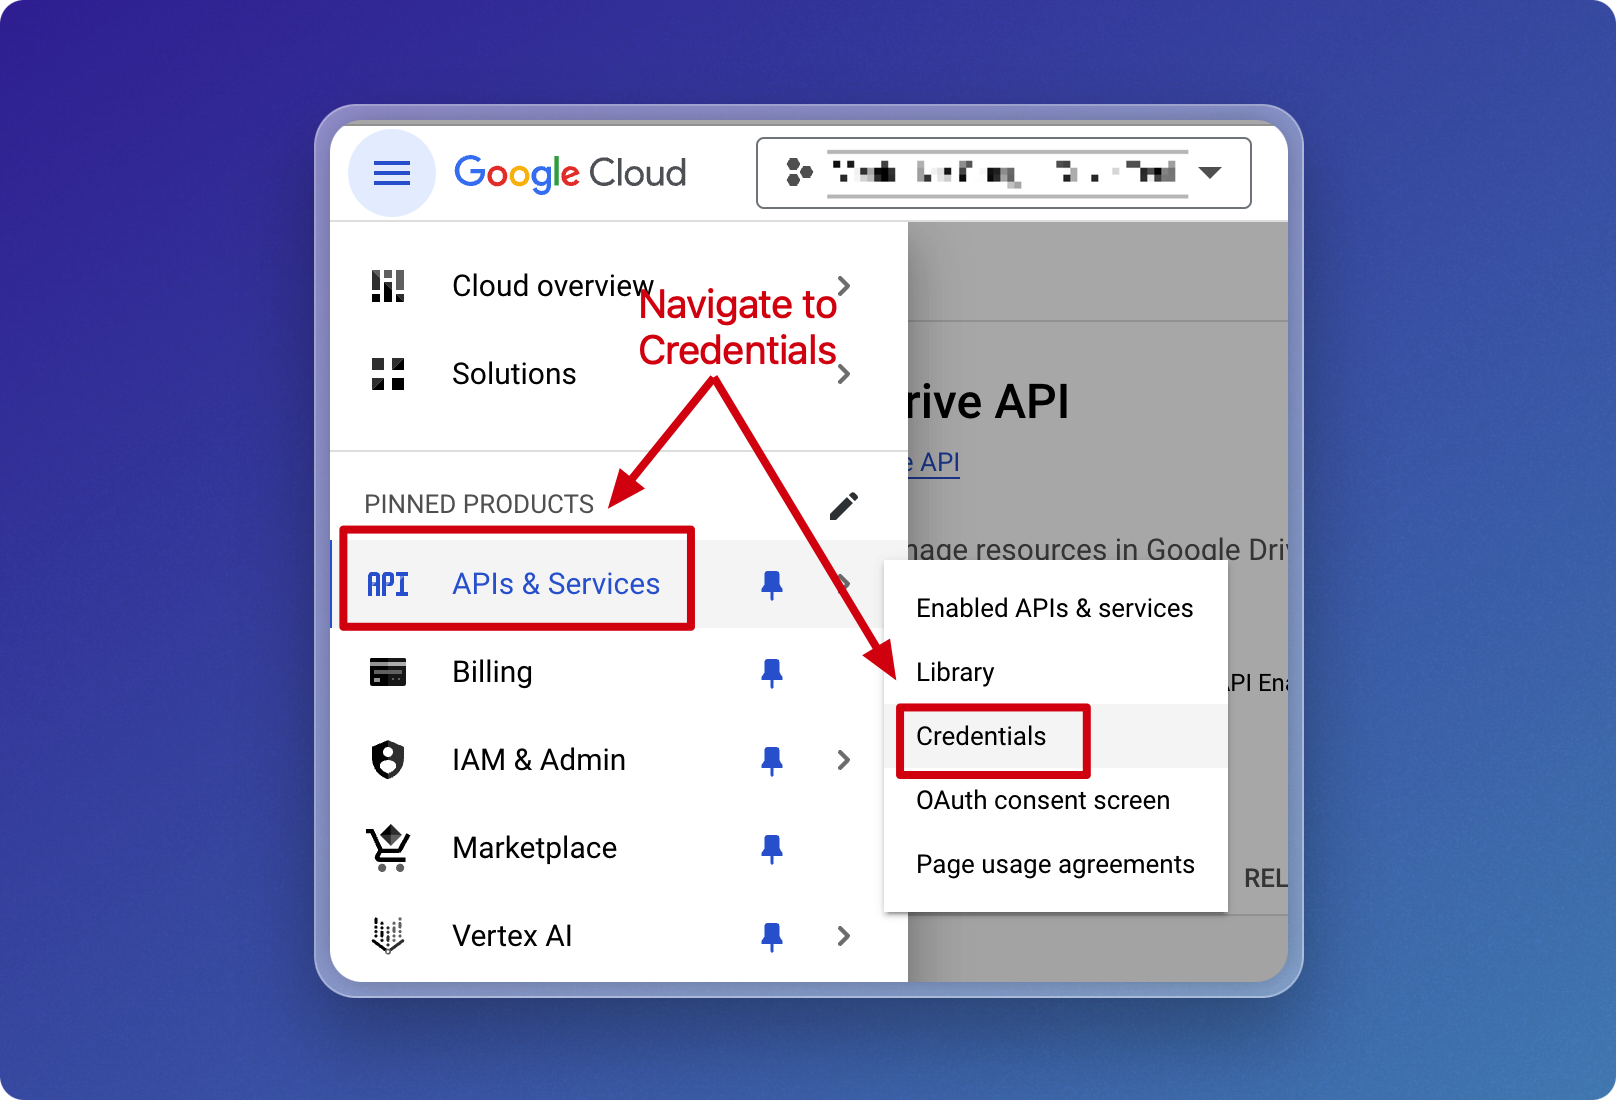
- Navigate to APIs & Services > Credentials.
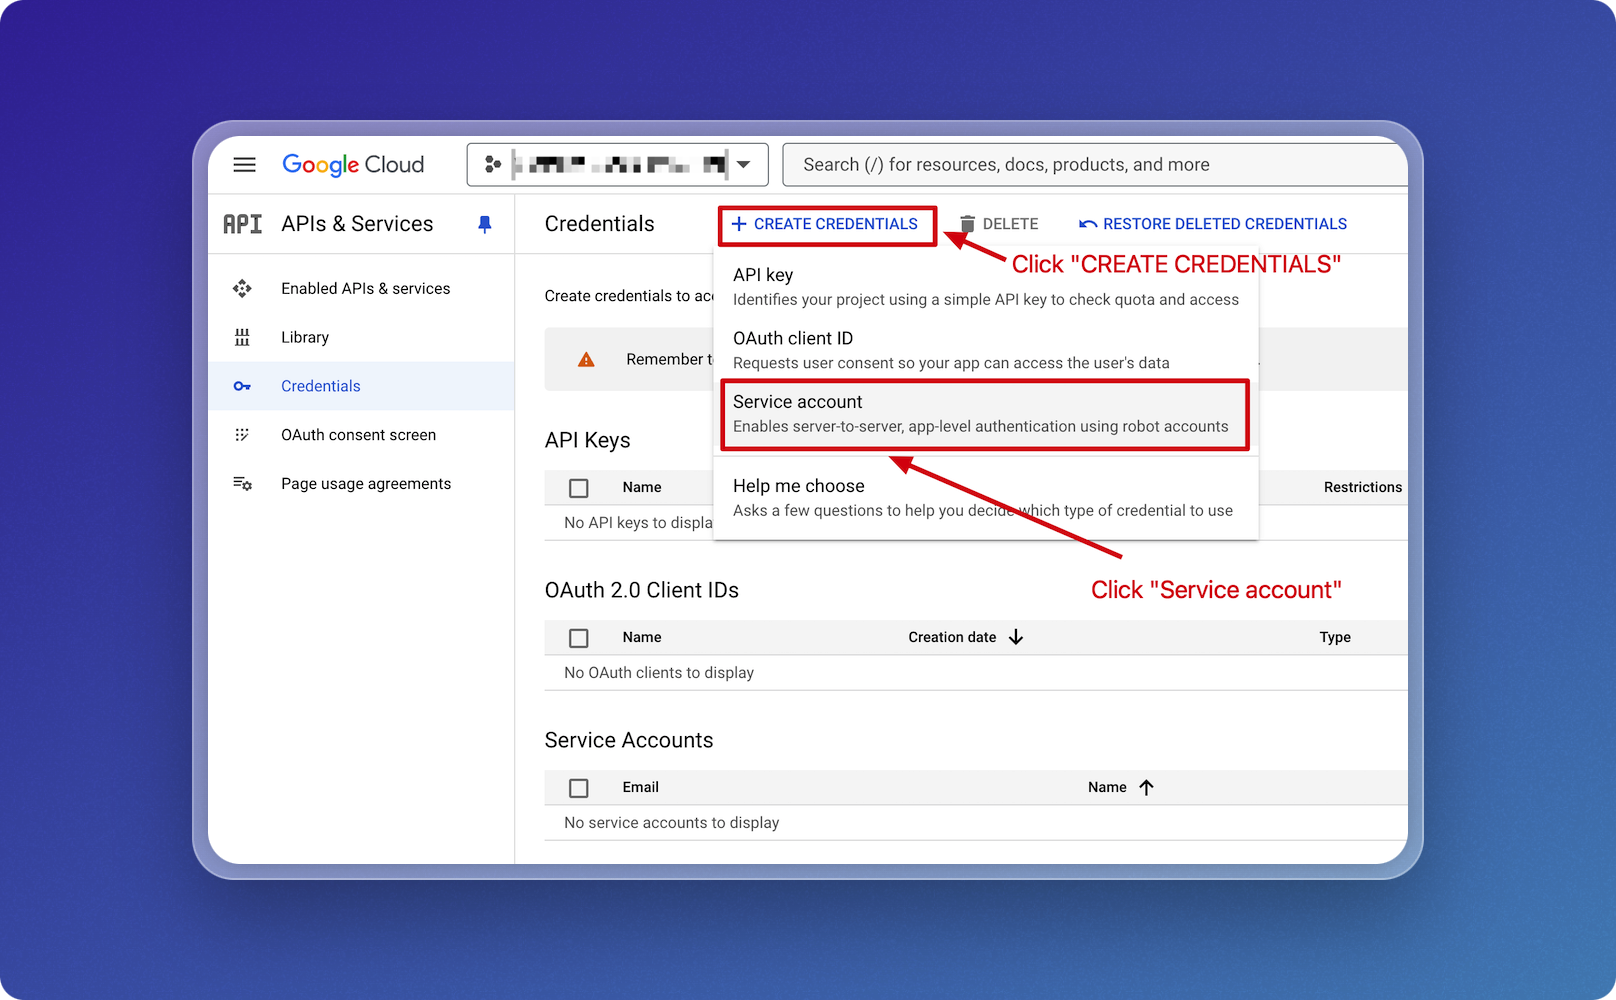
- Click CREATE CREDENTIALS, then click Service account.
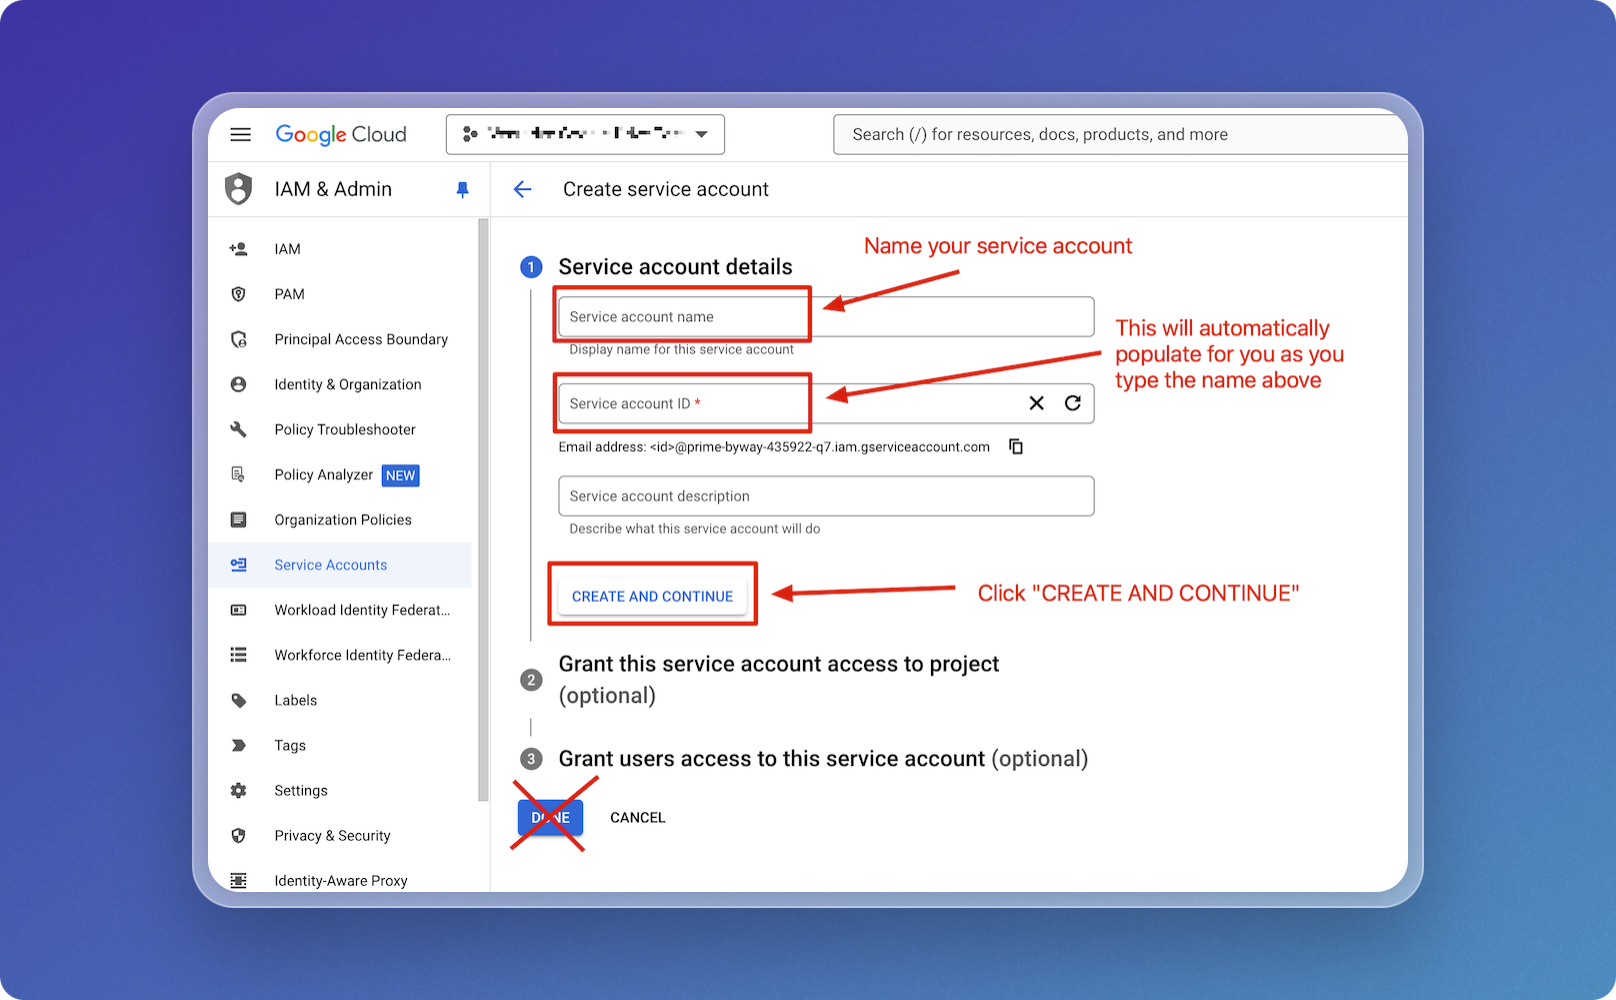
- Fill in your service details
- Provide a Service account name, this will automatically populate the Service account ID field as well
- Click on CREATE AND CONTINUE, making sure you're clicking the button shown and NOT the more prominent DONE button.
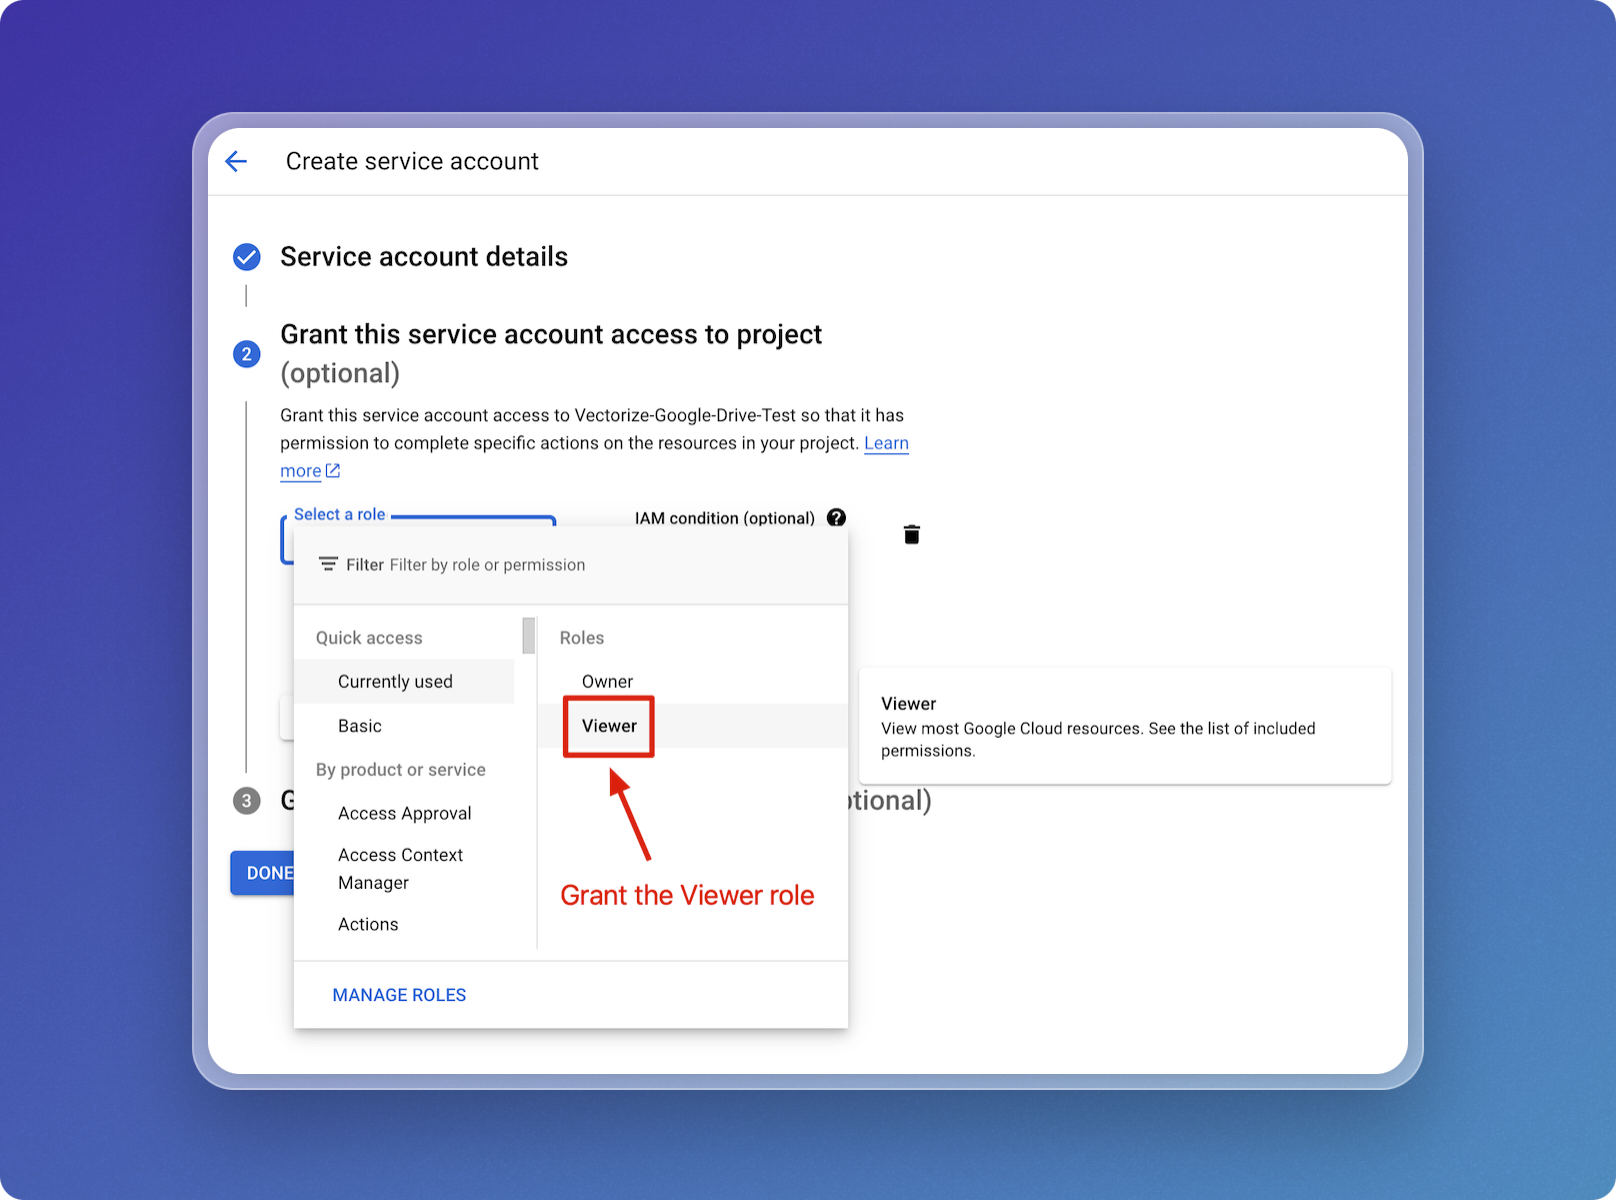
- Assign roles to your service account
- In the role selection section, grant the Viewer role for the service account.
-
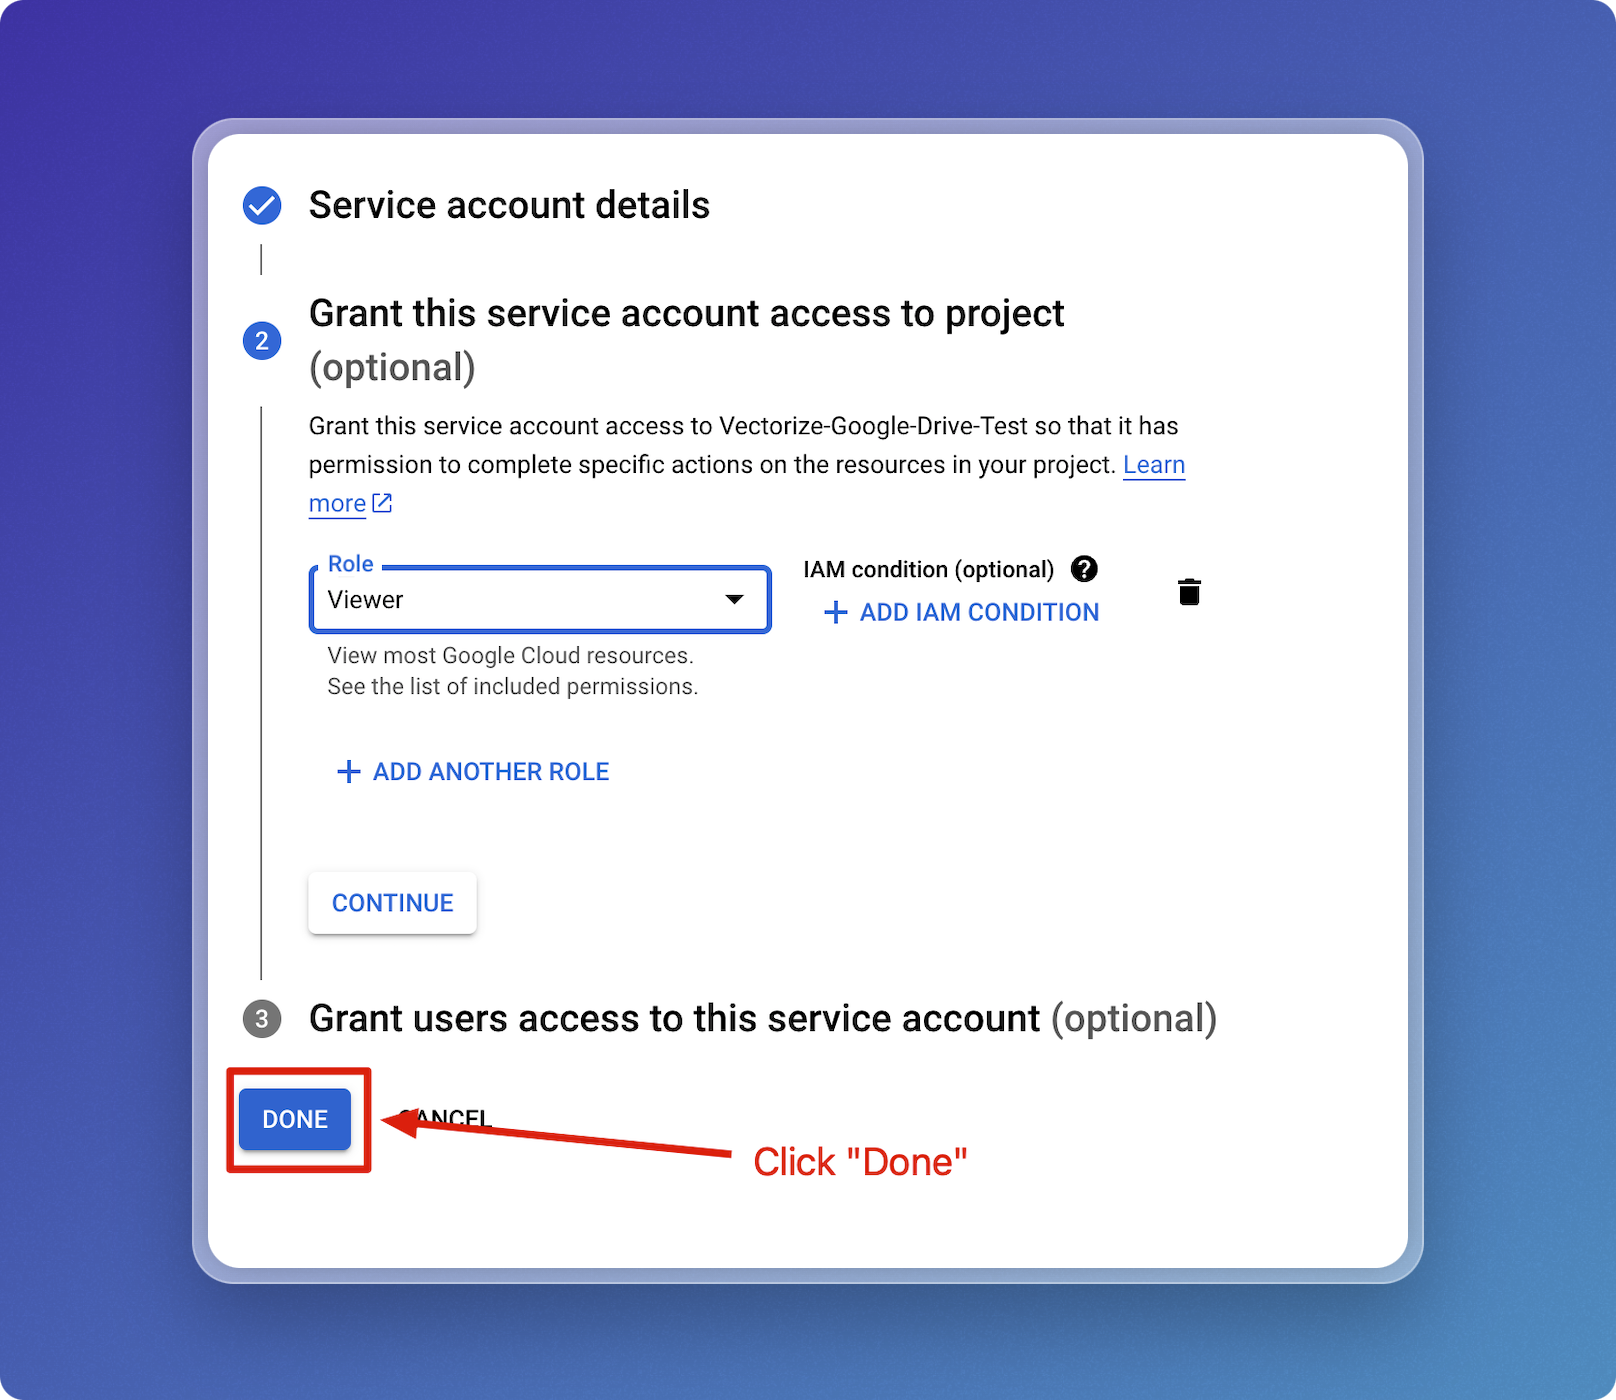
Finalizing the Service Account
- To finalize the setup, click DONE to complete the creation of the service account.
Step 4: Create Keys for the Service Account
-
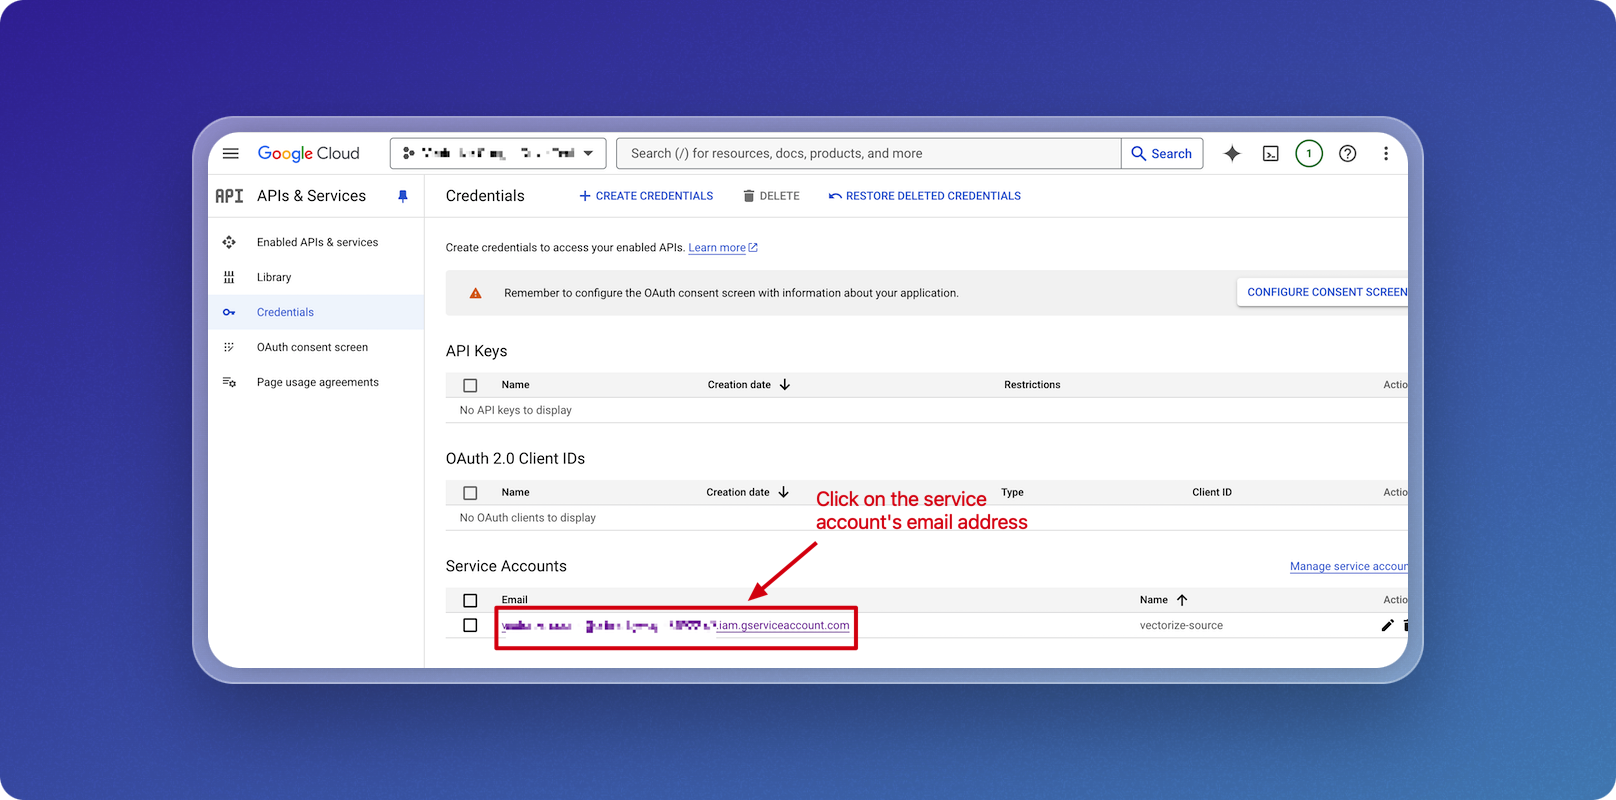
Select the Service Account
- After creating the service account, you should see a list with the new service account listed.
- If you left that page, you can always get to it by going to IAM & Admin > Service Accounts using upper left "hamburger" menu.
- Click on the service account email to manage it.
-
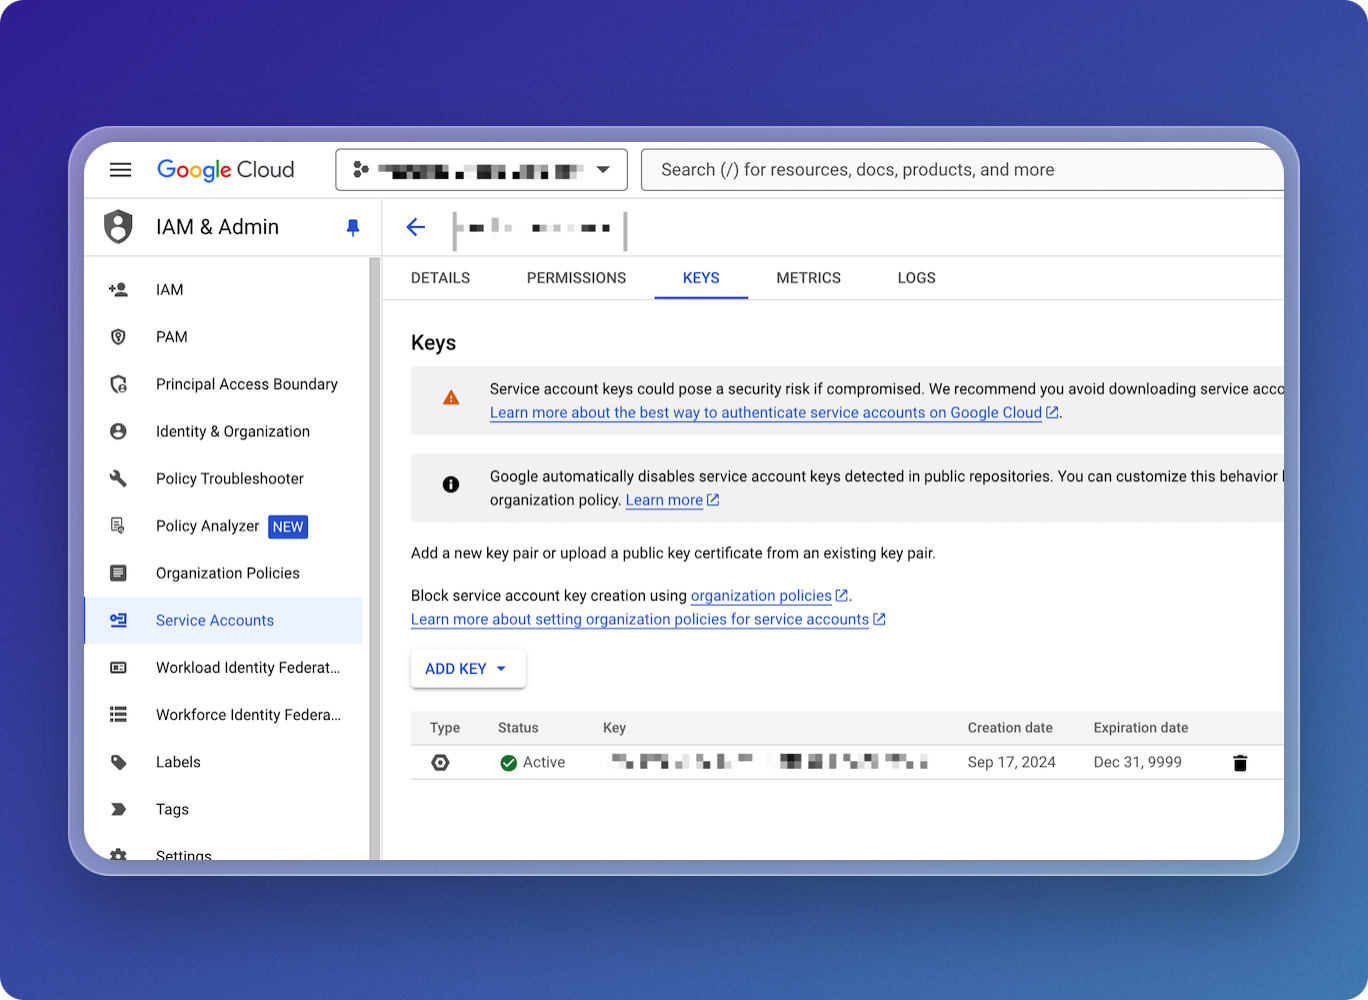
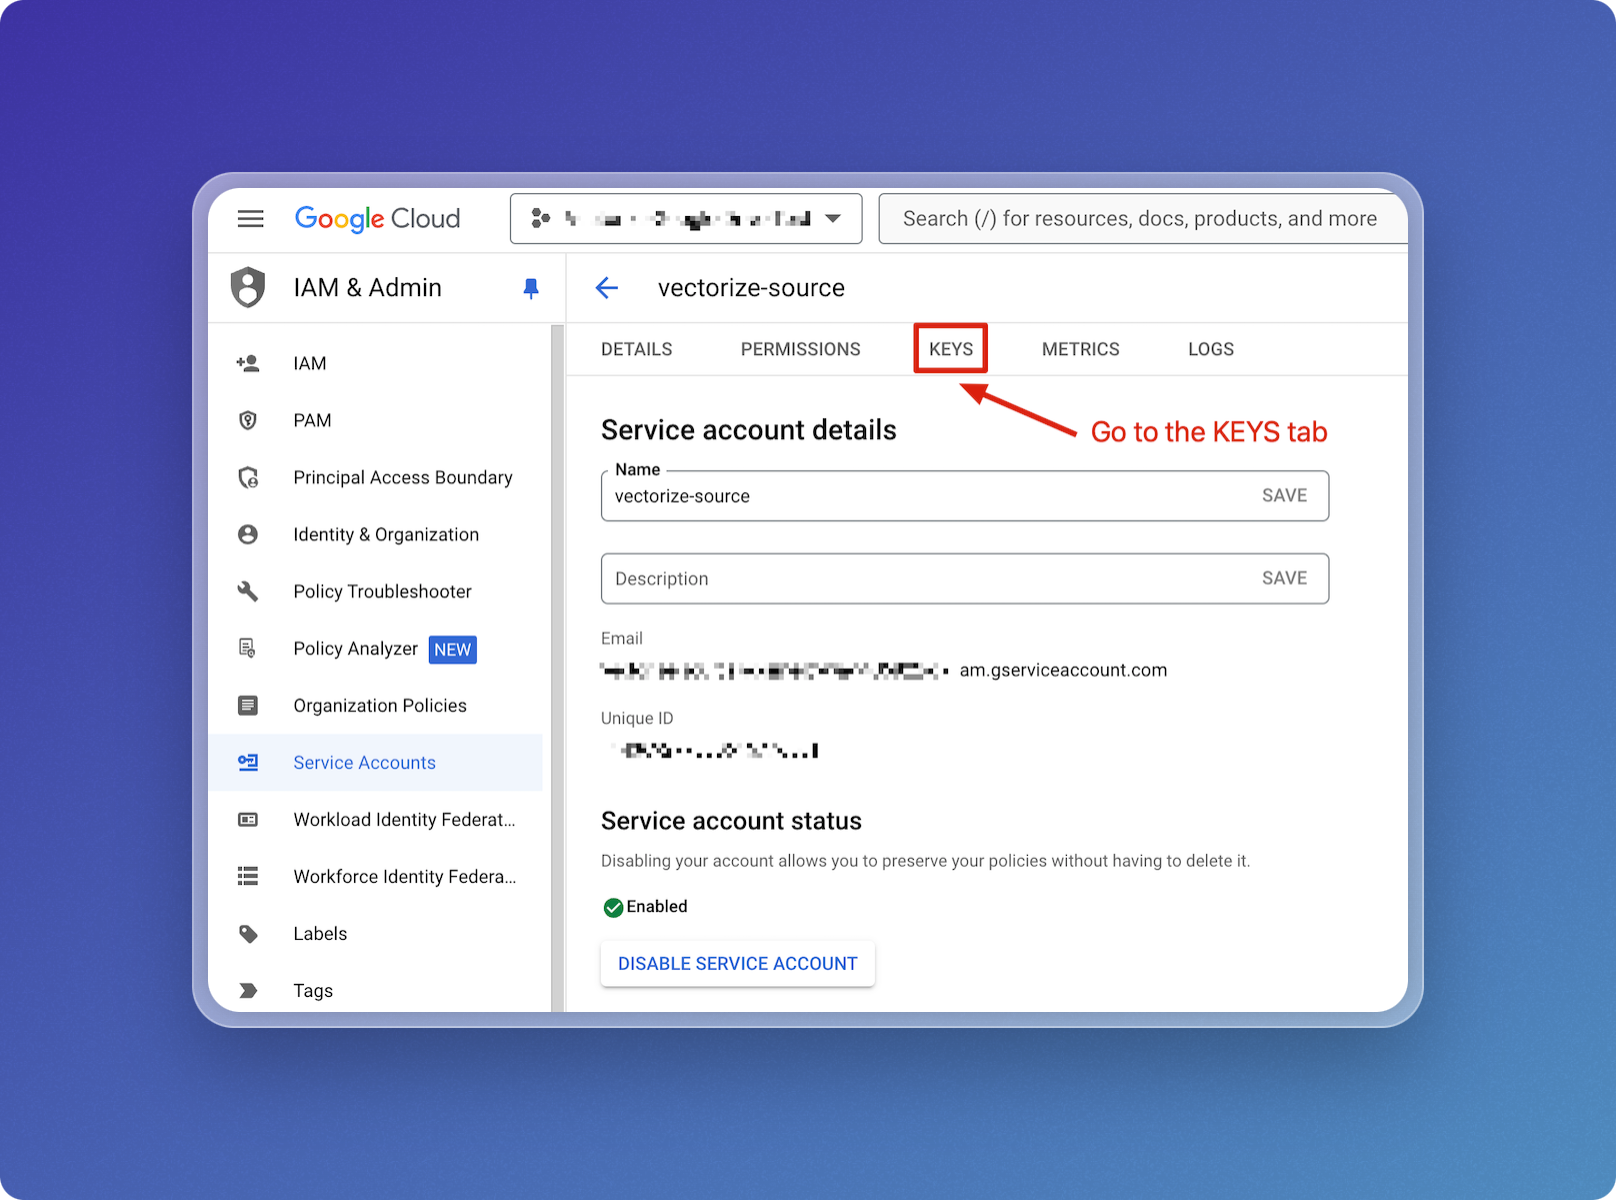
Go to the Keys Tab
- Once in the service account details, navigate to the KEYS tab.
-
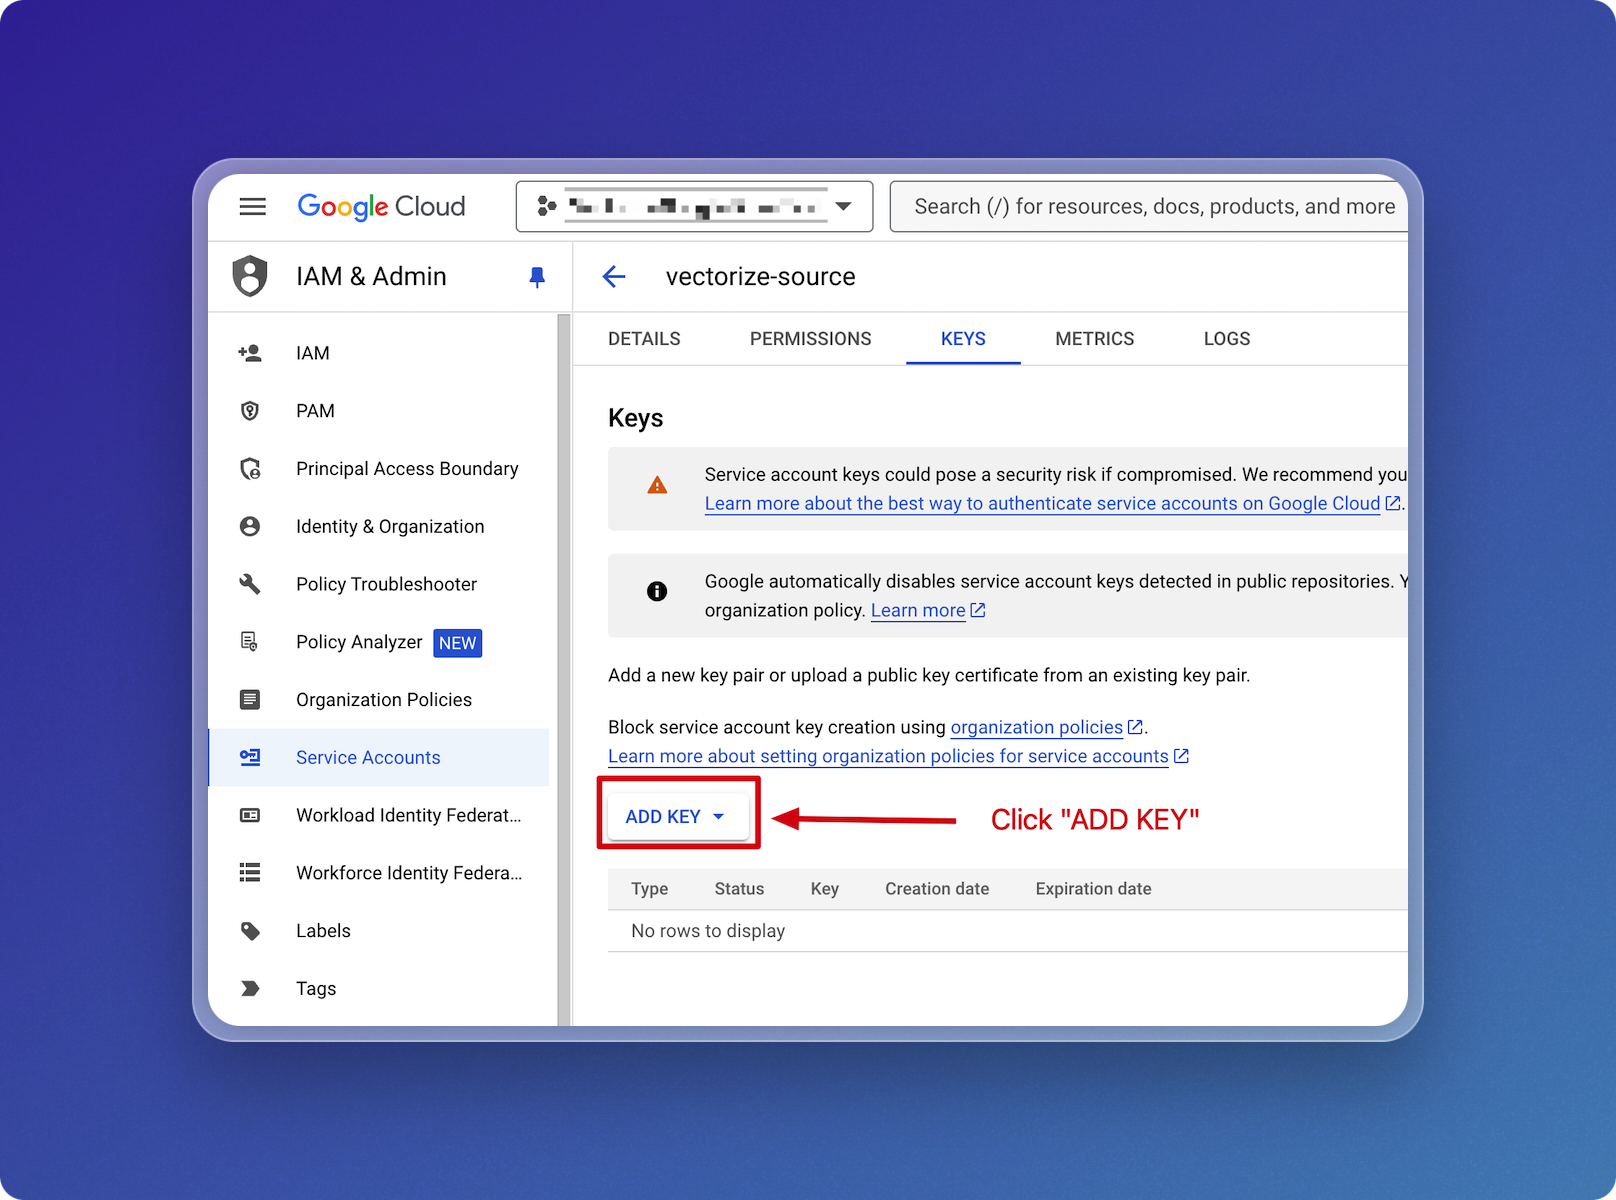
Add a New Key
- Open the ADD KEY dropdown
-
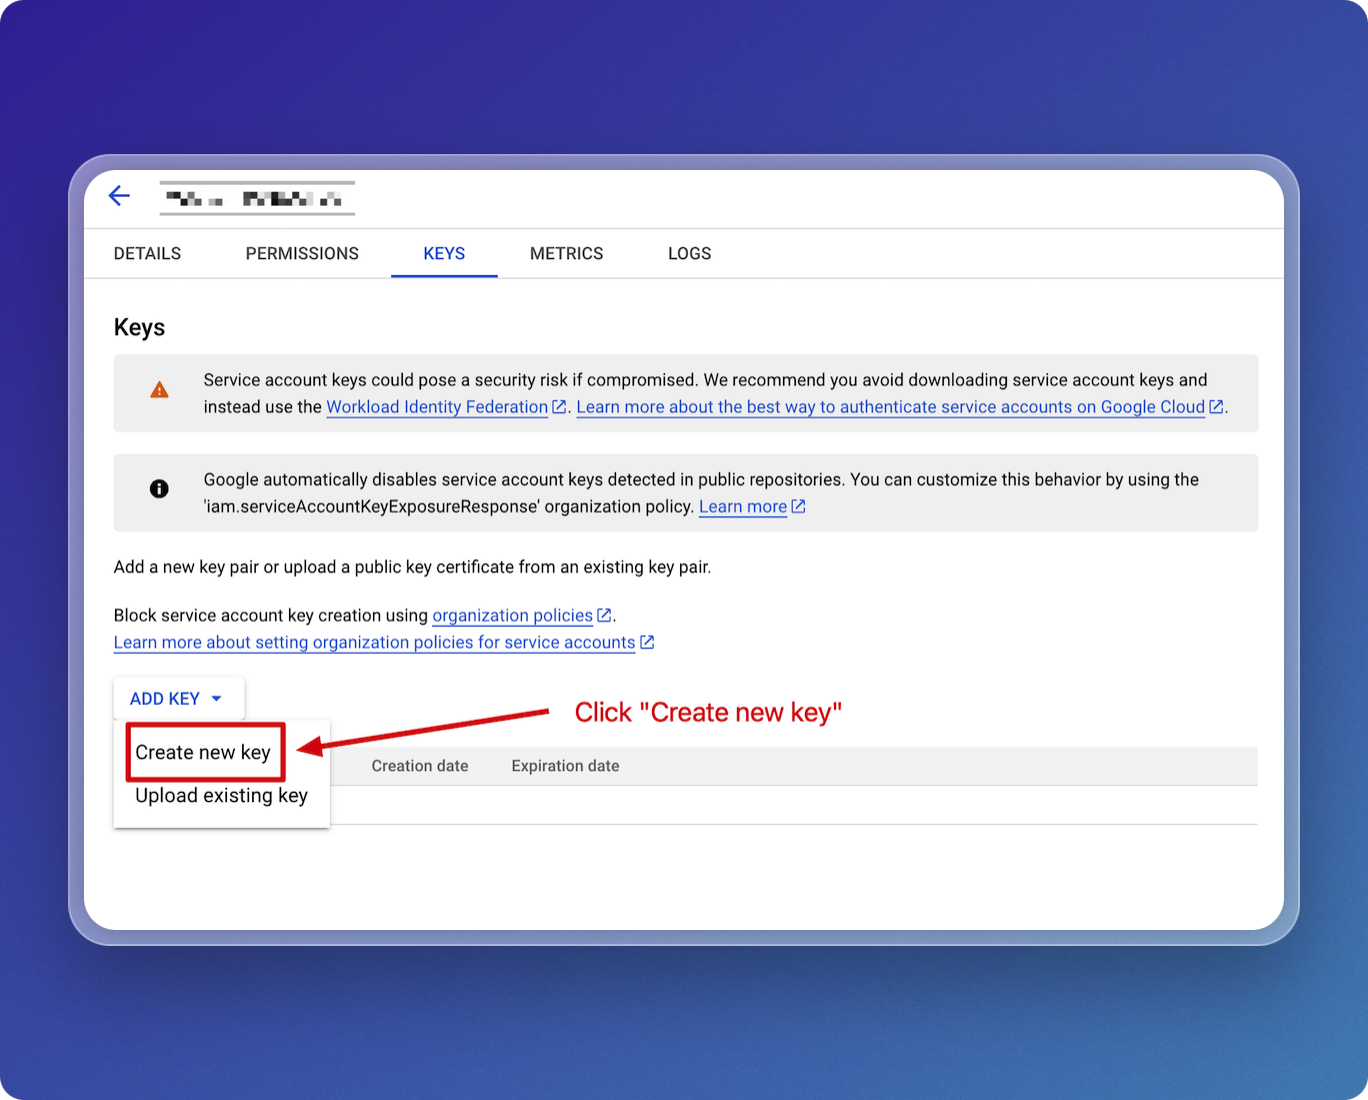
Select Create new key to generate a new key for this service account.
-
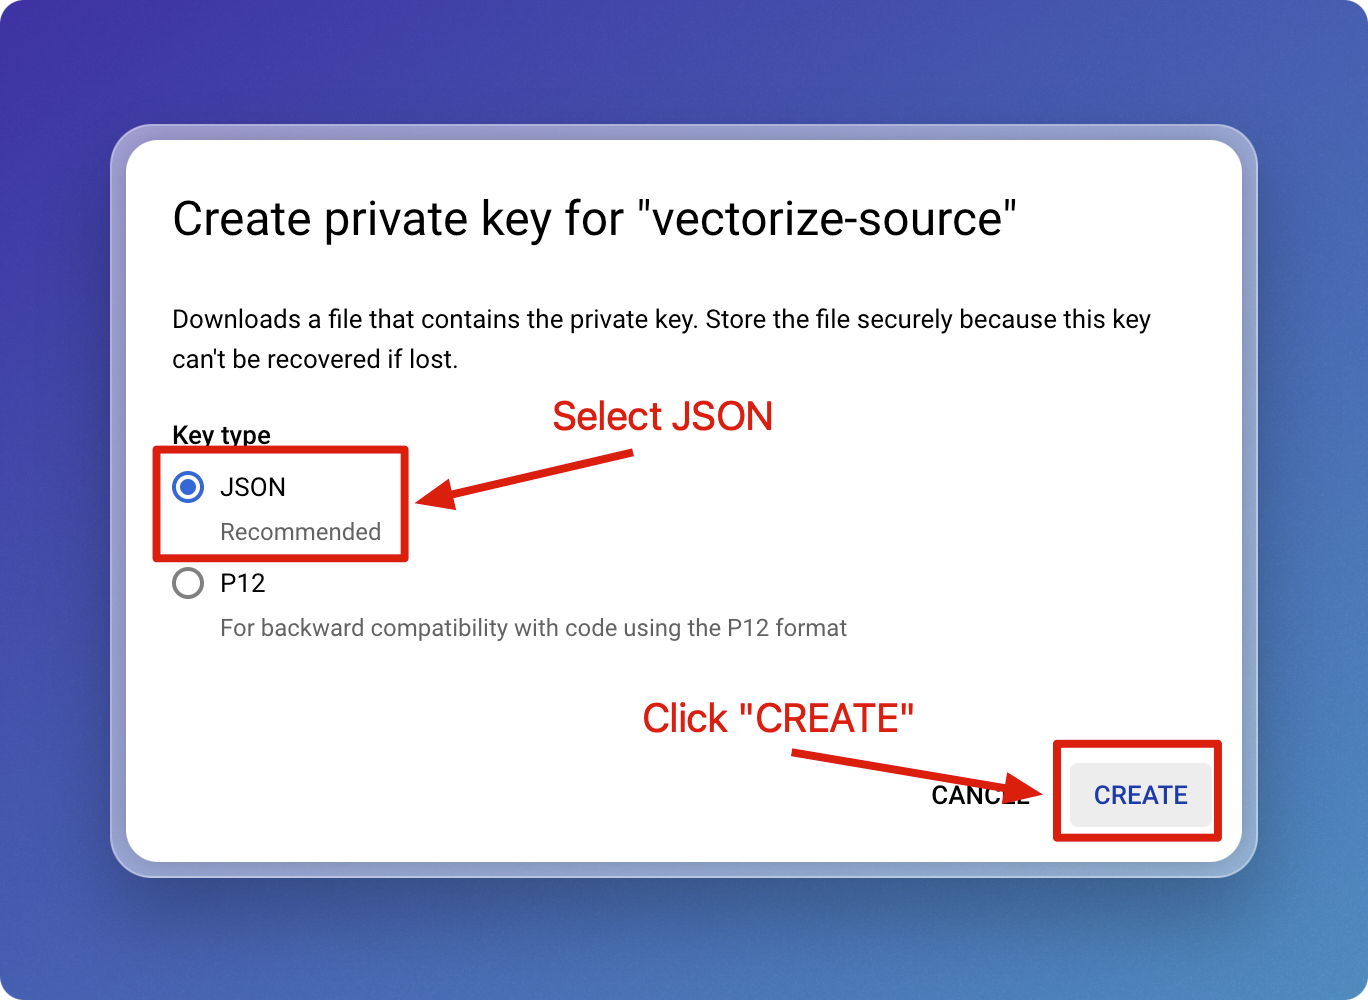
Create a JSON Key
- When prompted, select the JSON key type and click CREATE.
-
Save the Key
- A JSON file will be downloaded. Save this file securely as it contains the private key for your service account.
- Make sure to keep this key file secure, as it cannot be recovered if lost.