How to Create a Microsoft Entra ID Application
This how to article provides step-by-step instructions for configuring an Application in Microsoft Entra ID (formerly known as Azure Active Directory) for use with a RAG pipeline.
Before you begin
Before starting, ensure you have:
- A Microsoft 365 user account.
Step 1: Create a Microsoft Entra ID Application
-
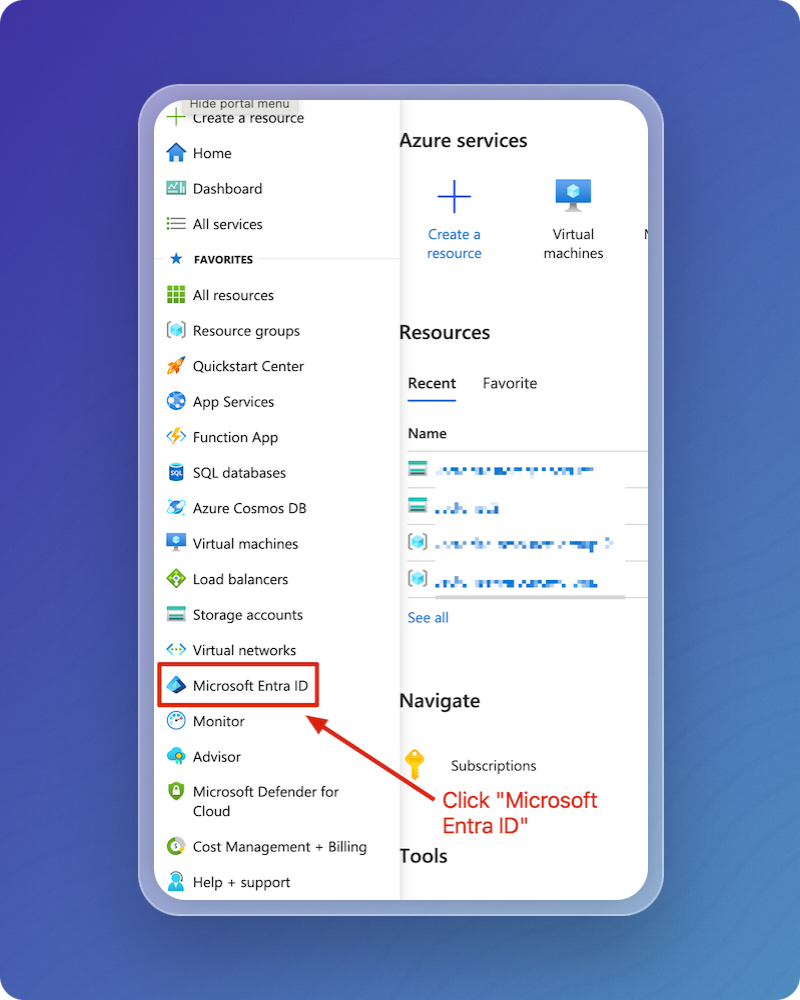
Go to the Azure Portal.
-
In the left-hand menu, click Microsoft Entra ID.
-
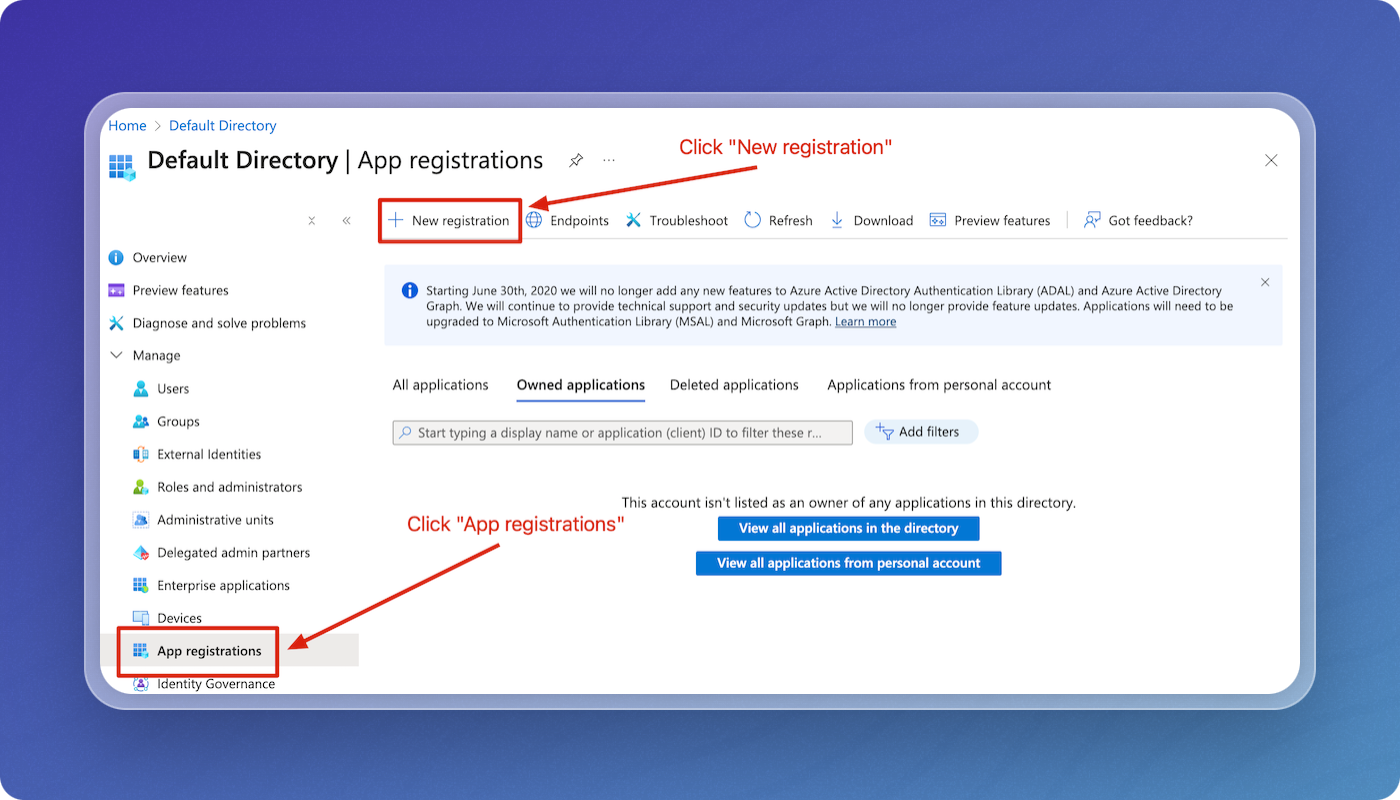
Select App Registrations, then click New registration.
-
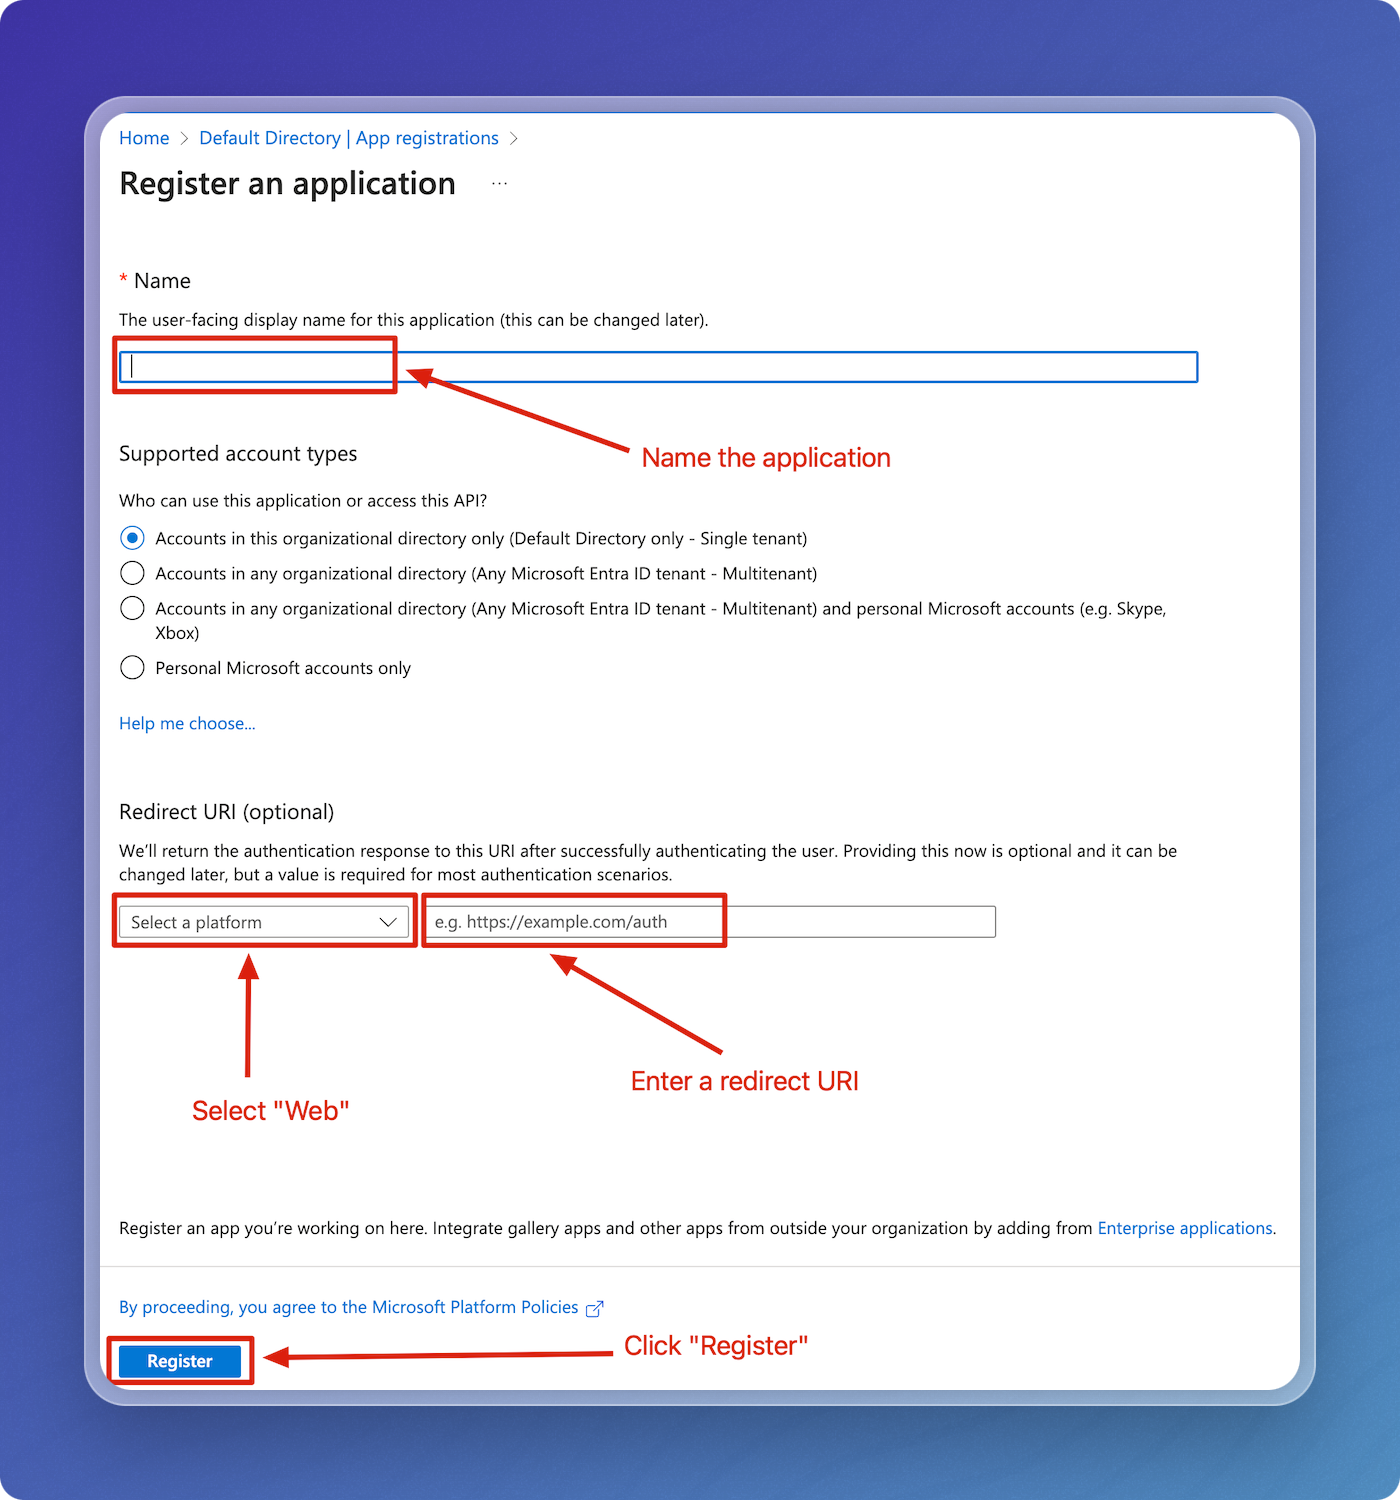
Name the application, select Web for the platform, enter a Redirect URI, then click Register.
-
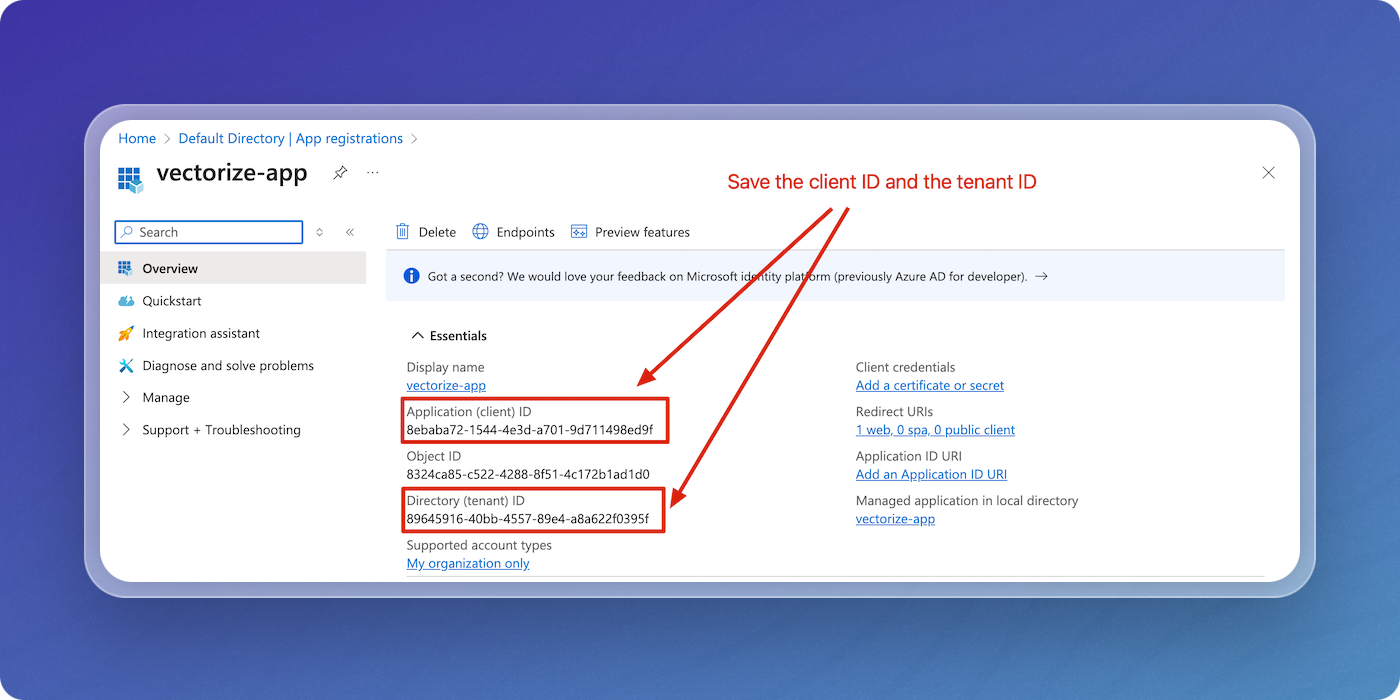
Save the Application (client) id and the Directory (tenant) id.
-
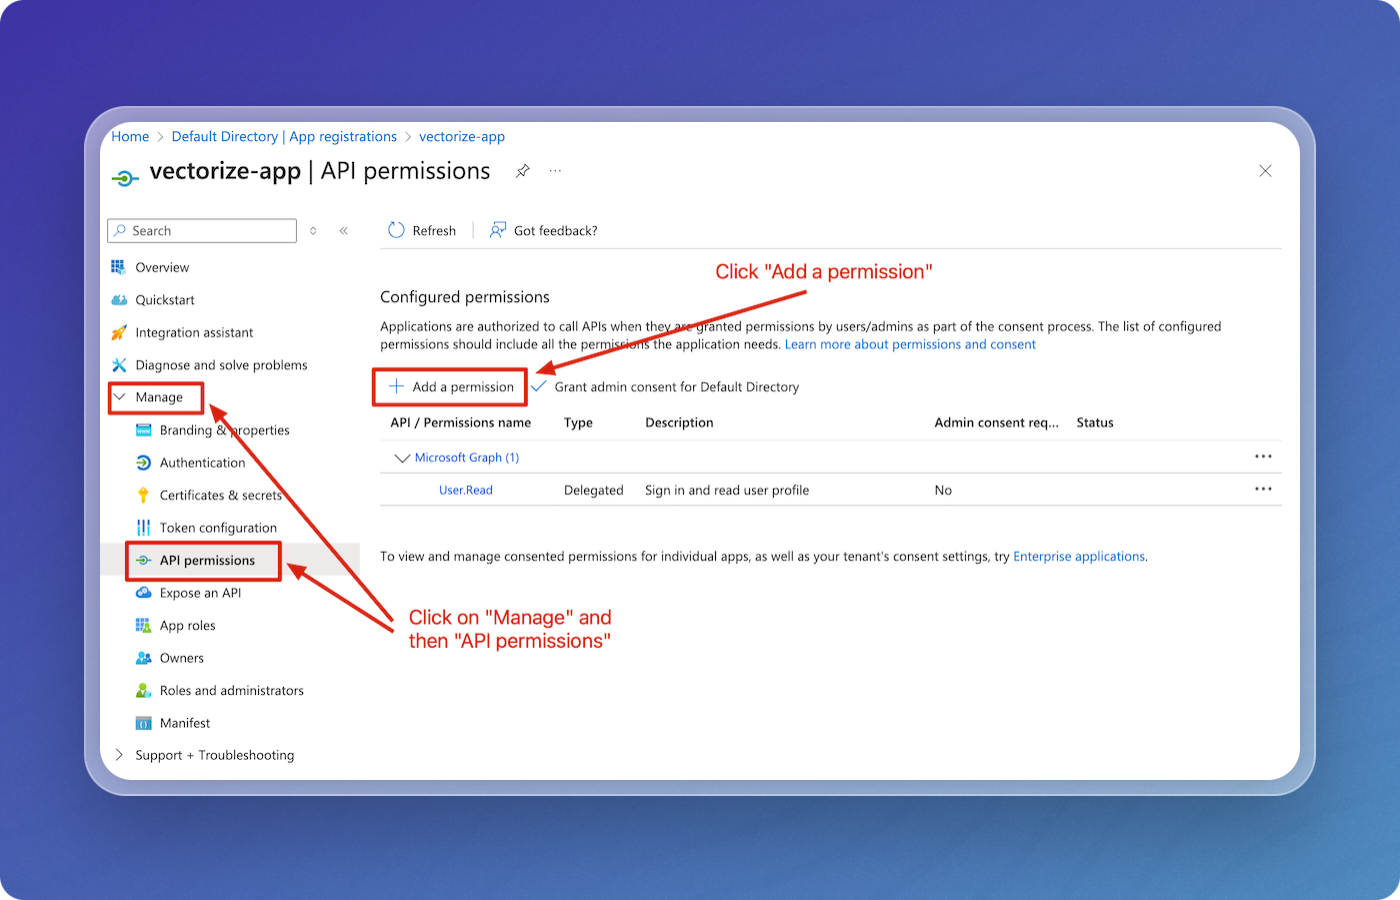
Go to Manage, then API permissions. Click Add a permission.
-
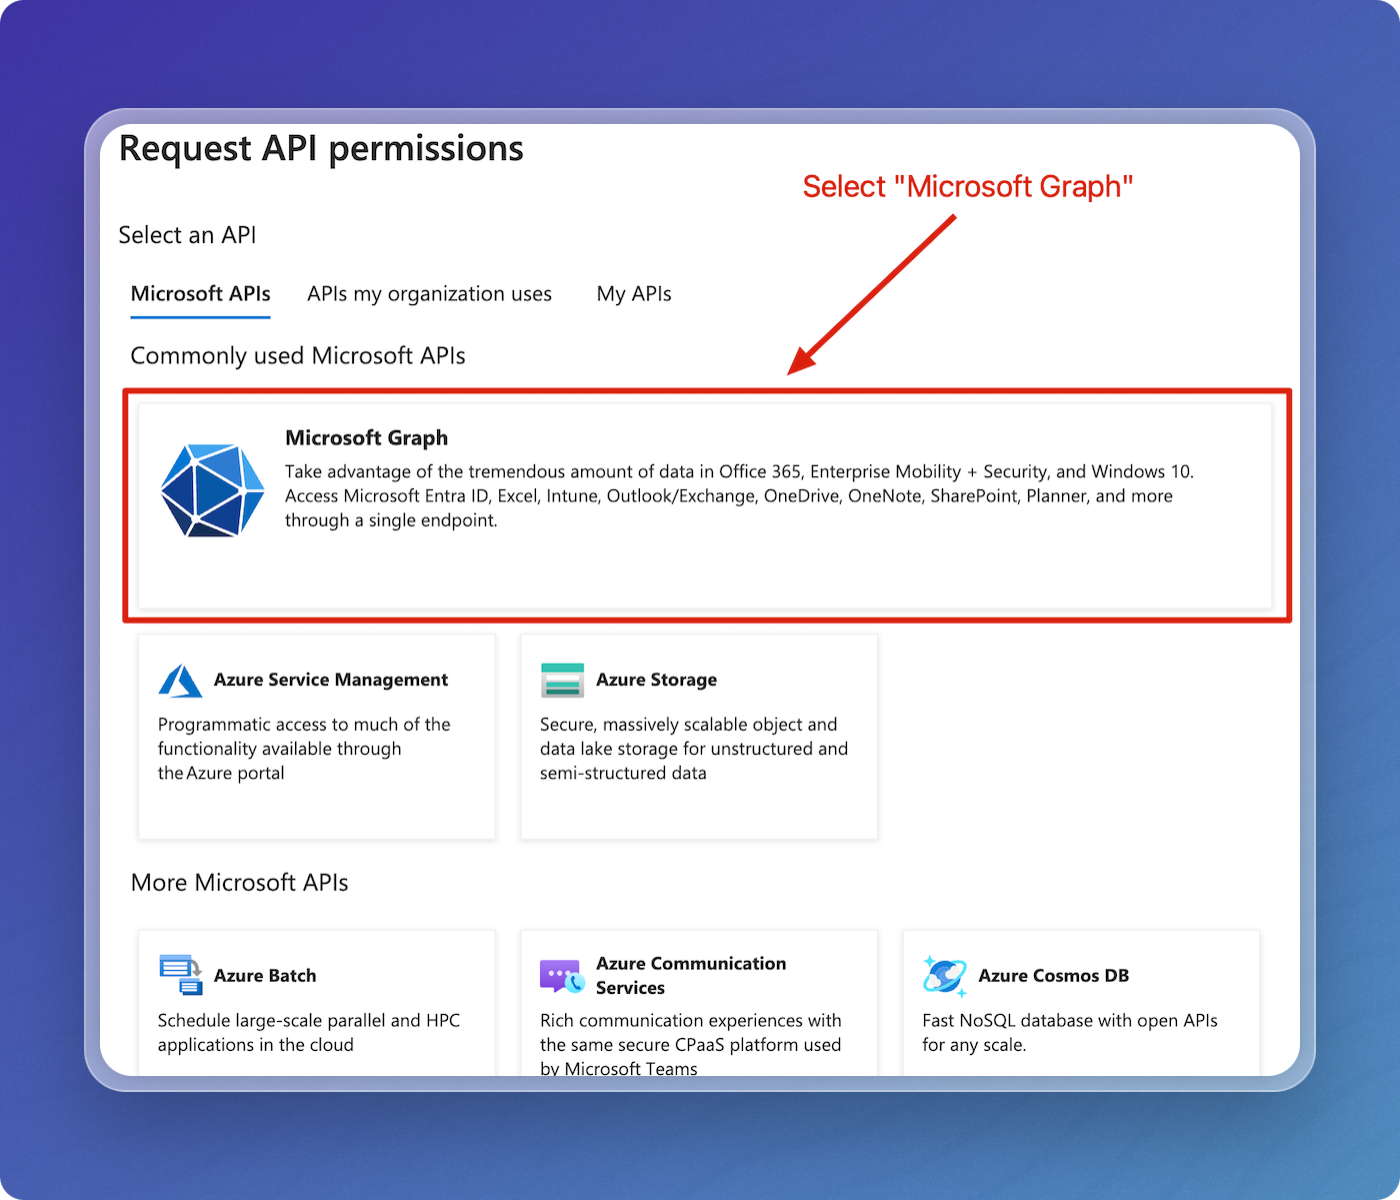
Select Microsoft Graph.
-
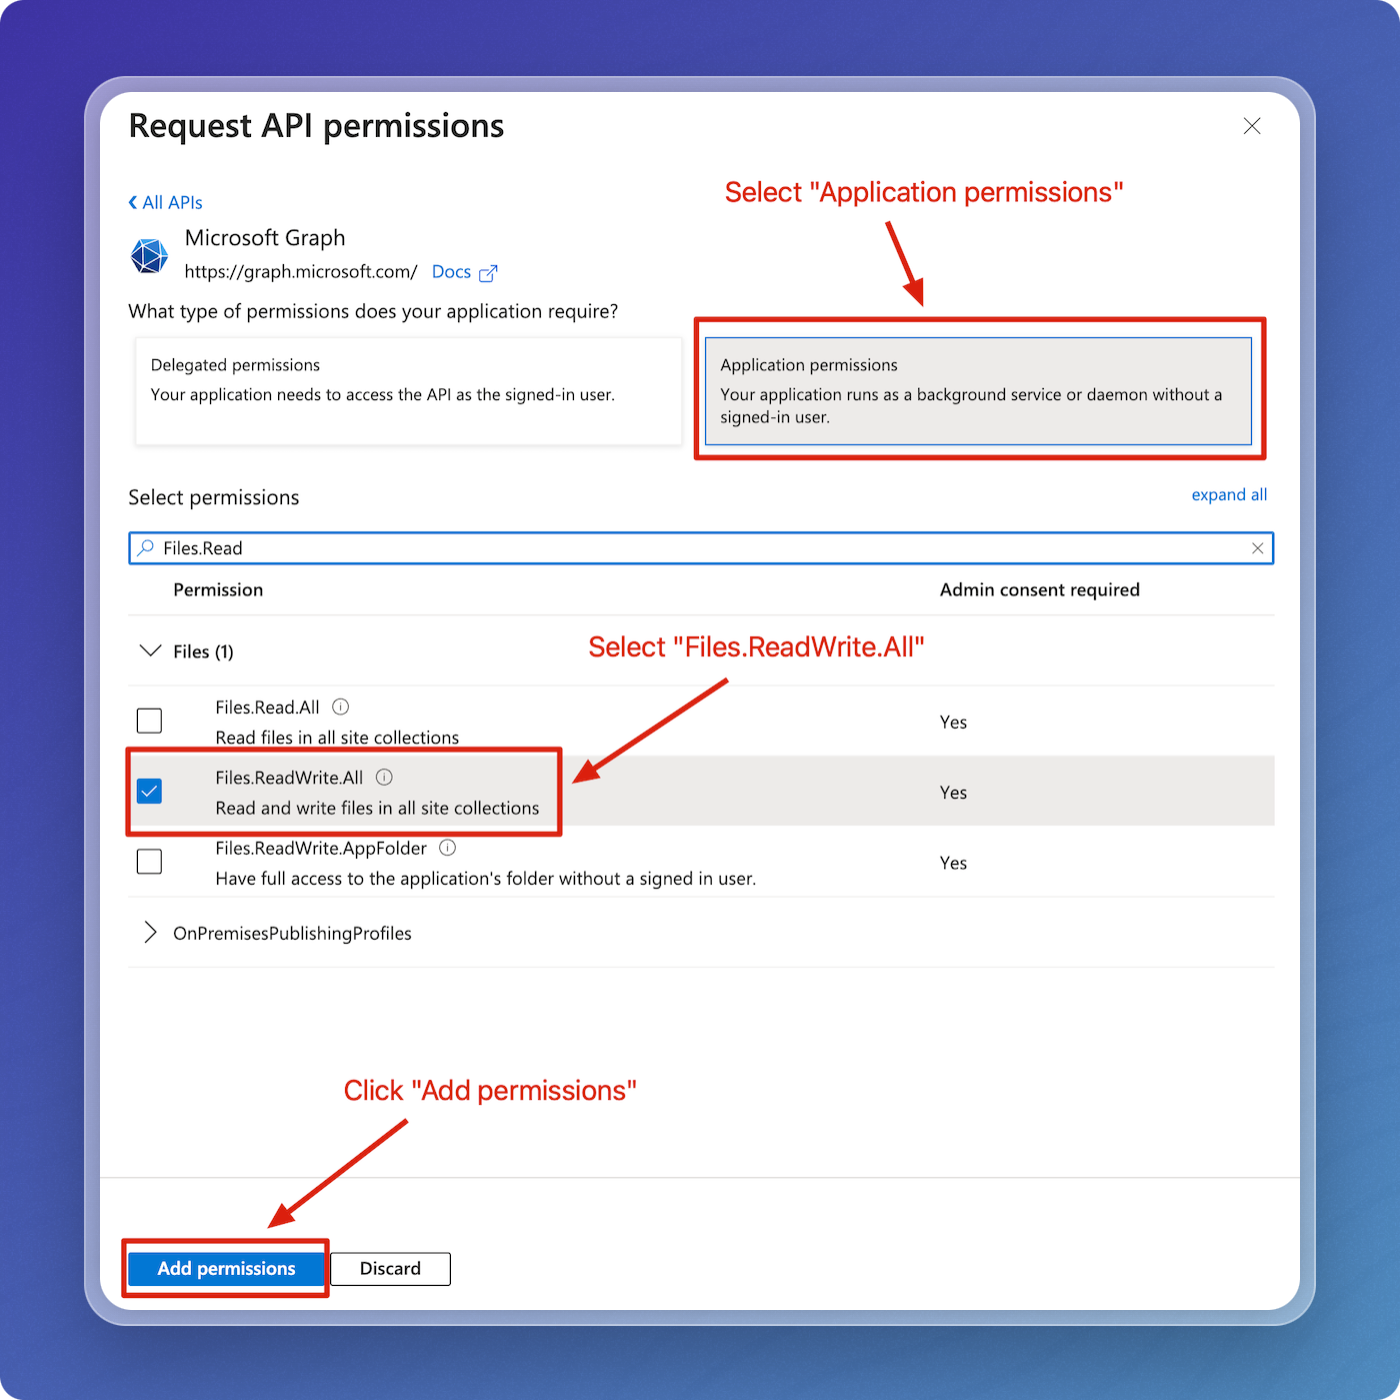
Select Application permissions, find and select the Files.ReadWrite.All permission. If you're going to use a SharePoint connector, you'll also need to select the Sites.Read.All permission. Click Add permissions.
-
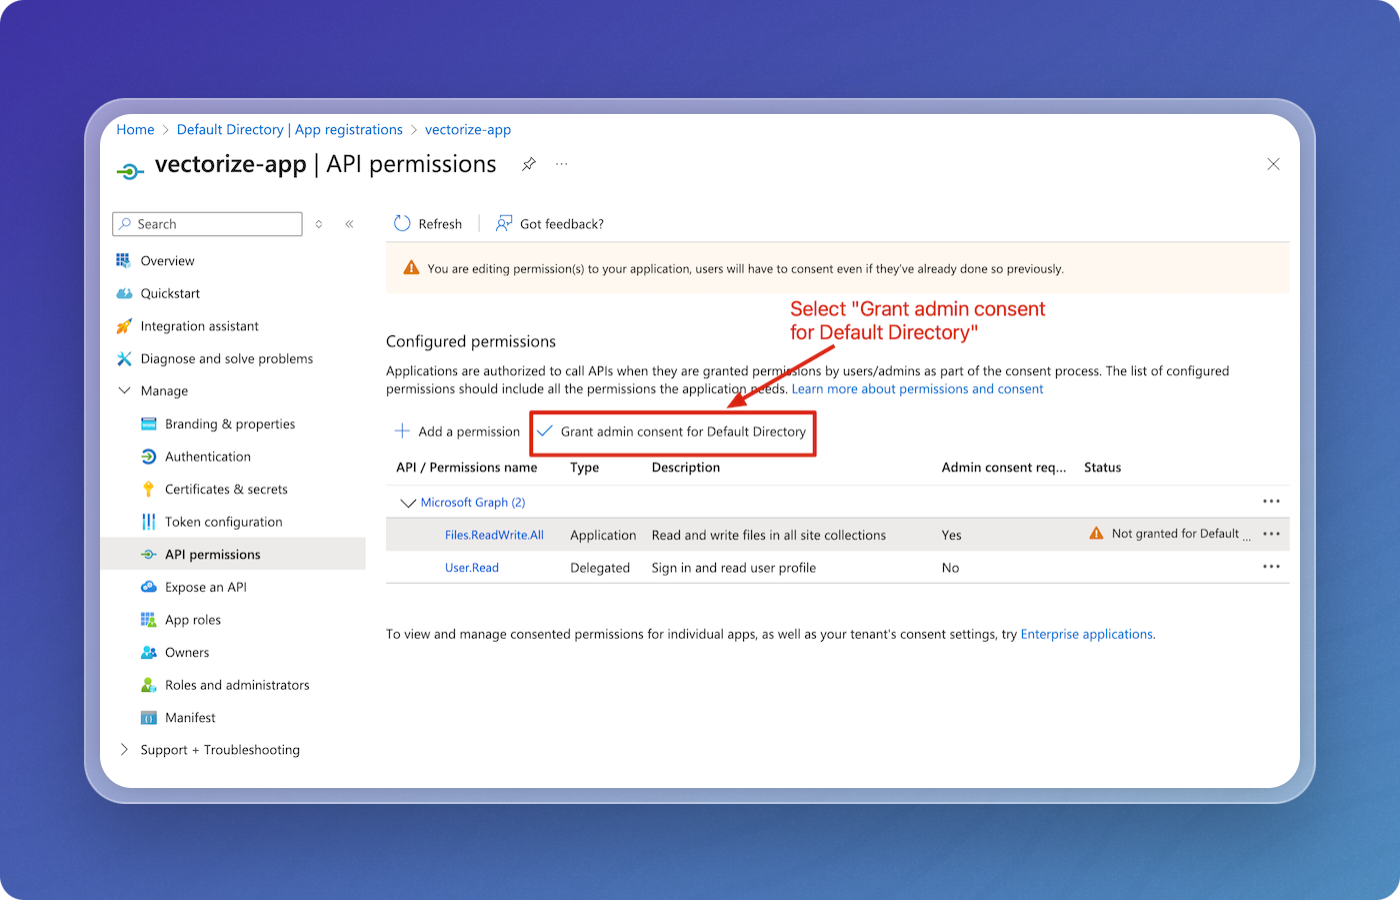
Select Grant admin consent for Default Directory, and confirm when prompted.
-
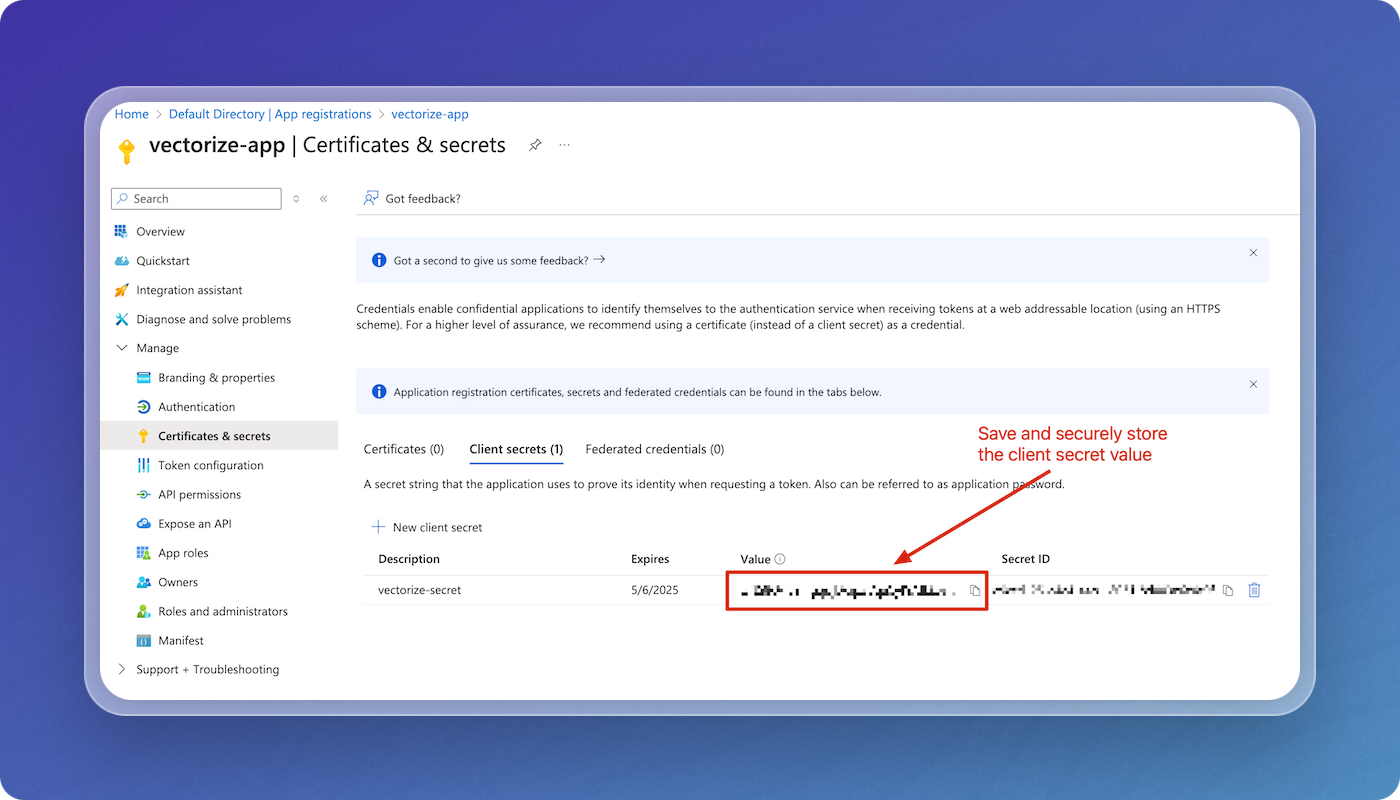
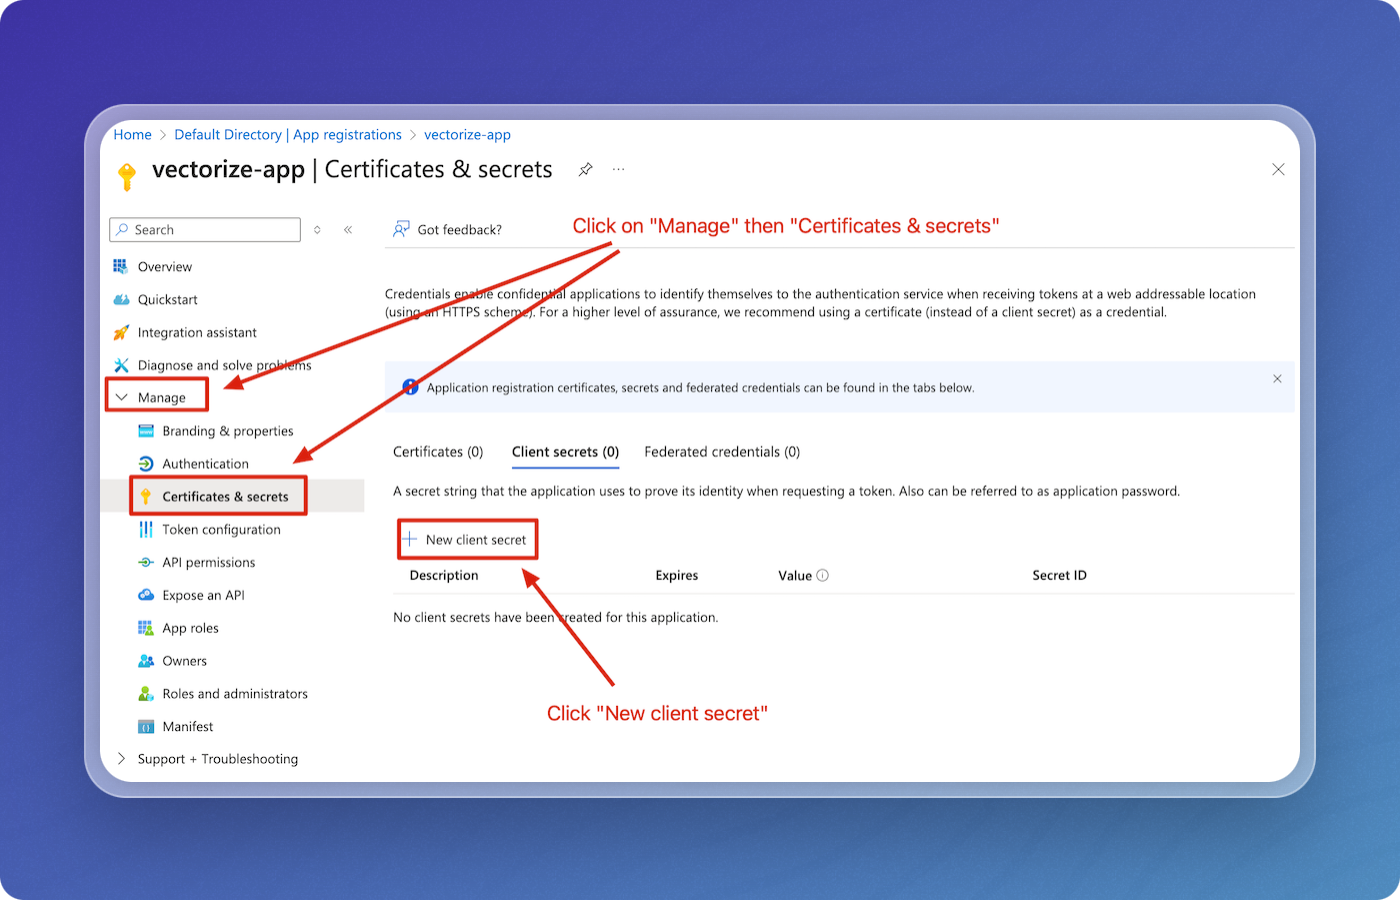
Go to Manage, then Certificates & secrets. Click on New client secret.
-
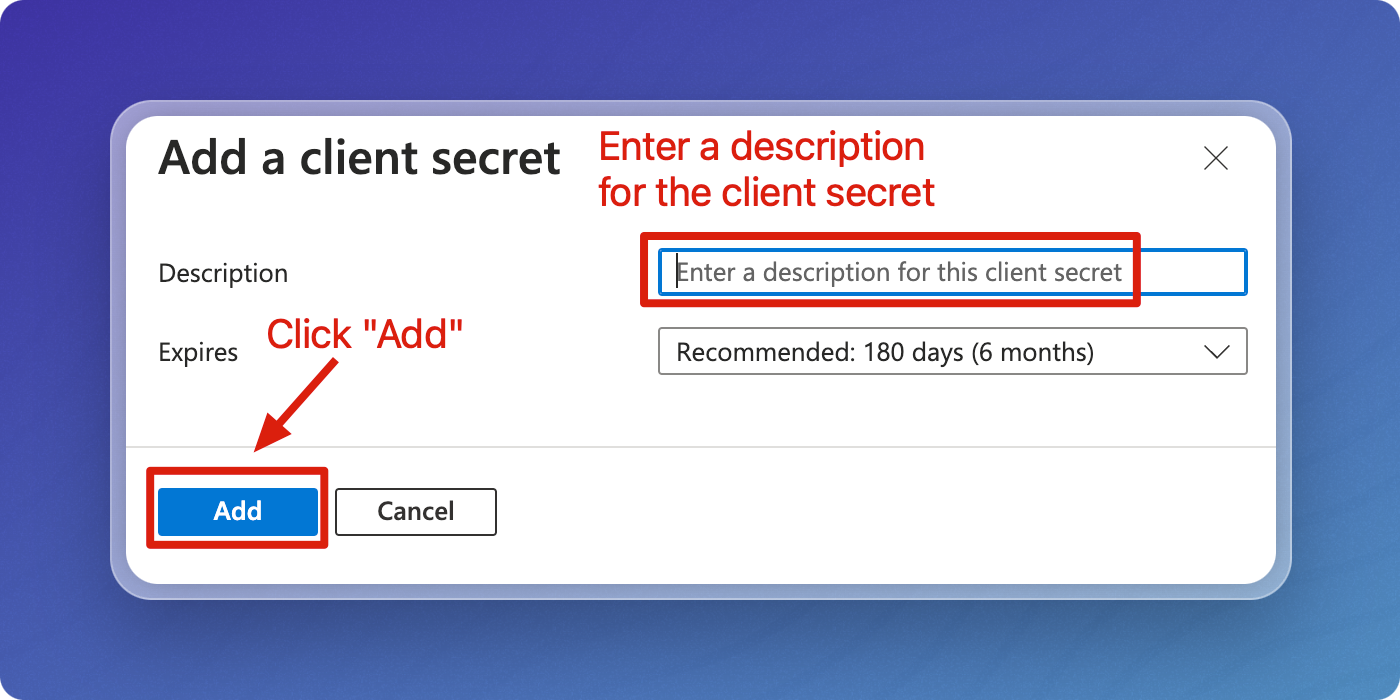
Enter a description for the client secret, then click Add.
-
Save and securely store the client secret value. You won't be able to access this value again after you leave this screen.