Qdrant
Data Pipeline Quickstart with Qdrant
Approximate time to complete: 5-10 minutes, excluding prerequisites
This quickstart will walk you through creating a pipeline that prepares your data for AI agents. You'll set up a pipeline that transforms content from the Vectorize documentation into structured, searchable context in Qdrant - giving agents the foundation they need to reason over your data, not just retrieve it.
Before you begin
Before starting, ensure you have access to the credentials, connection parameters, and API keys as appropriate for the following:
- A Vectorize account (Create one free here ↗ )
- An OpenAI API Key (How to article)
- An Qdrant account (Create one on Qdrant ↗)
Step 1: Create a Qdrant Cluster
Create Your Database
This quickstart shows how to create a free cluster. The steps are the same if you'd like to create a production cluster instead.
-
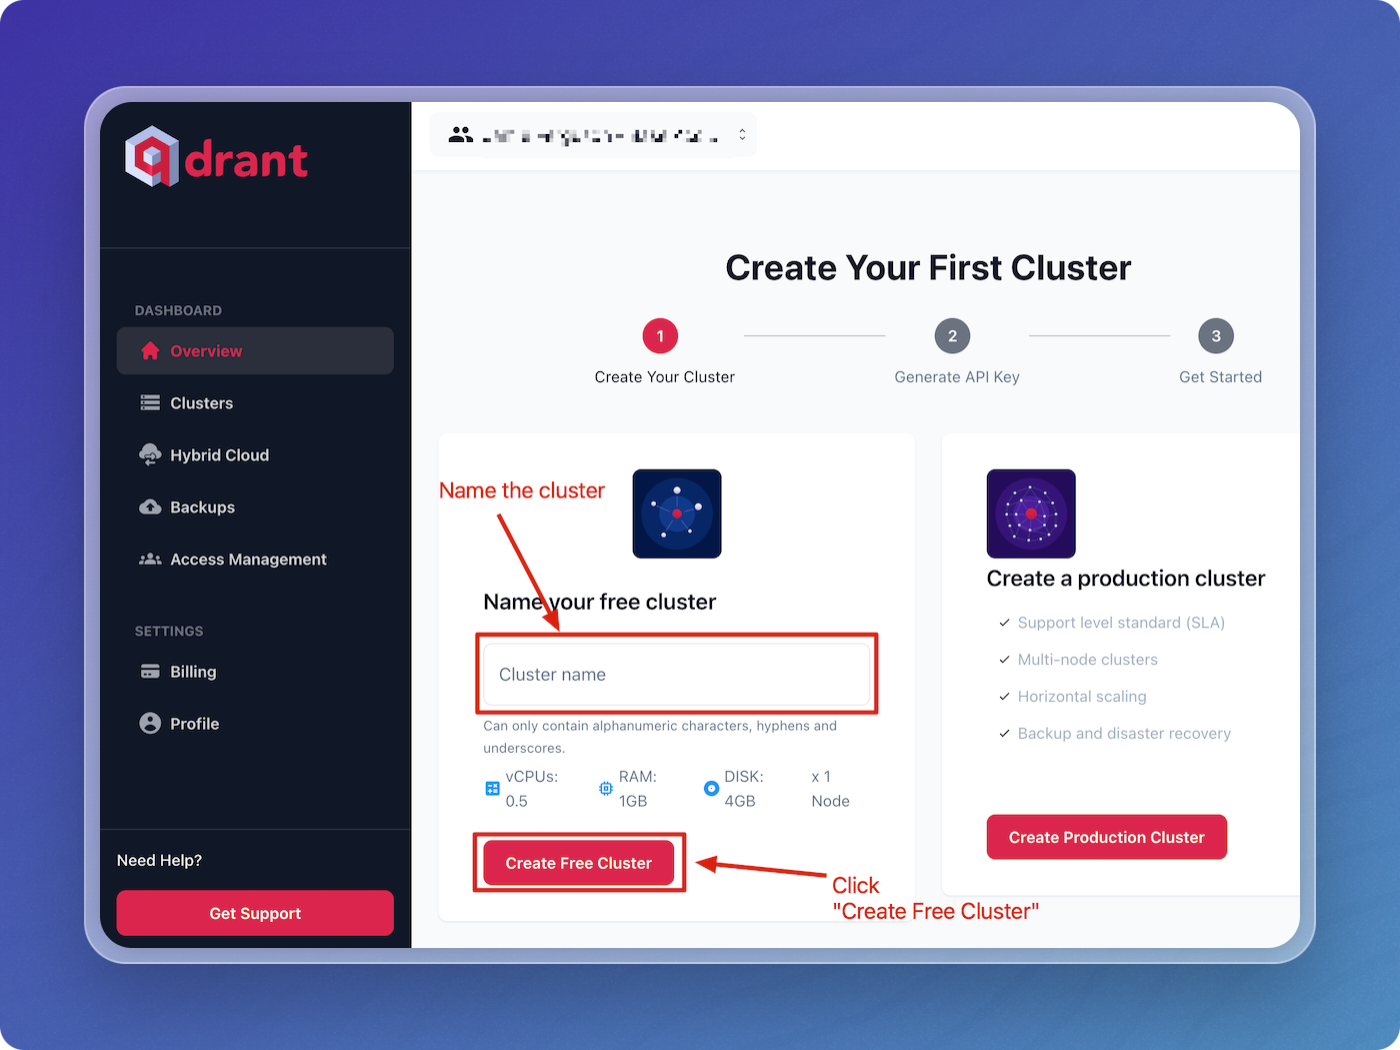
Log in to Qdrant, navigate to Clusters, and click Create Free Cluster.
-
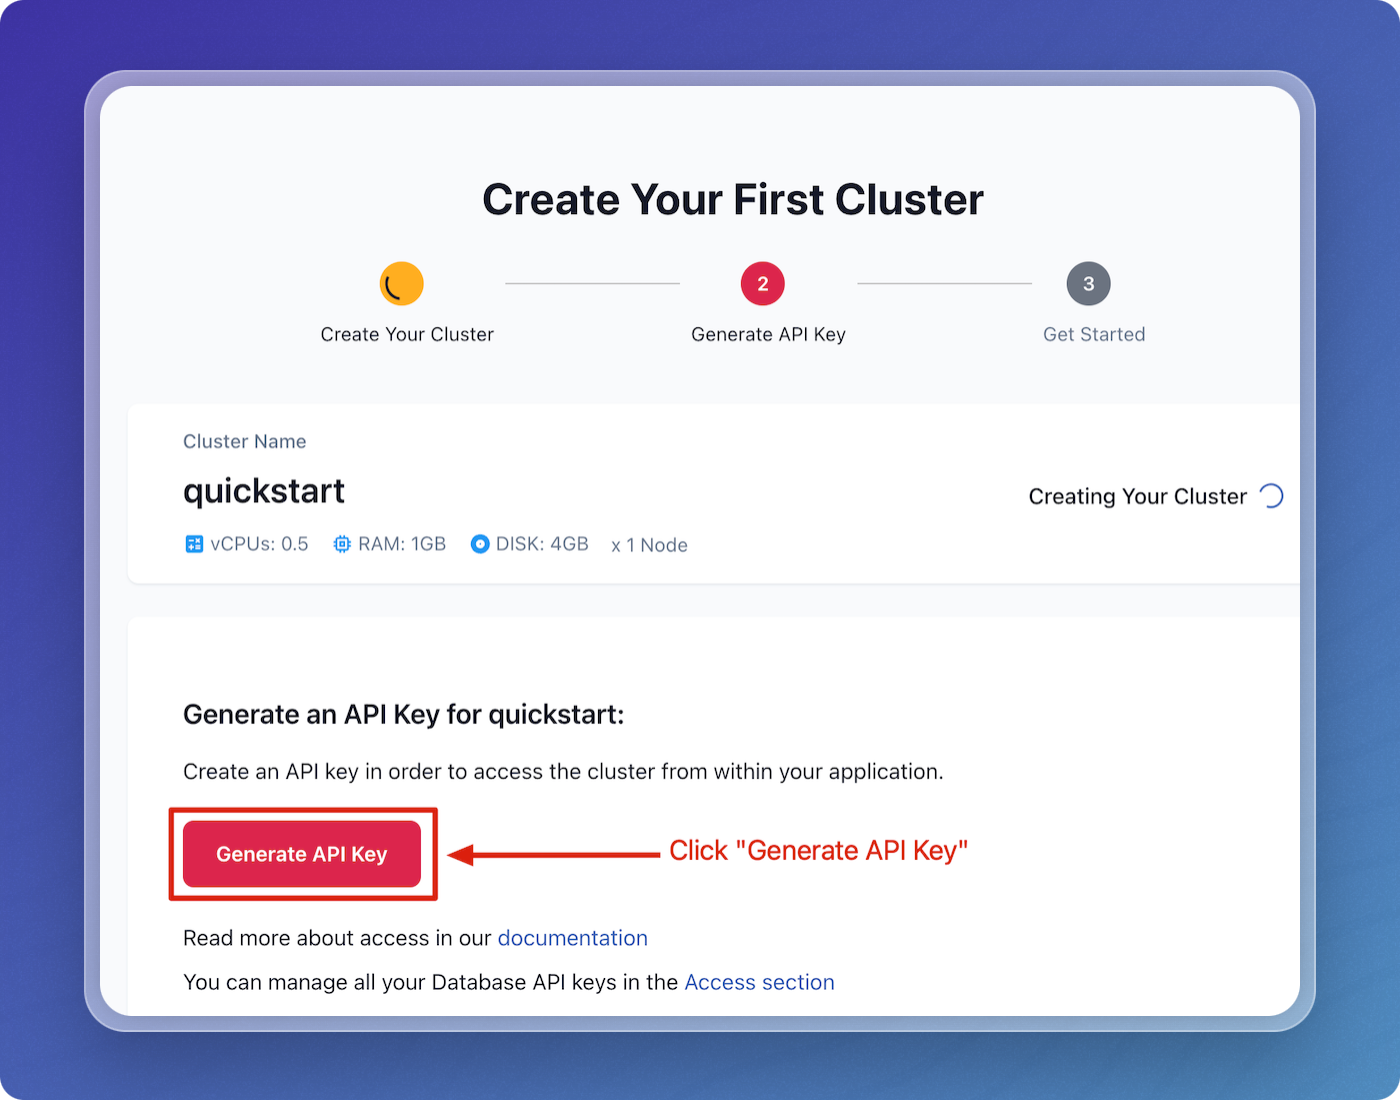
While your cluster is creating, generate your API key by clicking Generate API Key.
-
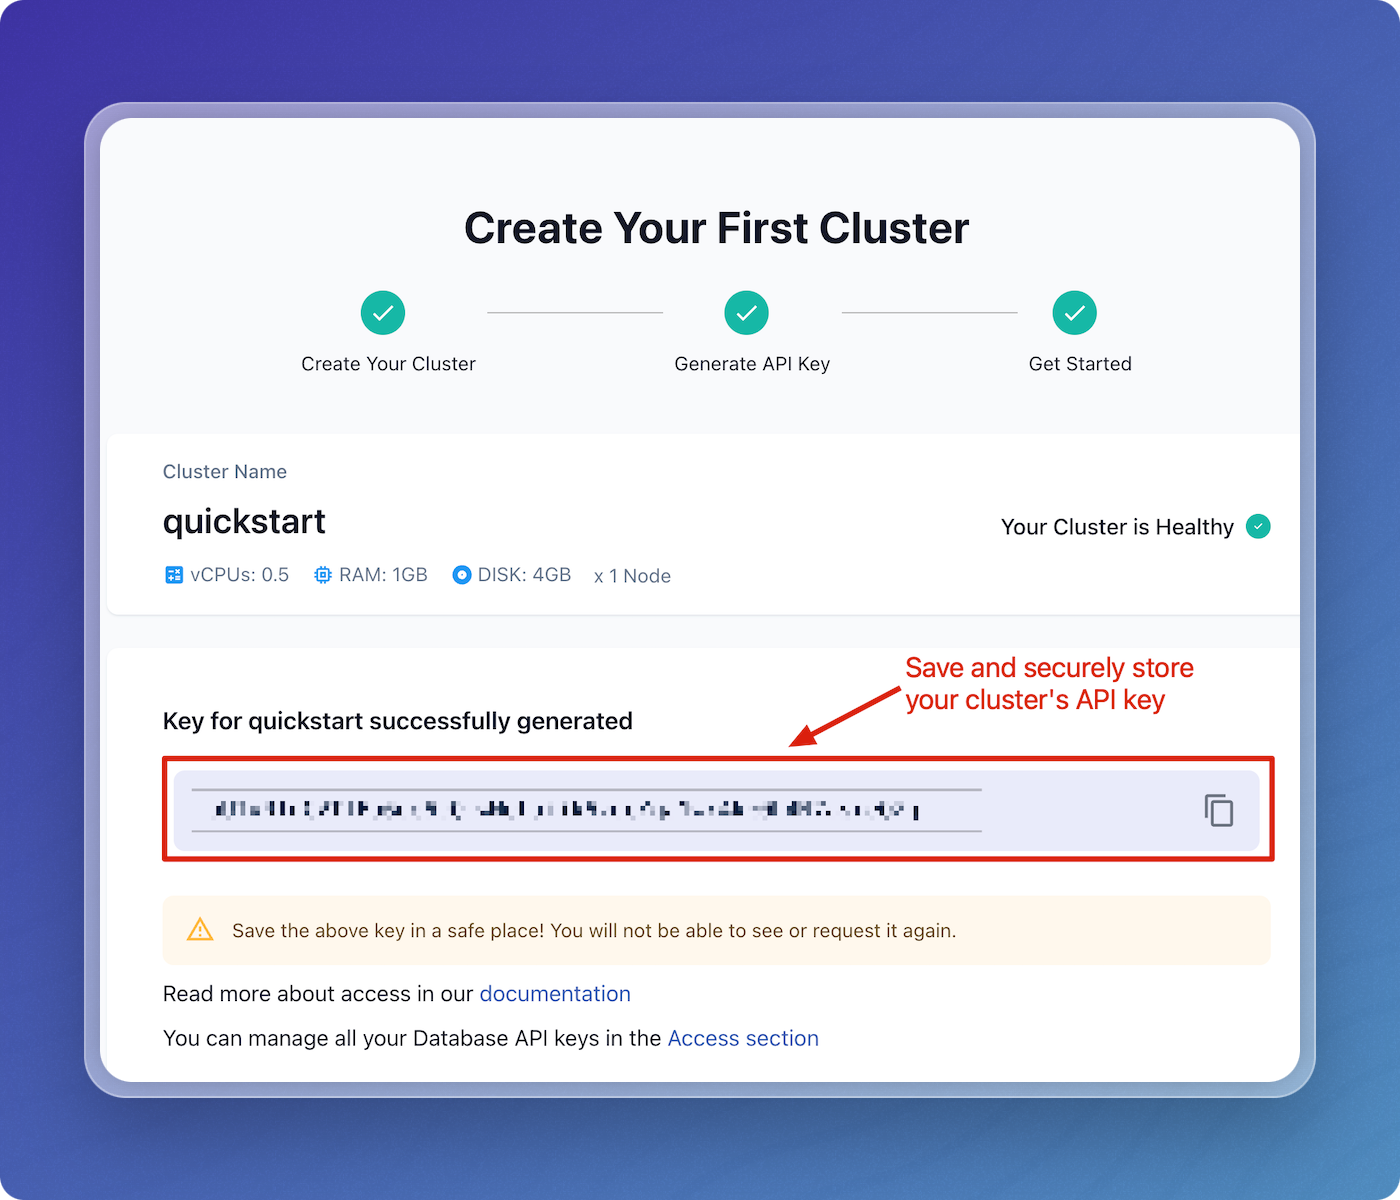
Save and securely store your API key.
-
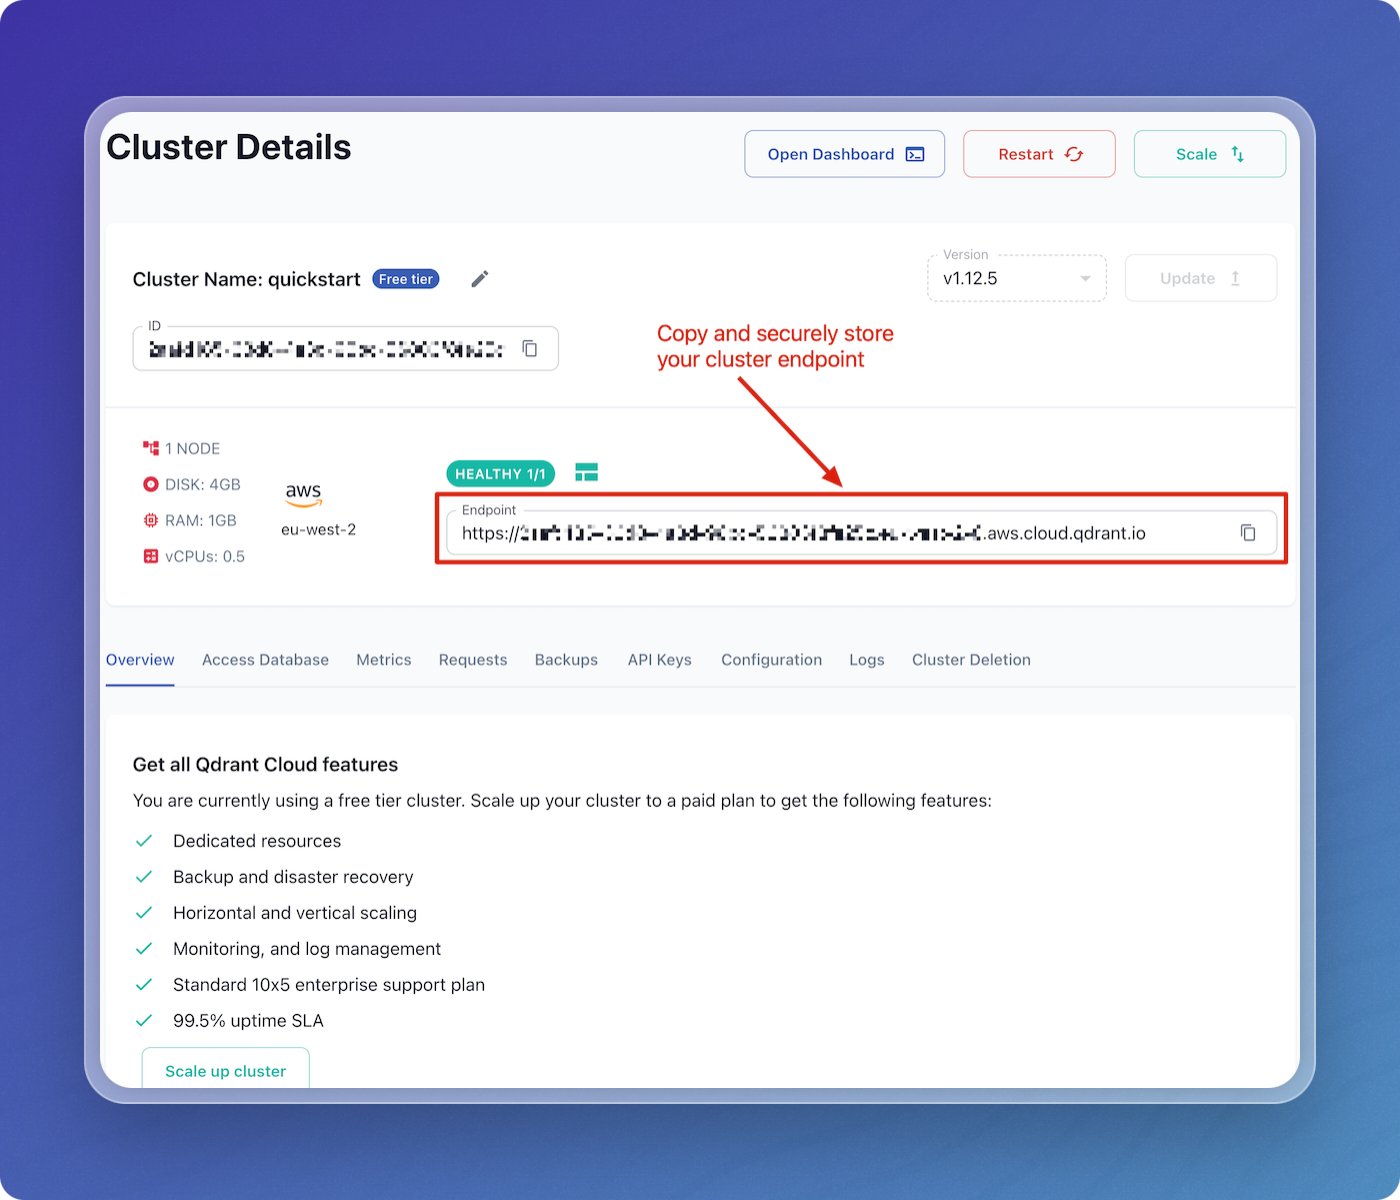
Scroll down and click on Manage your Cluster.

-
Copy and securely store your cluster's endpoint.
Step 2: Create a data pipeline on Vectorize
Create a New Data Pipeline
-
Open the Vectorize Application Console ↗
-
From the dashboard, click on
+ New RAG Pipelineunder the "RAG Pipelines" section.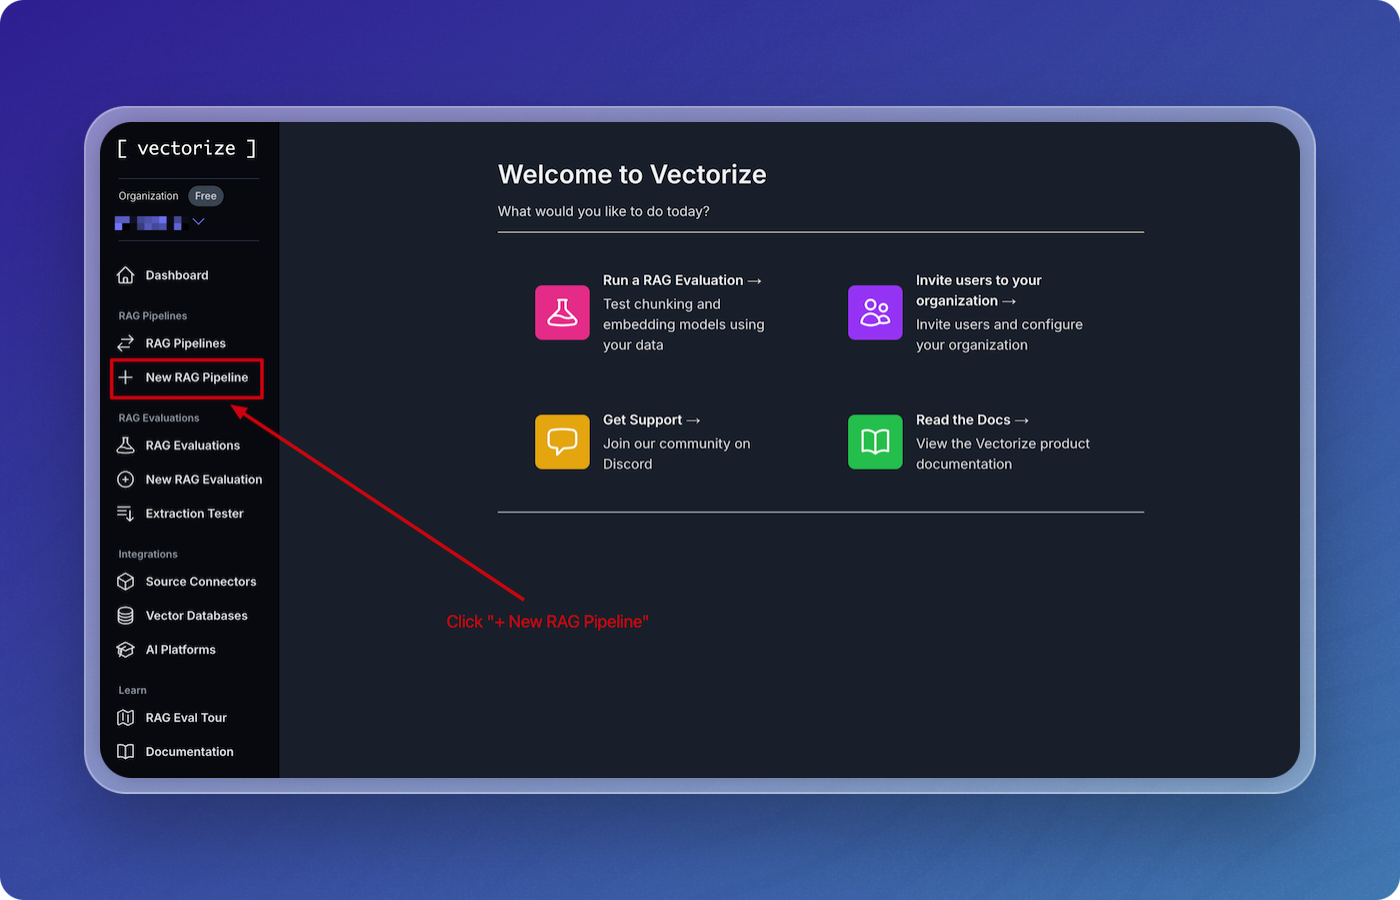
-
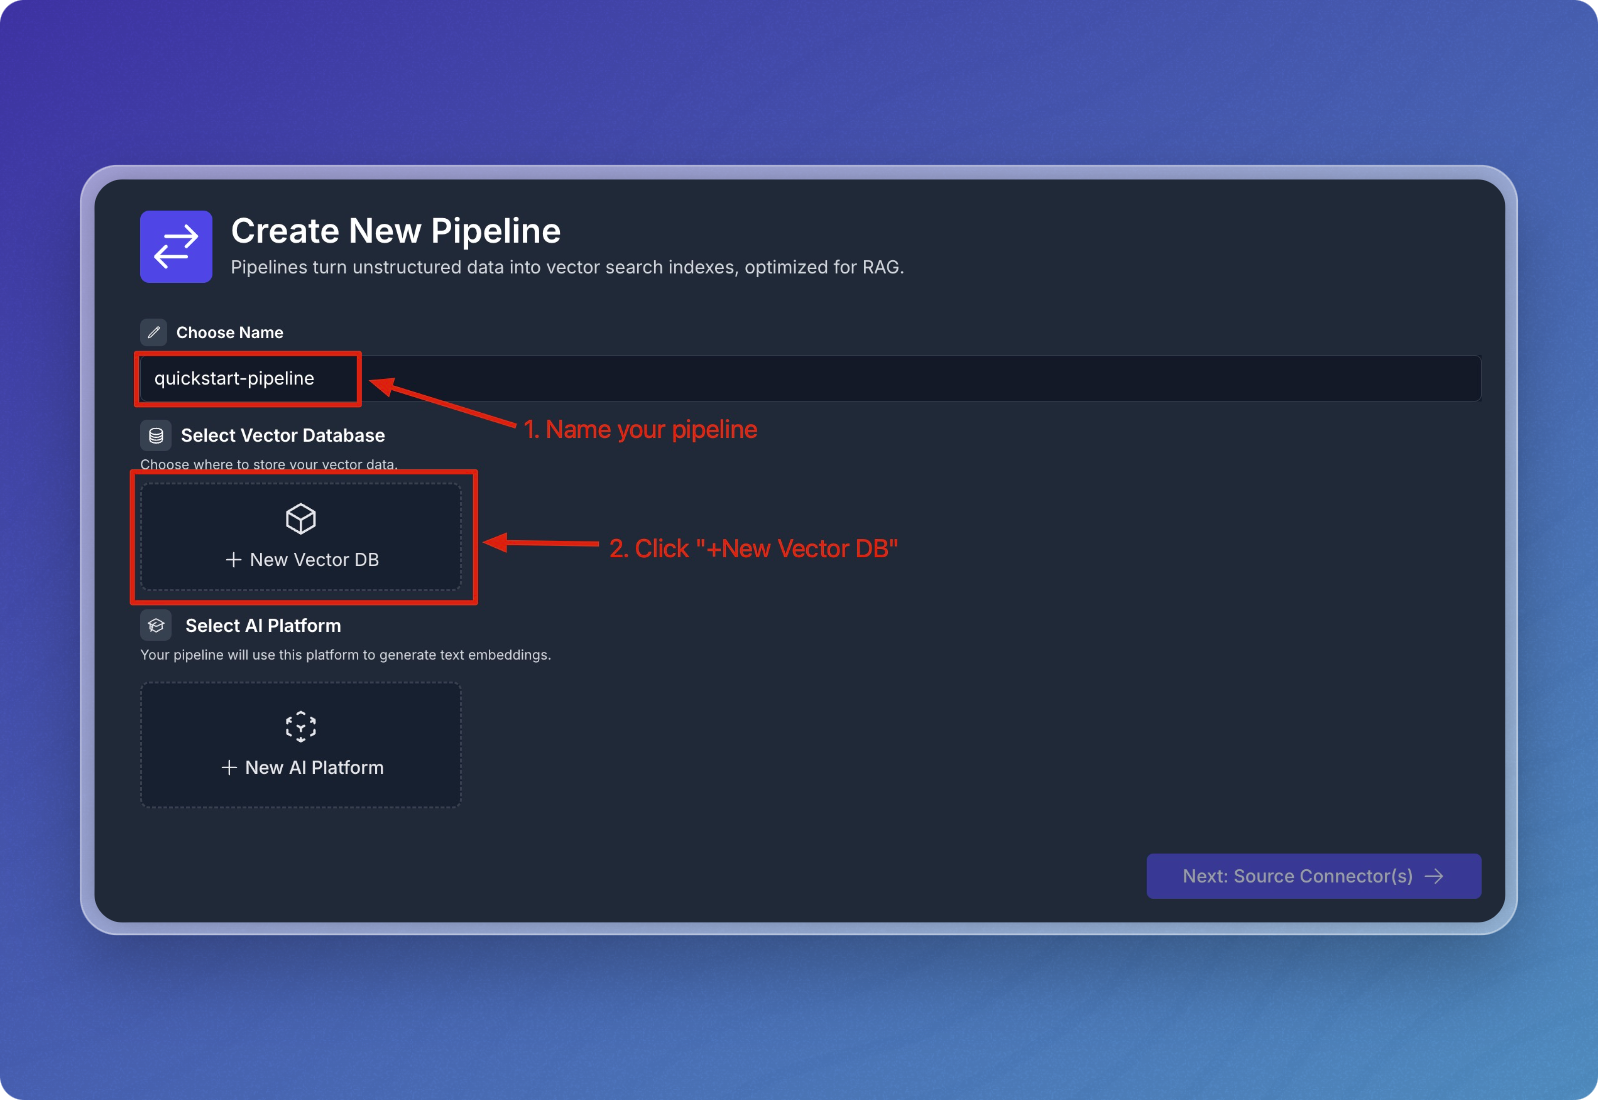
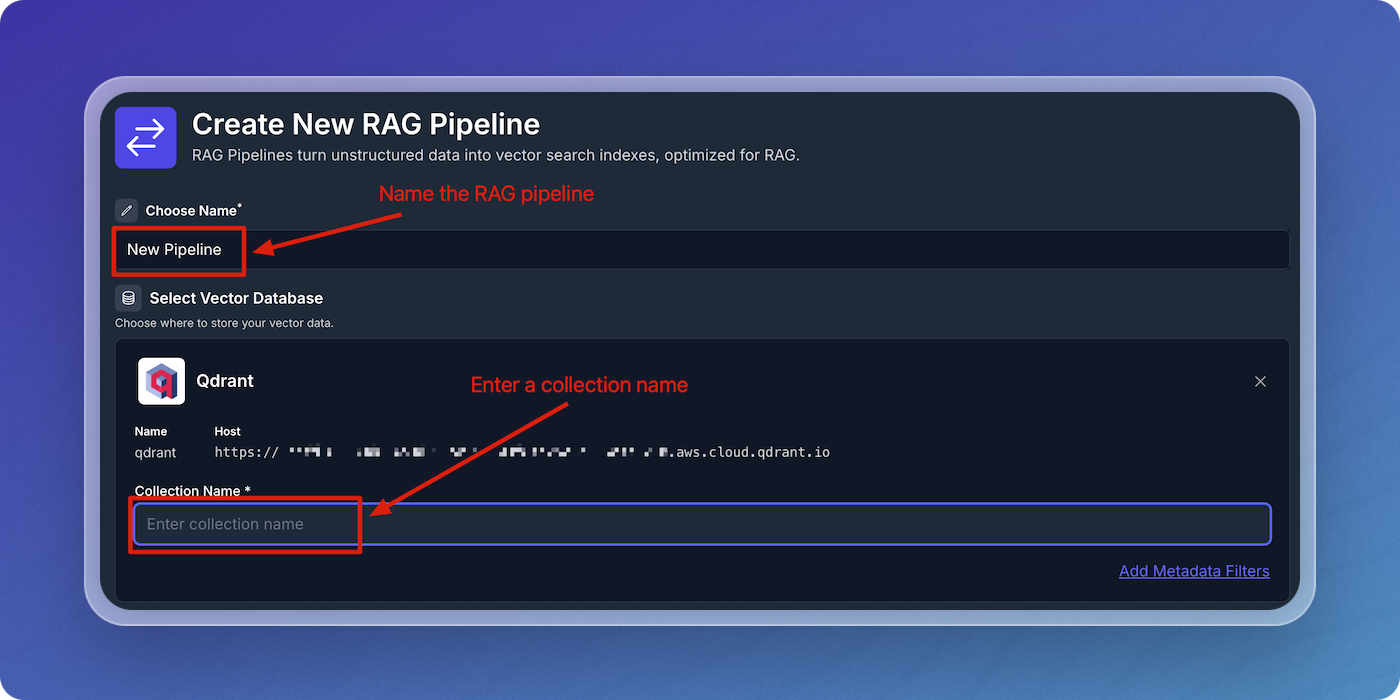
Enter a name for your pipeline. For example, you can name it
quickstart-pipeline. -
Click on New Vector DB to create a new vector database integration.
-
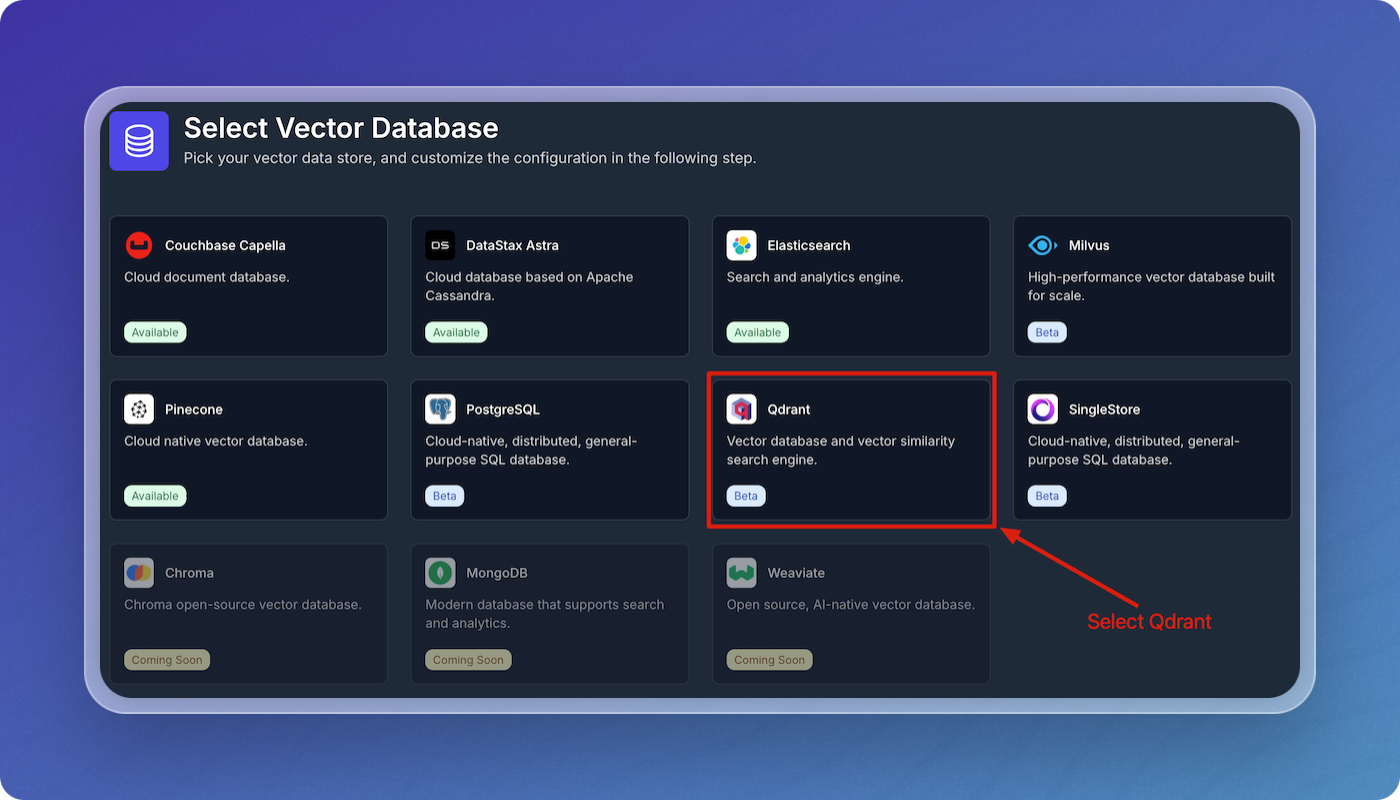
Select Qdrant from the list of vector databases.
-
Enter the parameters in the form using the Qdrant Parameters table below as a guide, then click Create Qdrant Integration.
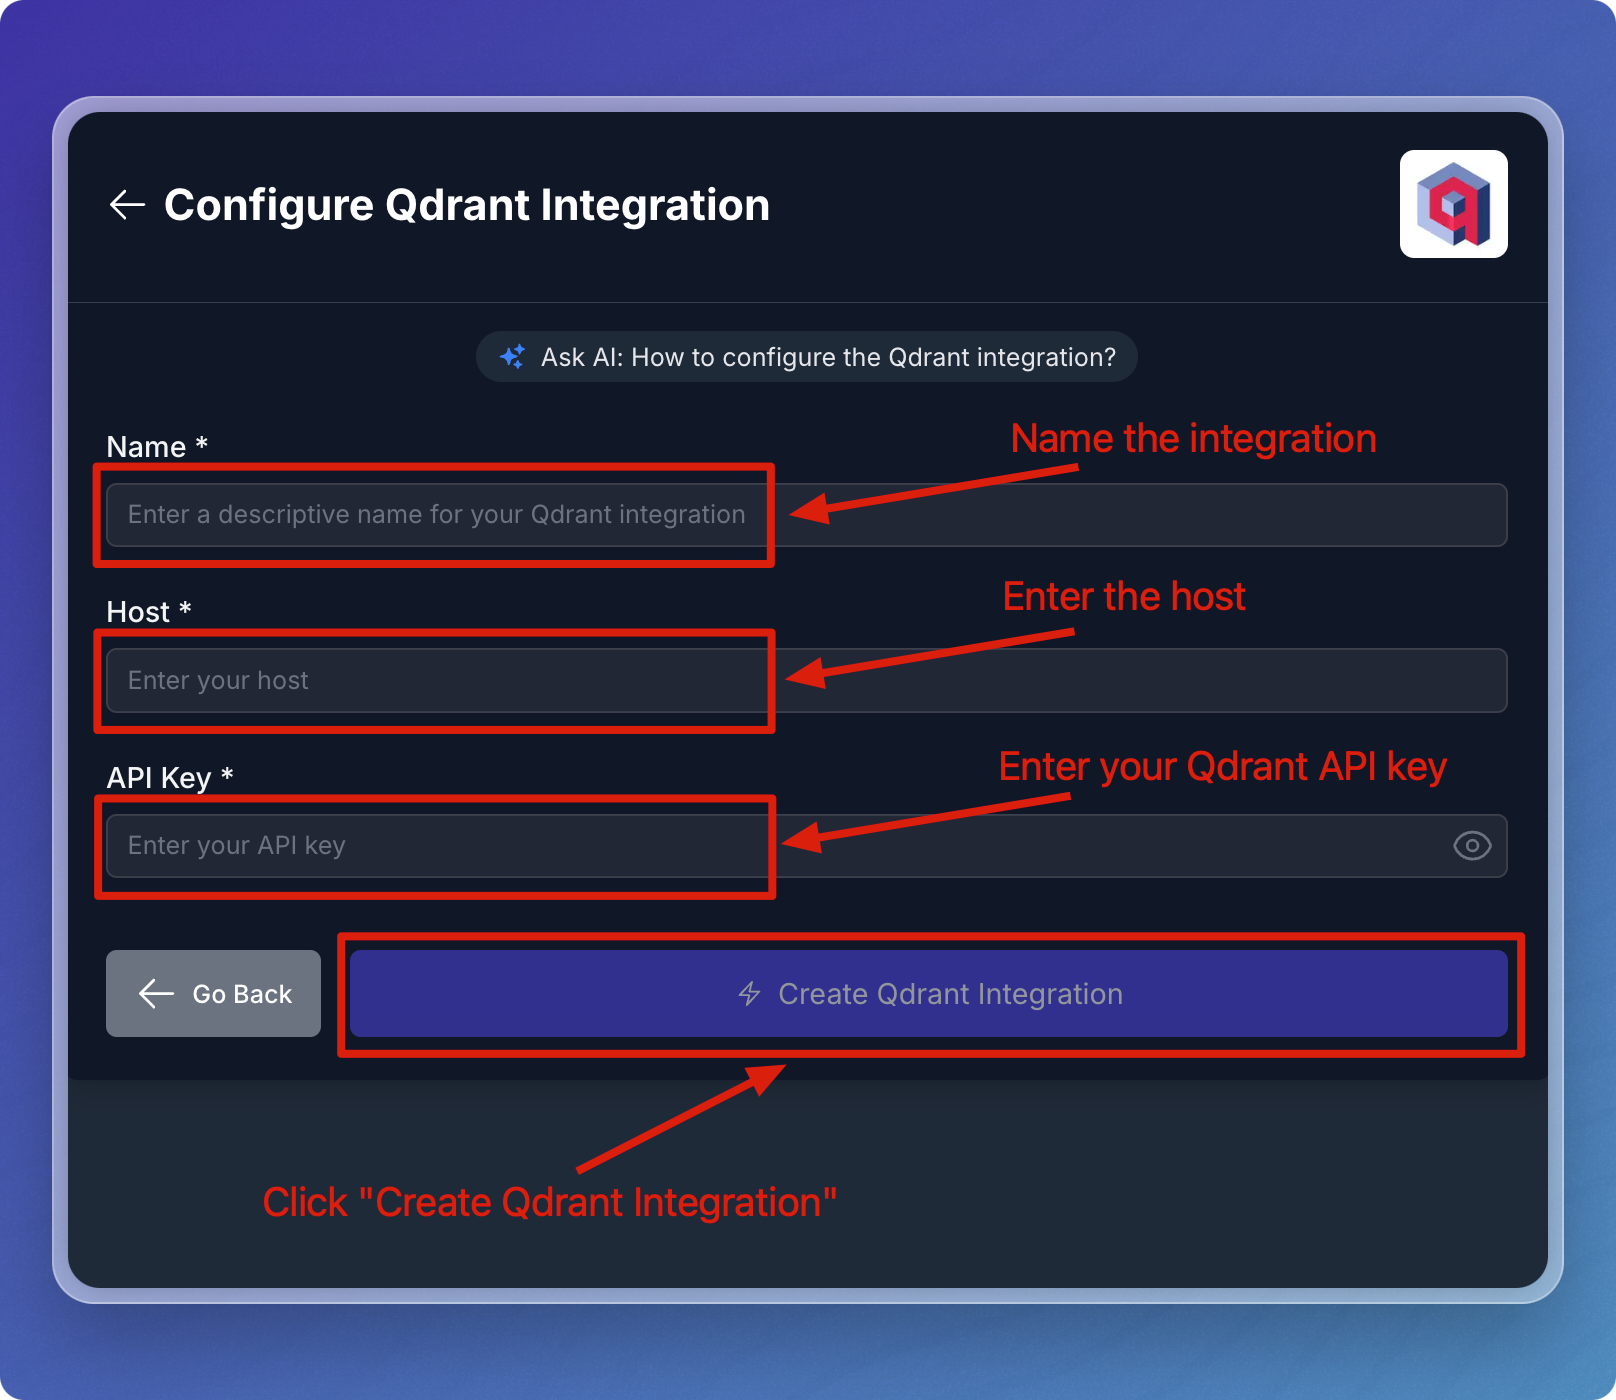
Qdrant Parameters
| Field | Description | Required |
|---|---|---|
| Name | A descriptive name to identify the integration within Vectorize. | Yes |
| Host | The Qdrant cluster's endpoint. | Yes |
| API key | The Qdrant cluster's API key. | Yes |
Configure the Qdrant integration in your RAG Pipeline
You can think of the Qdrant integration as having two parts to it. The first is authorization with your Qdrant cluster. This part is re-usable across pipelines and allows you to connect to this same application in different pipelines without providing the credentials every time.
The second part is the configuration that's specific to your RAG Pipeline. This is where you specify the name of the collection in your Qdrant database. If the collection does not already exist, Vectorize will create it for you.
Enter your collection name to complete configuration of your Qdrant integration for your RAG pipeline.
Configure AI Platform
-
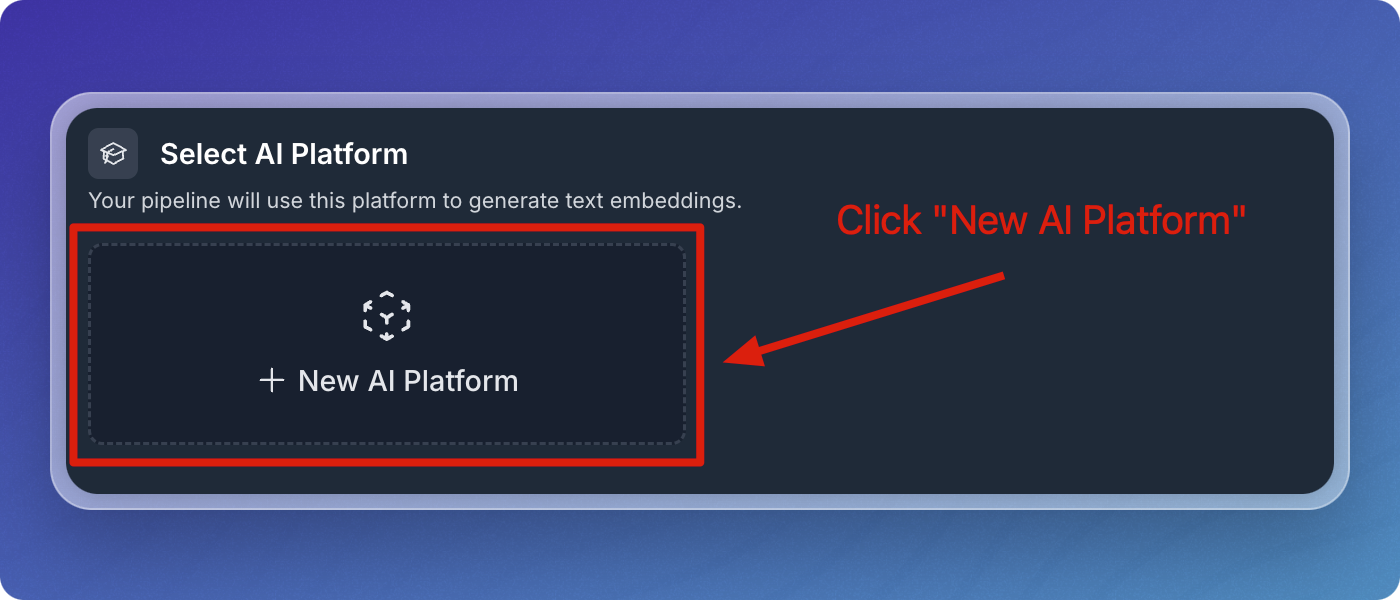
Click on New AI Platform.
-
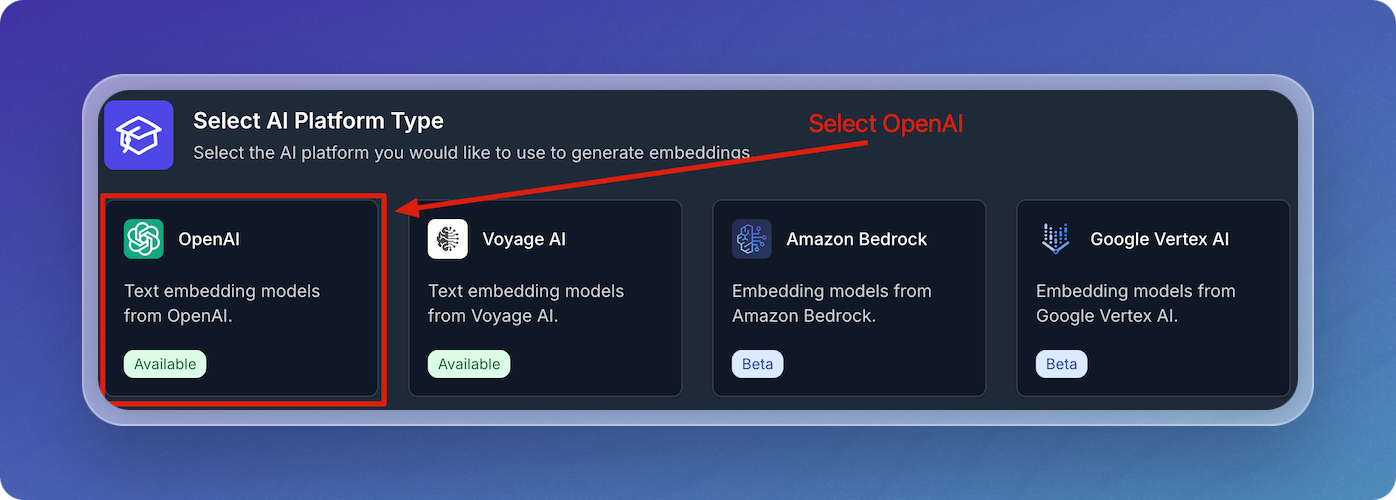
Select OpenAI from the AI platform options.
-
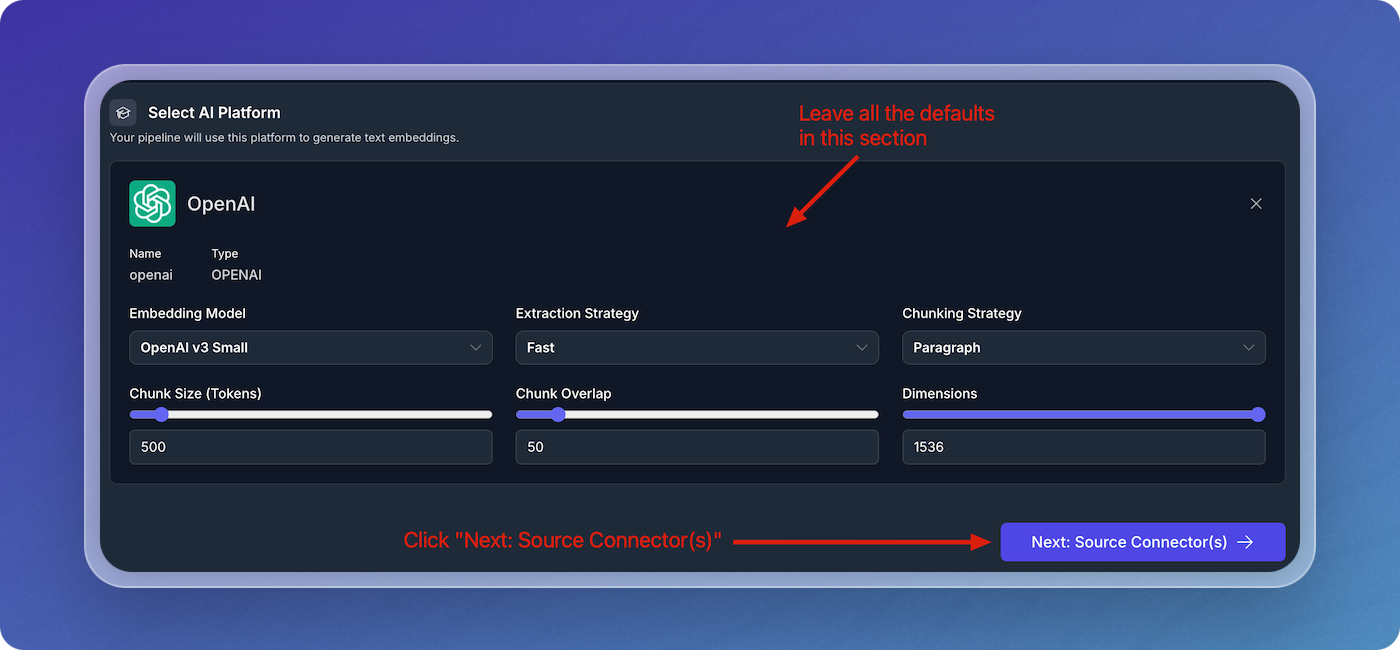
In the OpenAI configuration screen:
- Enter a descriptive name for your OpenAI integration.
- Enter your OpenAI API Key.

-
Leave the default values for embedding model, chunk size, and chunk overlap for the quickstart.
Add Source Connectors
- Click on Add Source Connector.
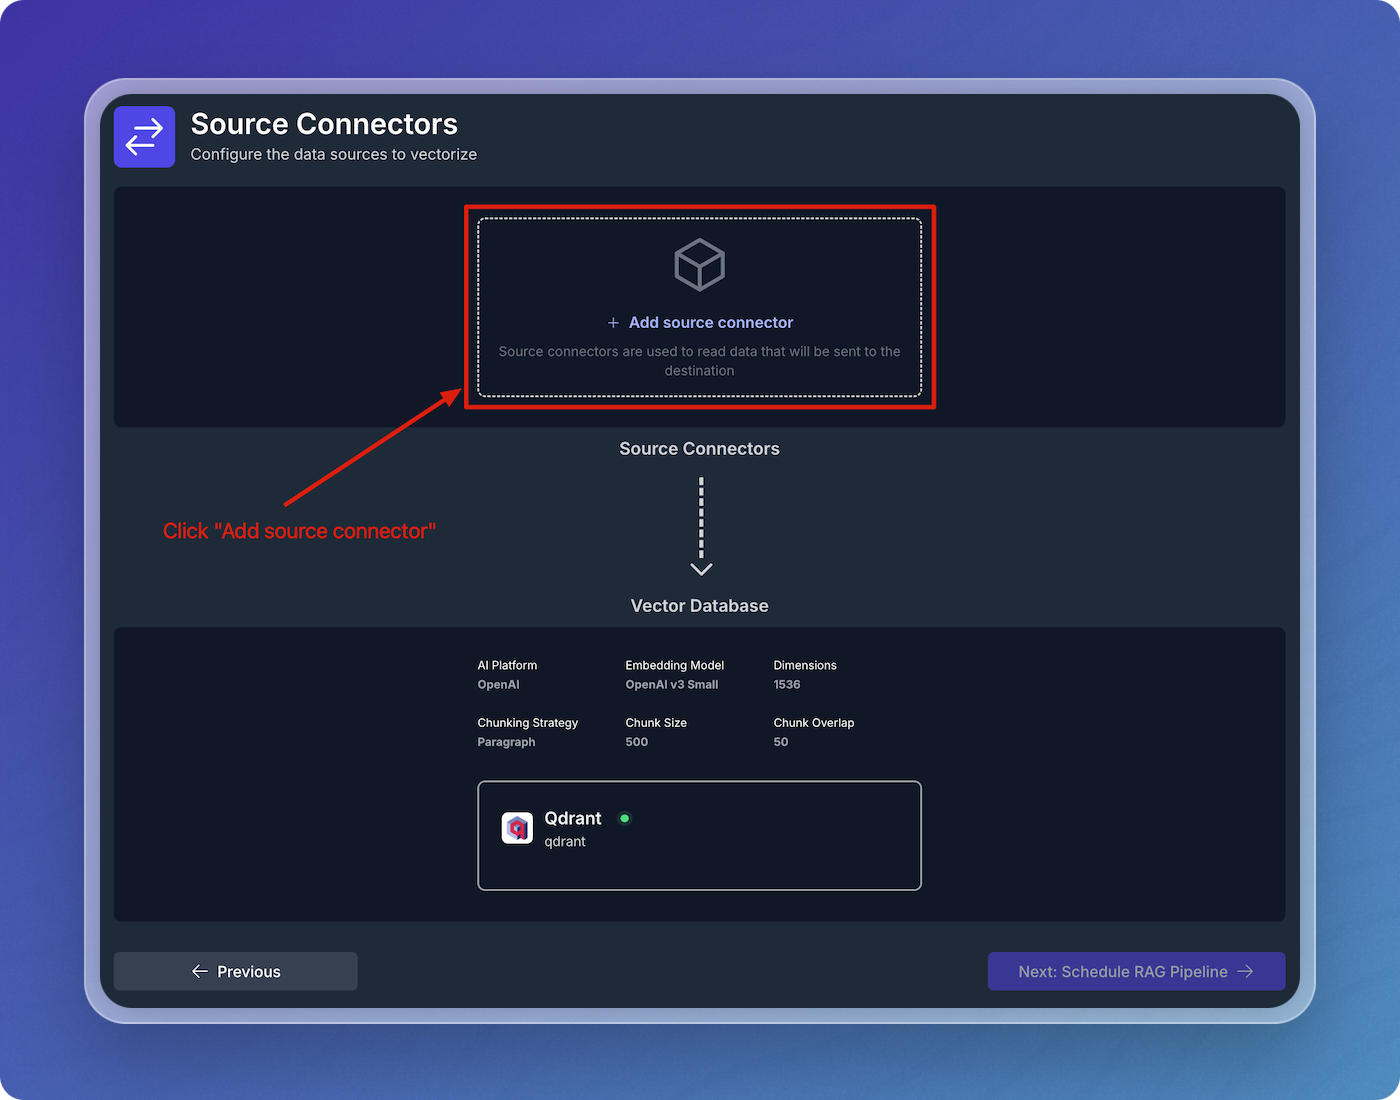
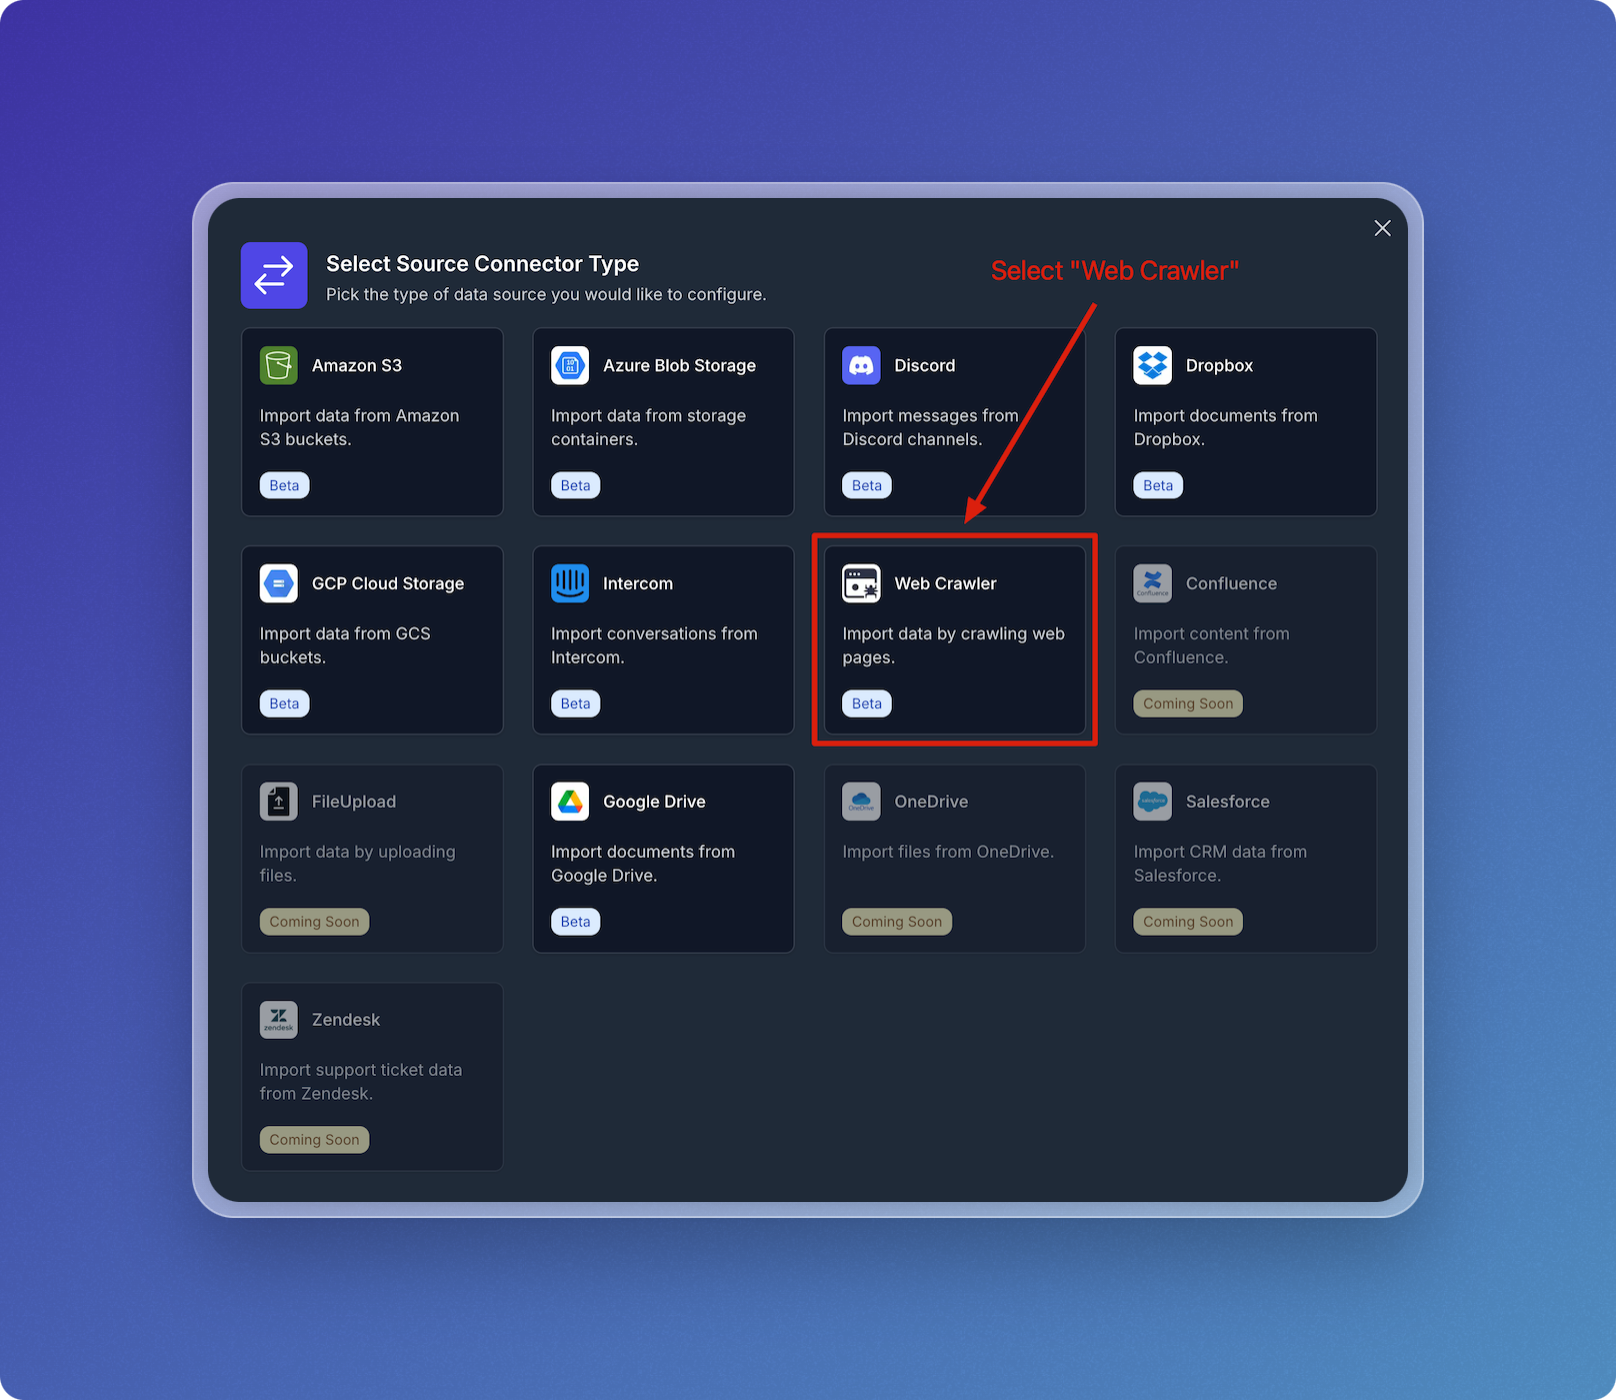
- Choose the type of source connector you'd like to use. In this example, select Web Crawler.
Configure Web Crawler Integration
- Name your web crawler source connector, e.g., vectorize-docs.
- Set Seed URL(s) to
https://docs.vectorize.io.
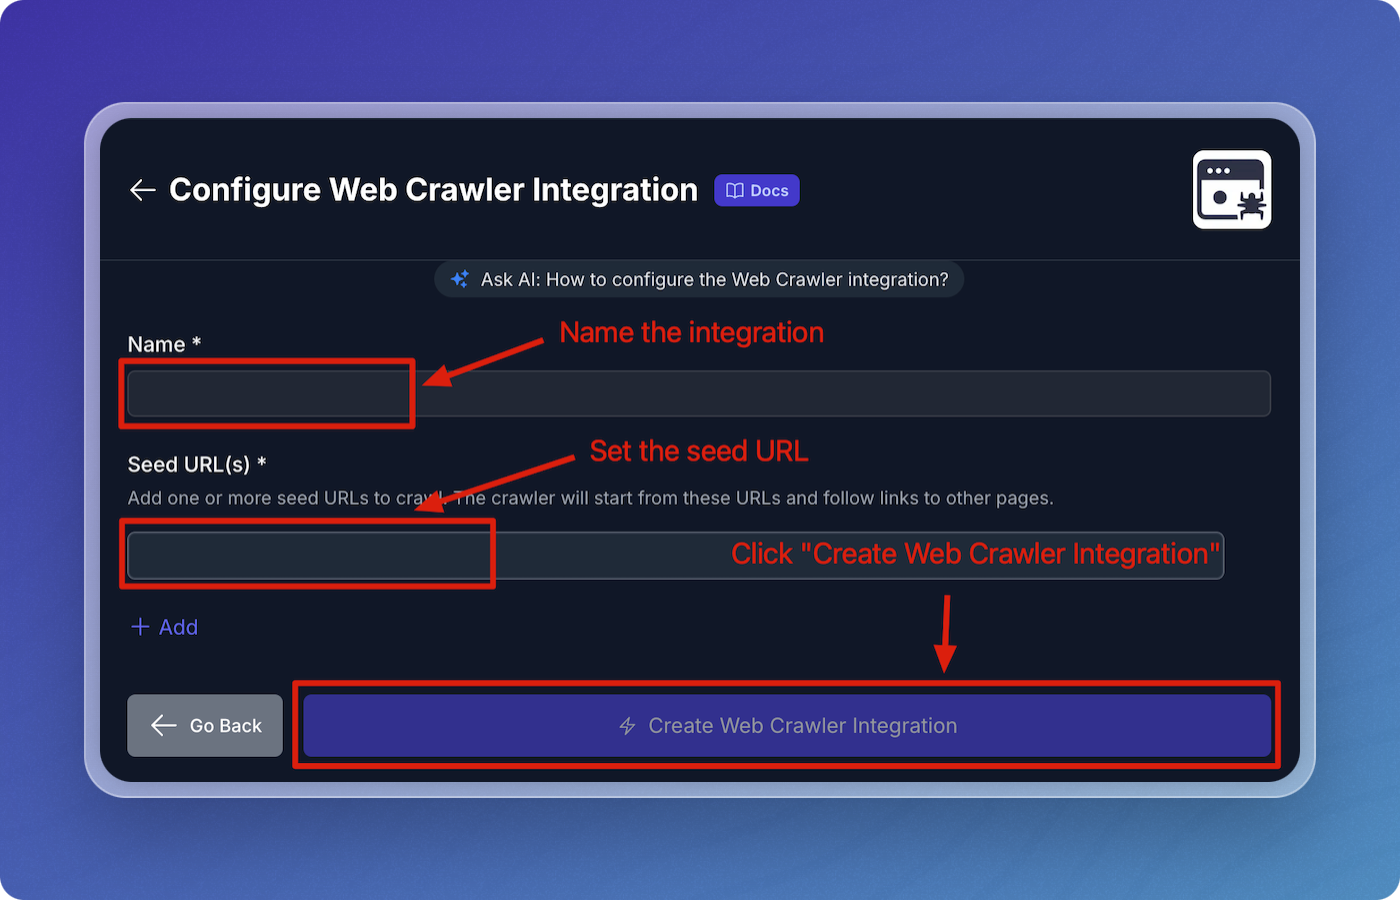
- Click Create Web Crawler Integration to proceed.
Configure Web Crawler Pipeline
- Accept all the default values for the web crawler pipeline configuration:
- Throttle Wait Between Requests: 500 ms
- Maximum Error Count: 5
- Maximum URLs: 1000
- Maximum Depth: 50
- Reindex Interval: 3600 seconds
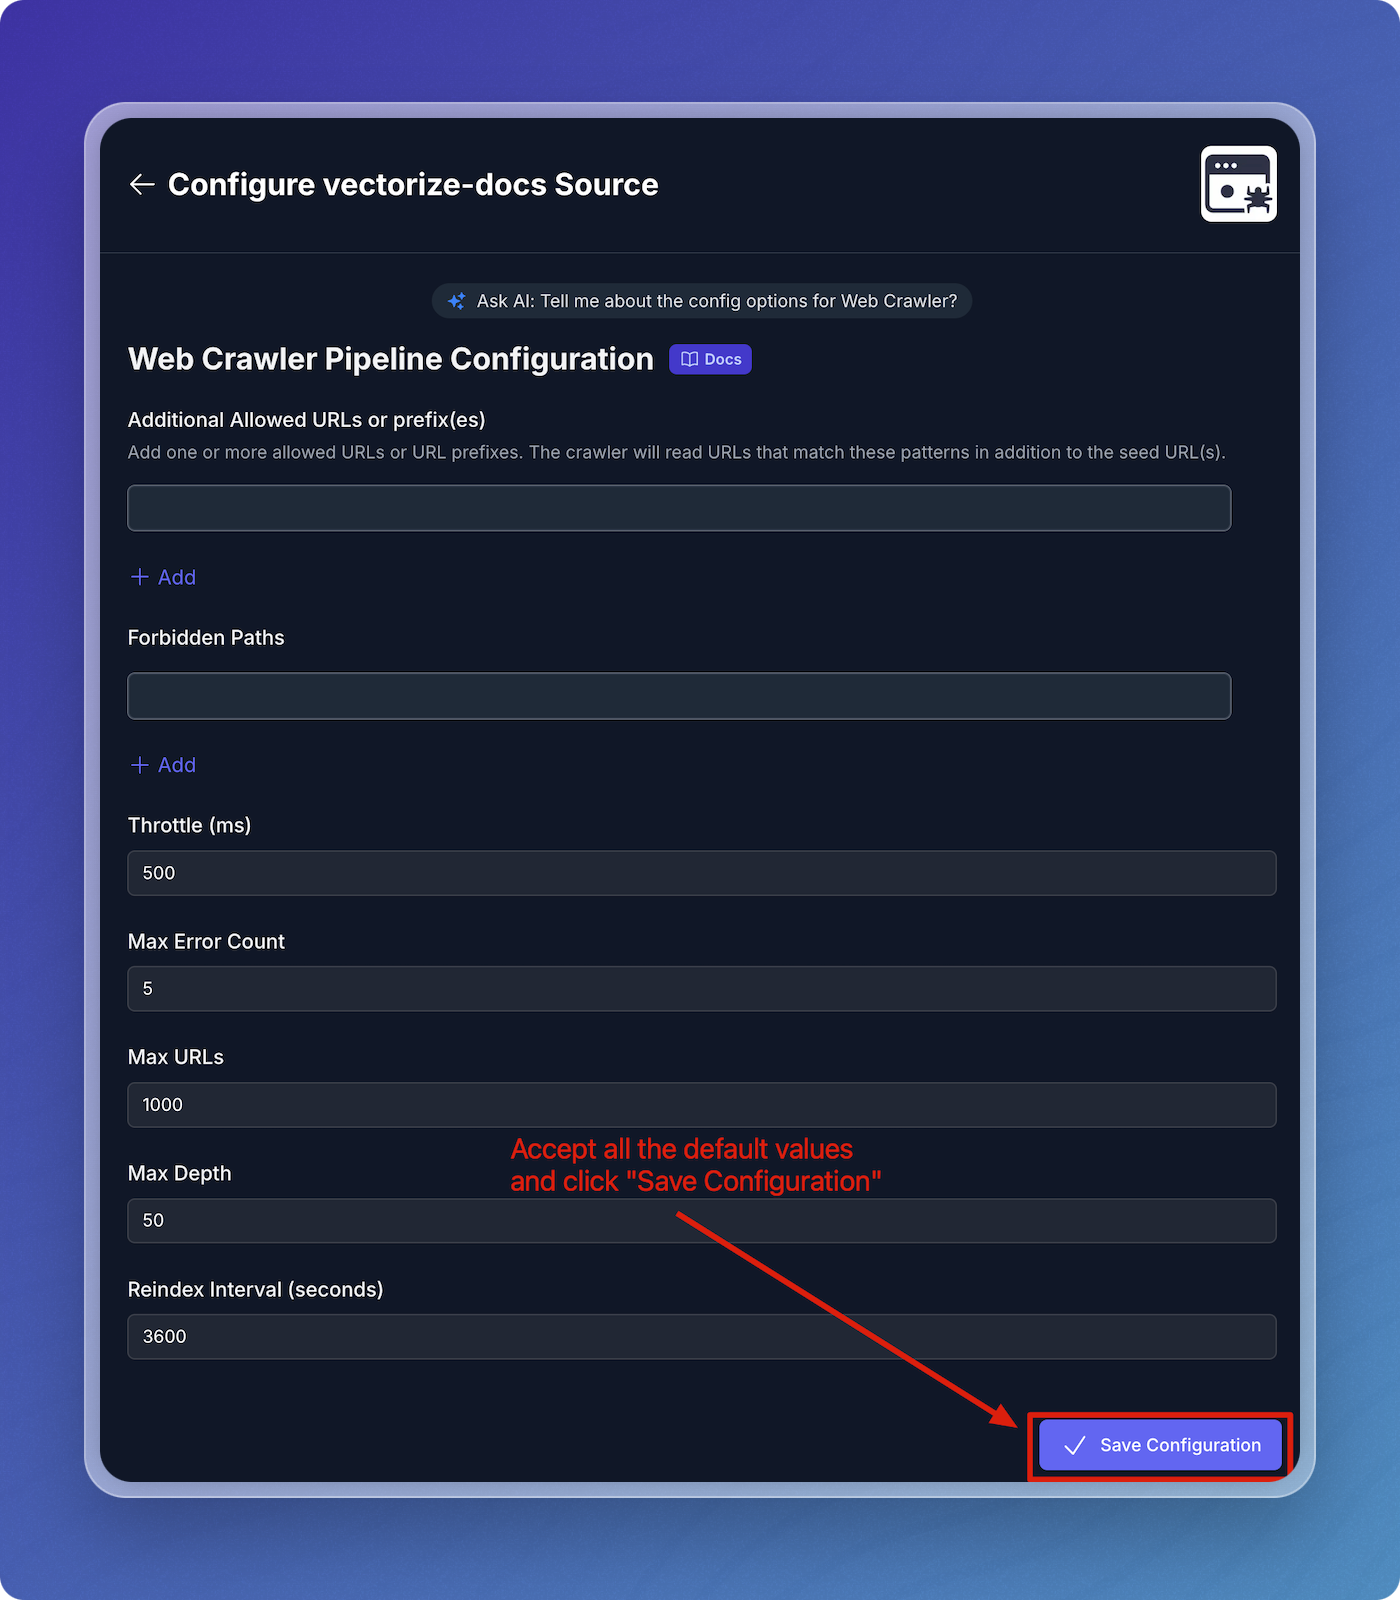
- Click Save Configuration.
Verify Source Connector and Schedule Pipeline
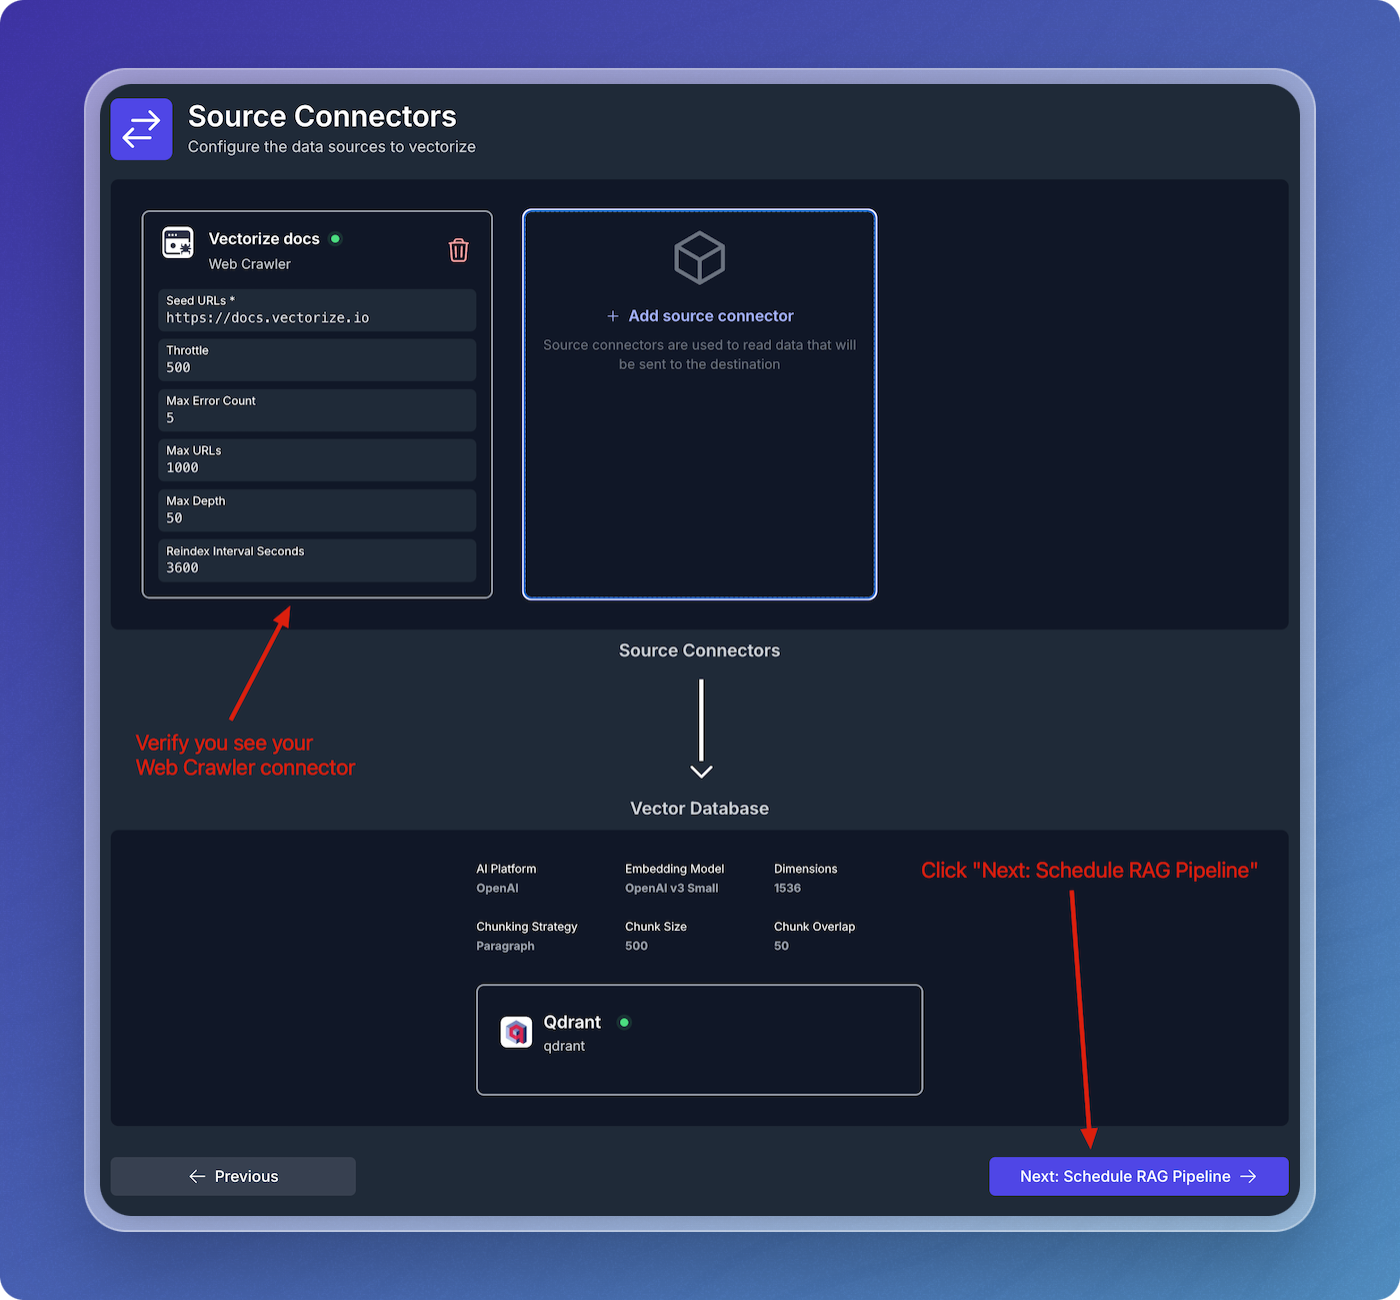
- Verify that your web crawler connector is visible under Source Connectors.
- Click Next: Schedule RAG Pipeline to continue.
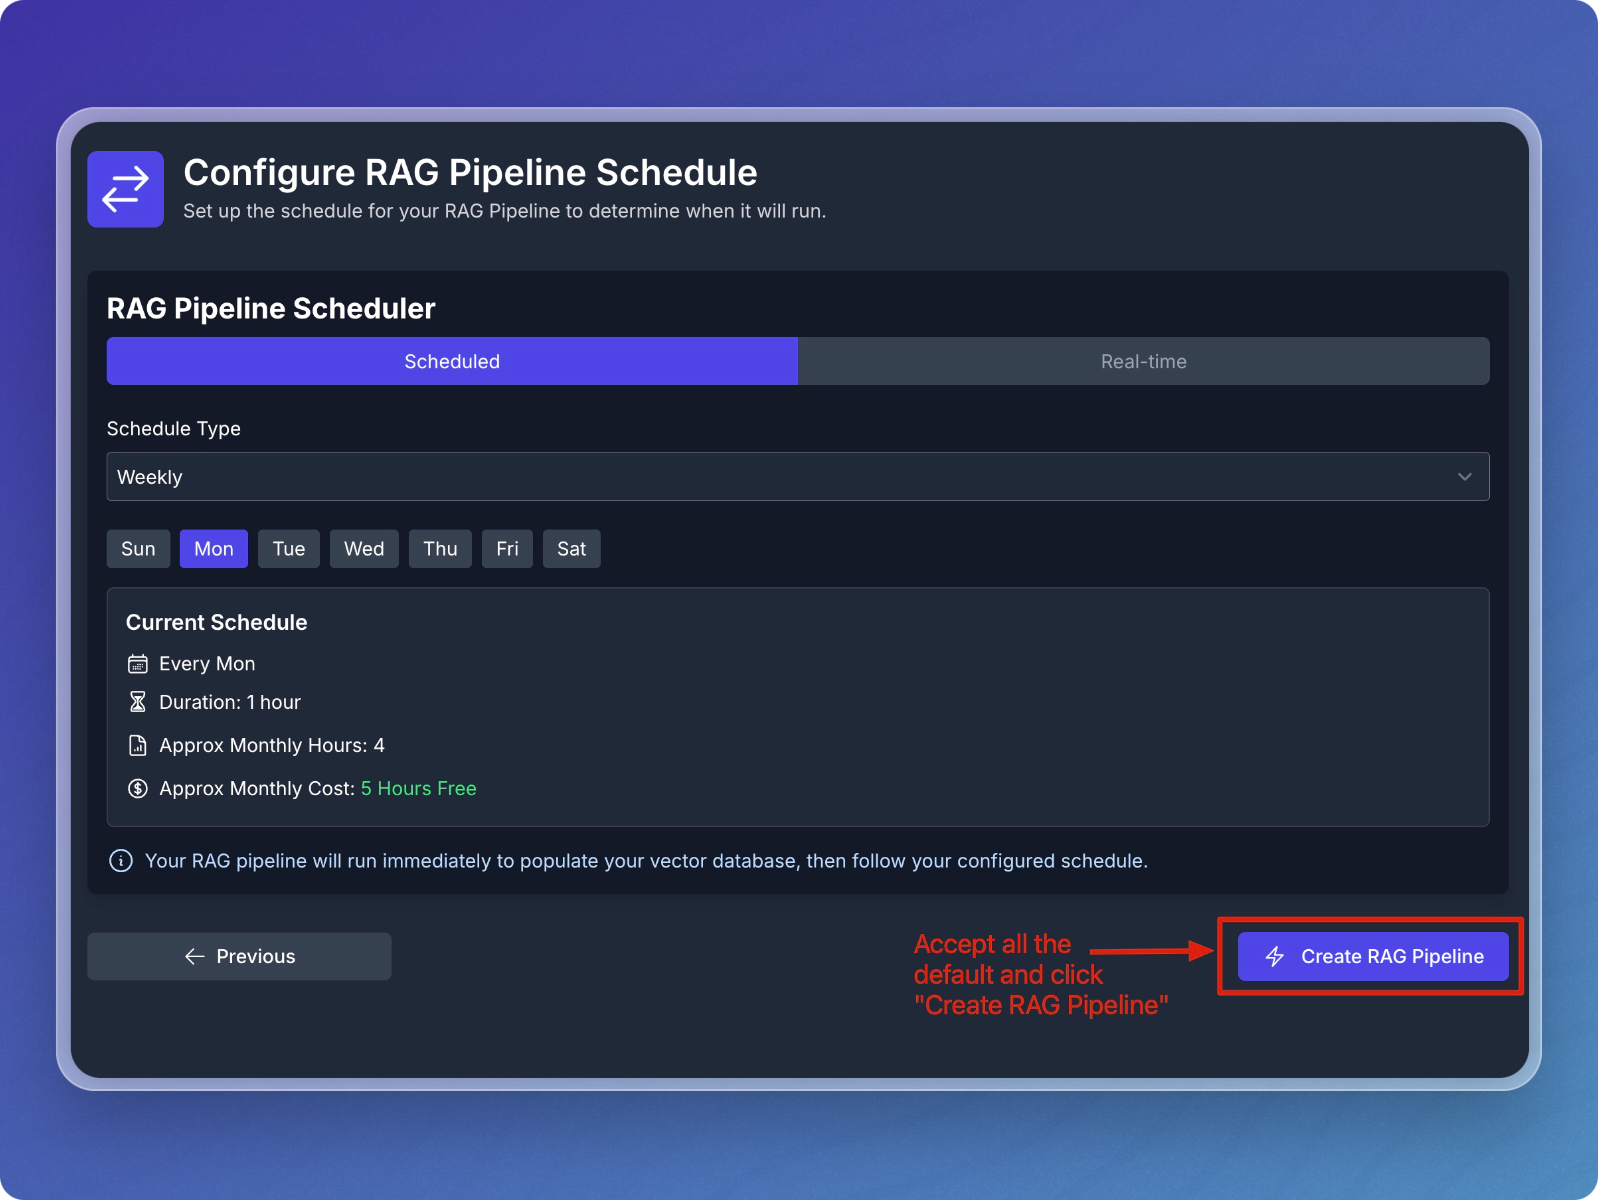
Schedule Data Pipeline
- Accept the default schedule configuration
- Click Create RAG Pipeline.
Step 3: Monitor and Test Your Pipeline
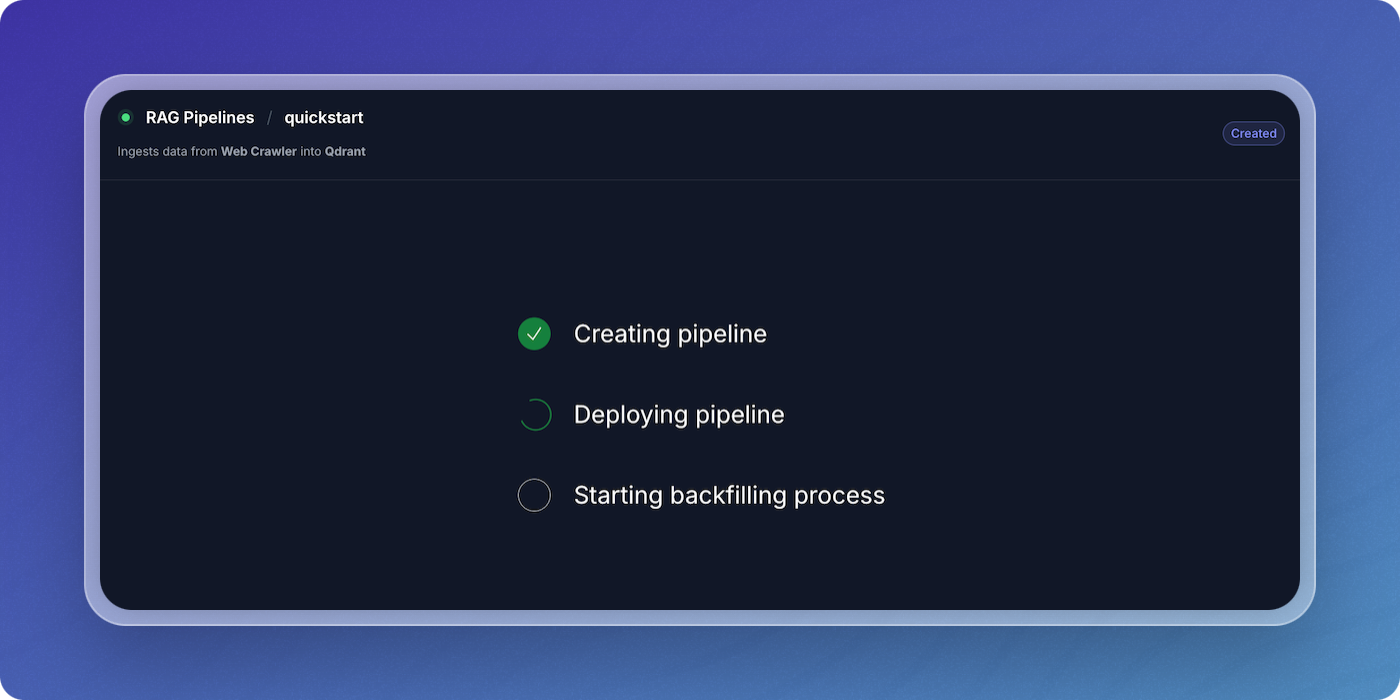
Monitor Pipeline Creation and Backfilling
- The system will now create, deploy, and backfill the pipeline.
- You can monitor the status changes from Creating Pipeline to Deploying Pipeline and Starting Backfilling Process.
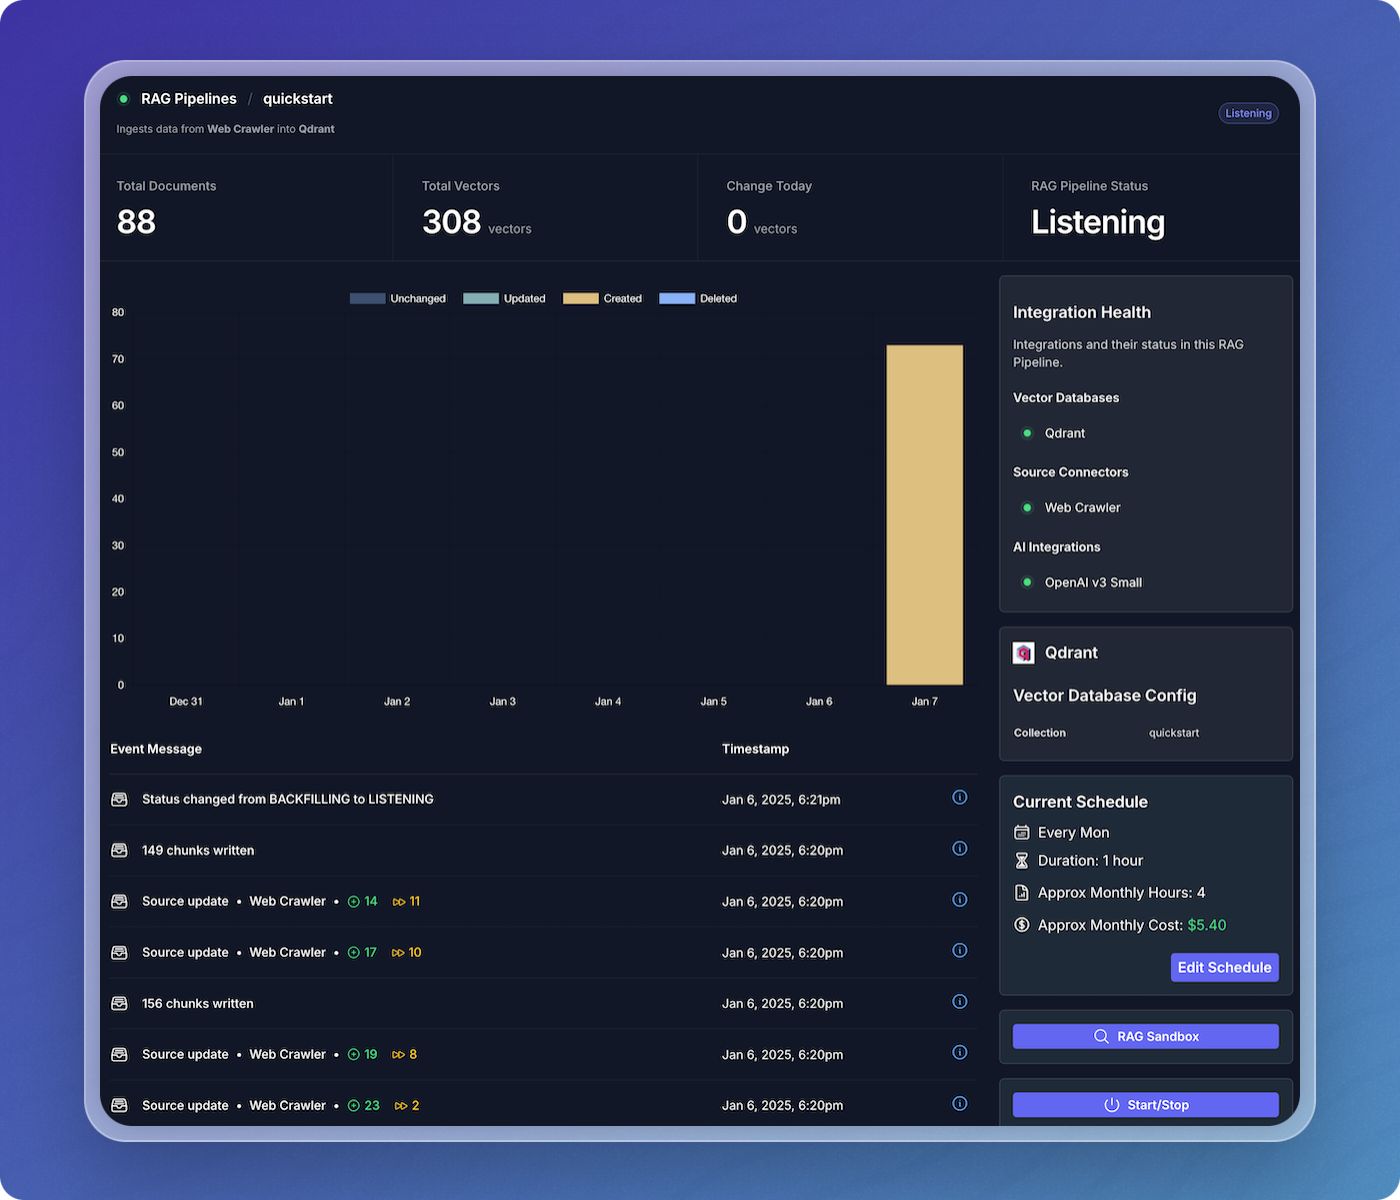
- Once the initial population is complete, the data pipeline will begin crawling the Vectorize docs and writing vectors to your Qdrant index.

View Data Pipeline Status
- Once the website crawling is complete, your data pipeline will switch to the Listening state, where it will stay until more updates are available.
Step 4: Test Your Pipeline in the RAG Sandbox
Access the RAG Sandbox
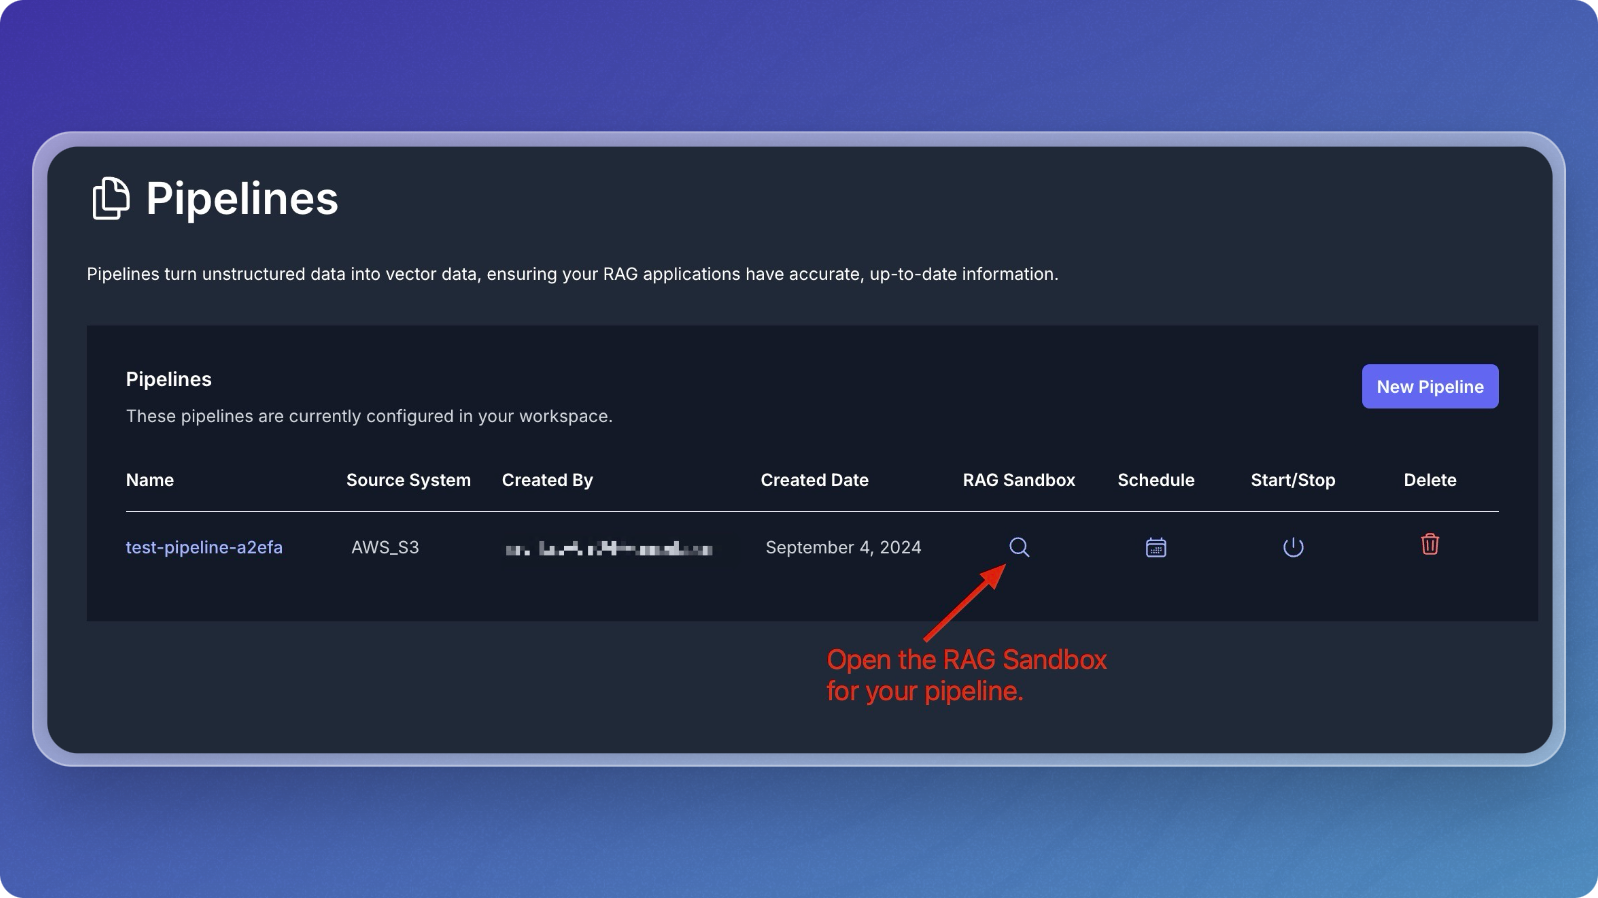
- From the main pipeline overview, click on the RAG Pipelines menu item to view your active pipelines.
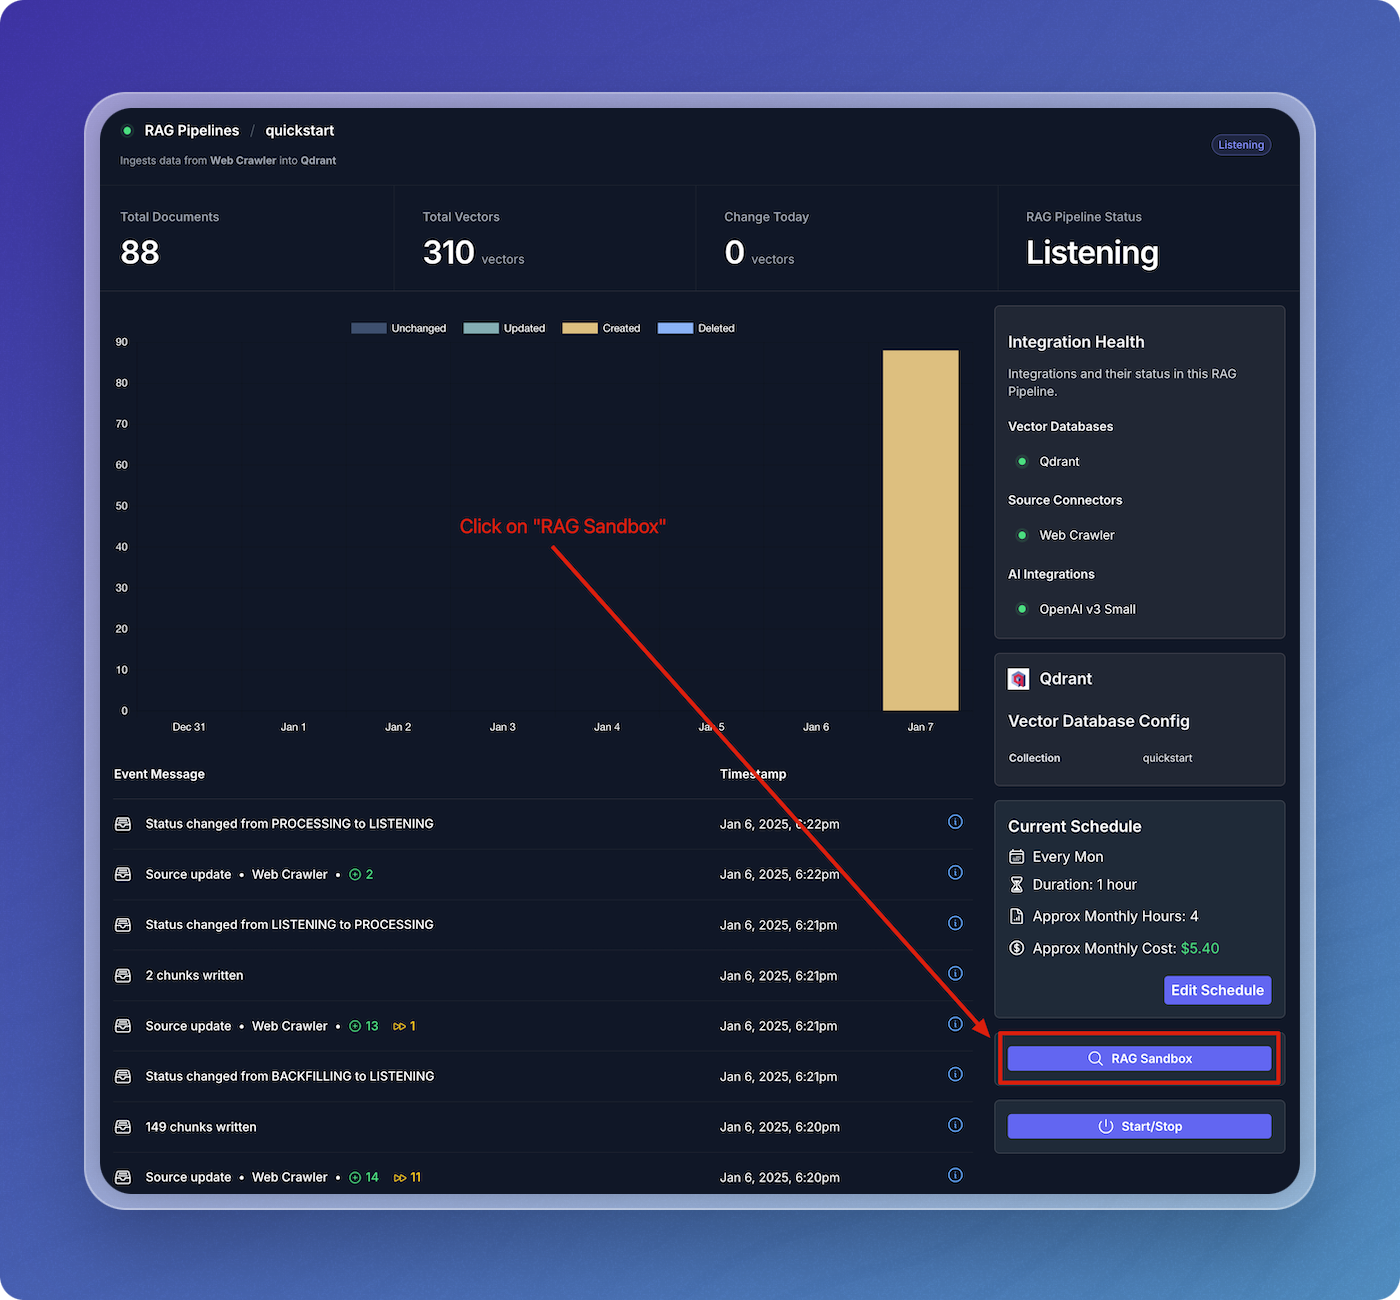
- Find your pipeline in the list of pipelines.
- Click on the magnifying glass icon under the RAG Sandbox column to open the sandbox for your selected pipeline.
Query Your Data
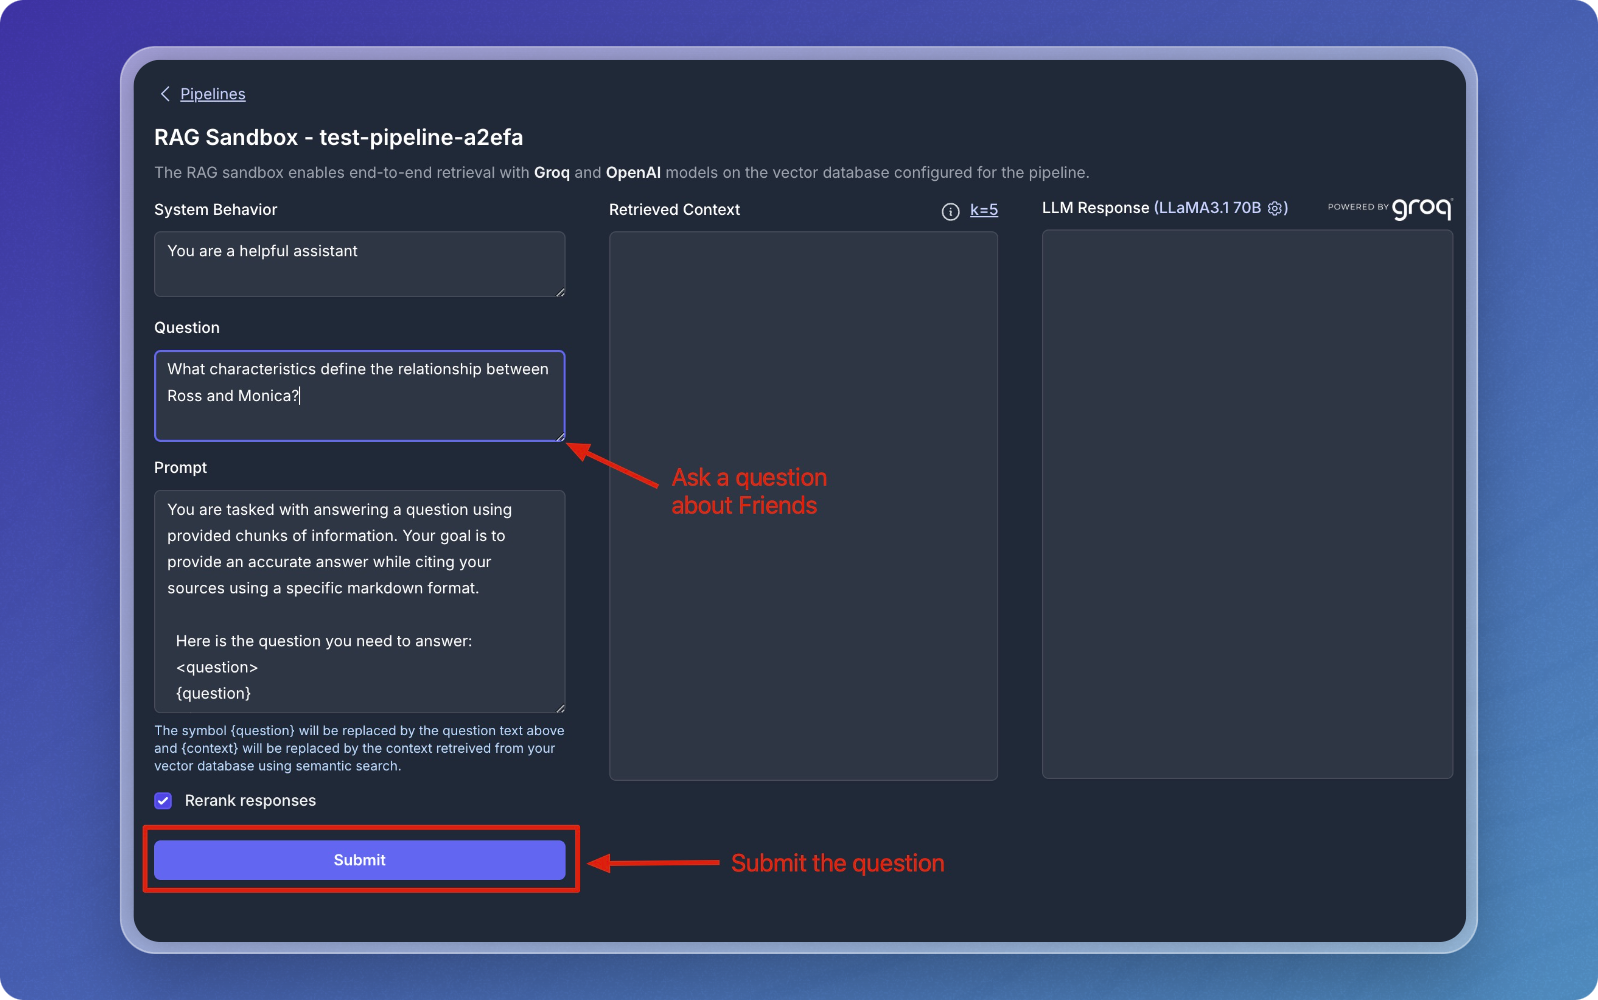
- In the sandbox, you can ask questions about the data you've ingested.
- Type a question related to your dataset in the Question field. For example, "What is Vectorize?" since you're working with the Vectorize documentation.
- Click Submit to send the question.
Review Results
- After submitting your question, the sandbox will retrieve relevant chunks from your vector database and display them in the Retrieved Context section.
- The response from the language model (LLM) will be displayed in the LLM Response section.
- The Retrieved Context section shows the chunks that were matched with your question.
- The LLM Response section provides the final output based on the retrieved chunks.
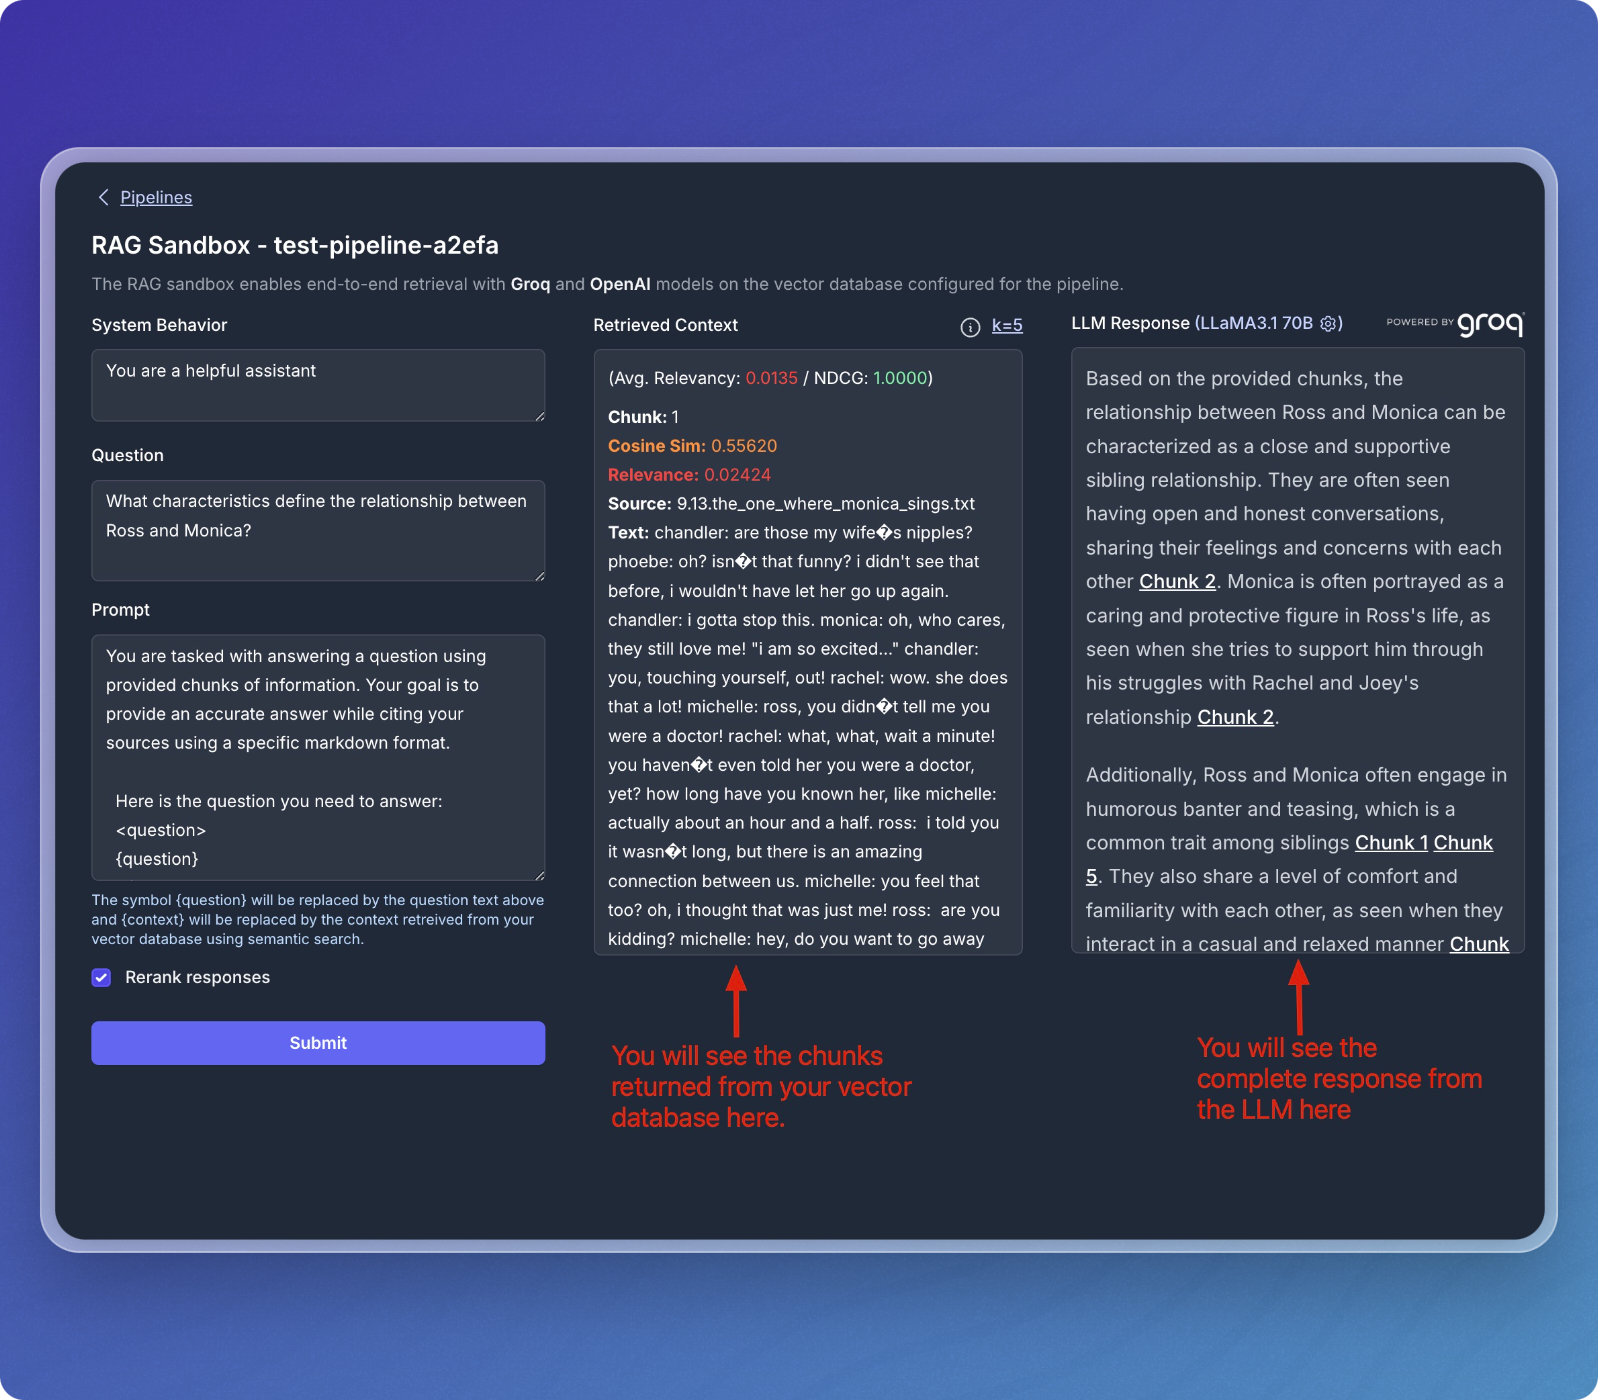
- You can continue to ask different questions or refine your queries to explore your dataset further.
- The sandbox allows for dynamic interactions with the data stored in your vector database.
That's it! You've successfully created a data pipeline that transforms your content into structured context, ready for AI agents to reason over and make intelligent decisions.