Create a Hosted Chat Agent
Vectorize provides hosted chat agents that allow you to quickly deploy AI-powered chat applications connected to your data pipelines. These agents can search and reason over your documents to answer user questions.
Prerequisites
Before creating a hosted chat agent, ensure you have:
- An active Vectorize account with a paid plan (Starter or higher)
- At least one pipeline created with indexed documents
- Administrator access to create agents
- Chat servers enabled for your organization
Step-by-Step Guide
1. Navigate to Agents
On the left navigation bar, click on Agents.
2. Create a New Agent
Click on the New Agent button in the top right corner.
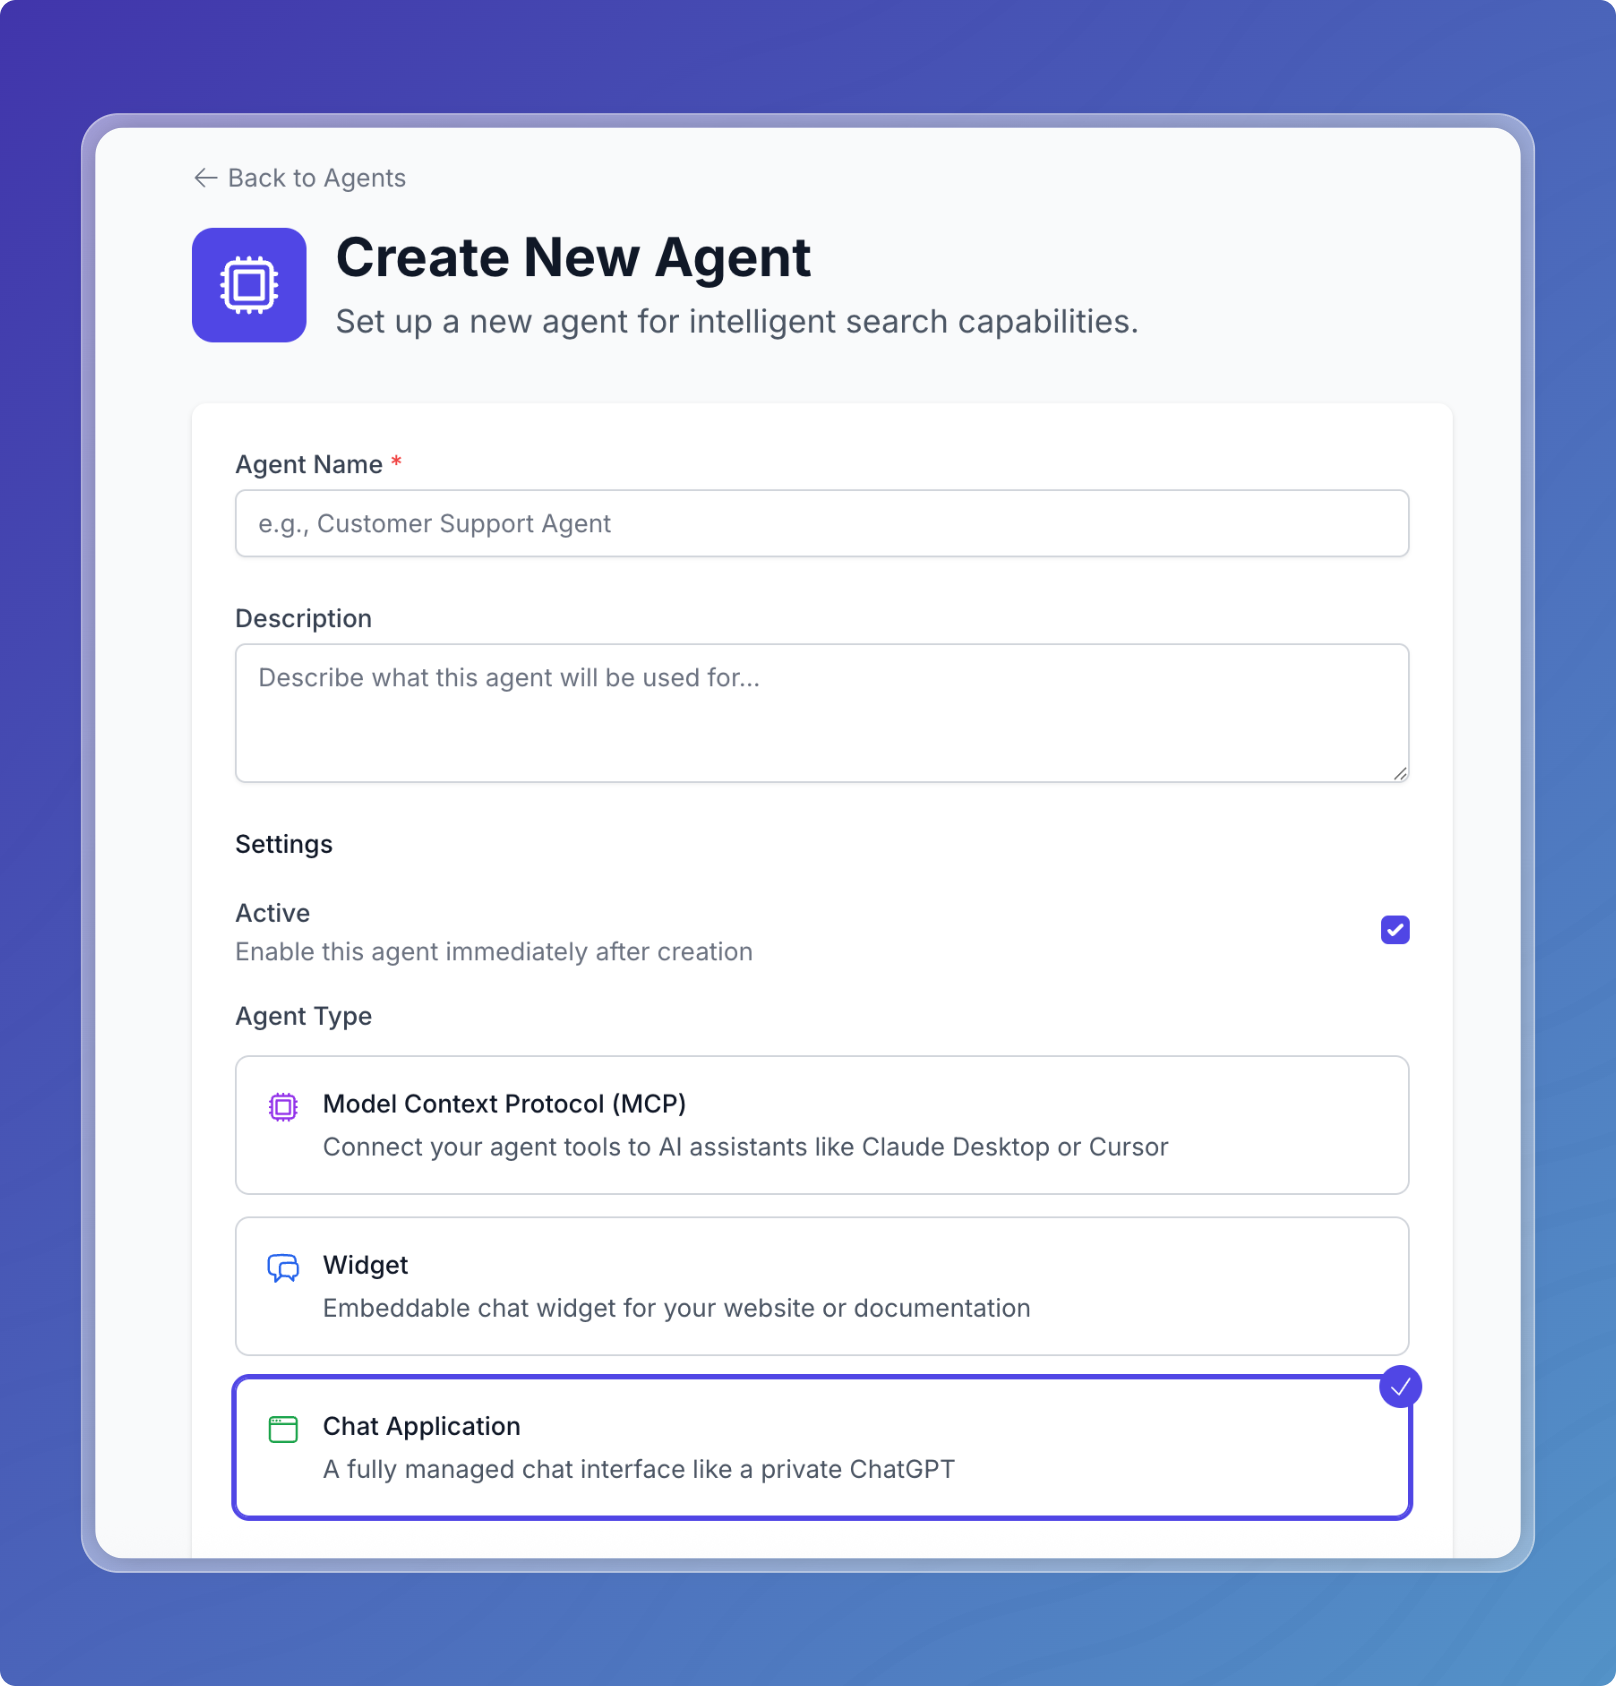
3. Configure Agent Settings
Basic Information
-
Agent Name: Enter a descriptive name for your agent (e.g., "Audit Report Assistant")
- Must be between 3-50 characters
-
Description: Optionally add a description of what this agent will be used for
- Maximum 200 characters
-
Active Status: Toggle whether the agent should be active immediately after creation
- Enabled by default
Select Application Type
Select Chat Application as the agent type. This enables:
- Multi-model support for users
- Voice capabilities (optional)
- Public or secure access options
- Admin dashboard for management
Note: Chat Applications require a paid plan. If you're on the free plan, you'll see an "Upgrade Required" message.
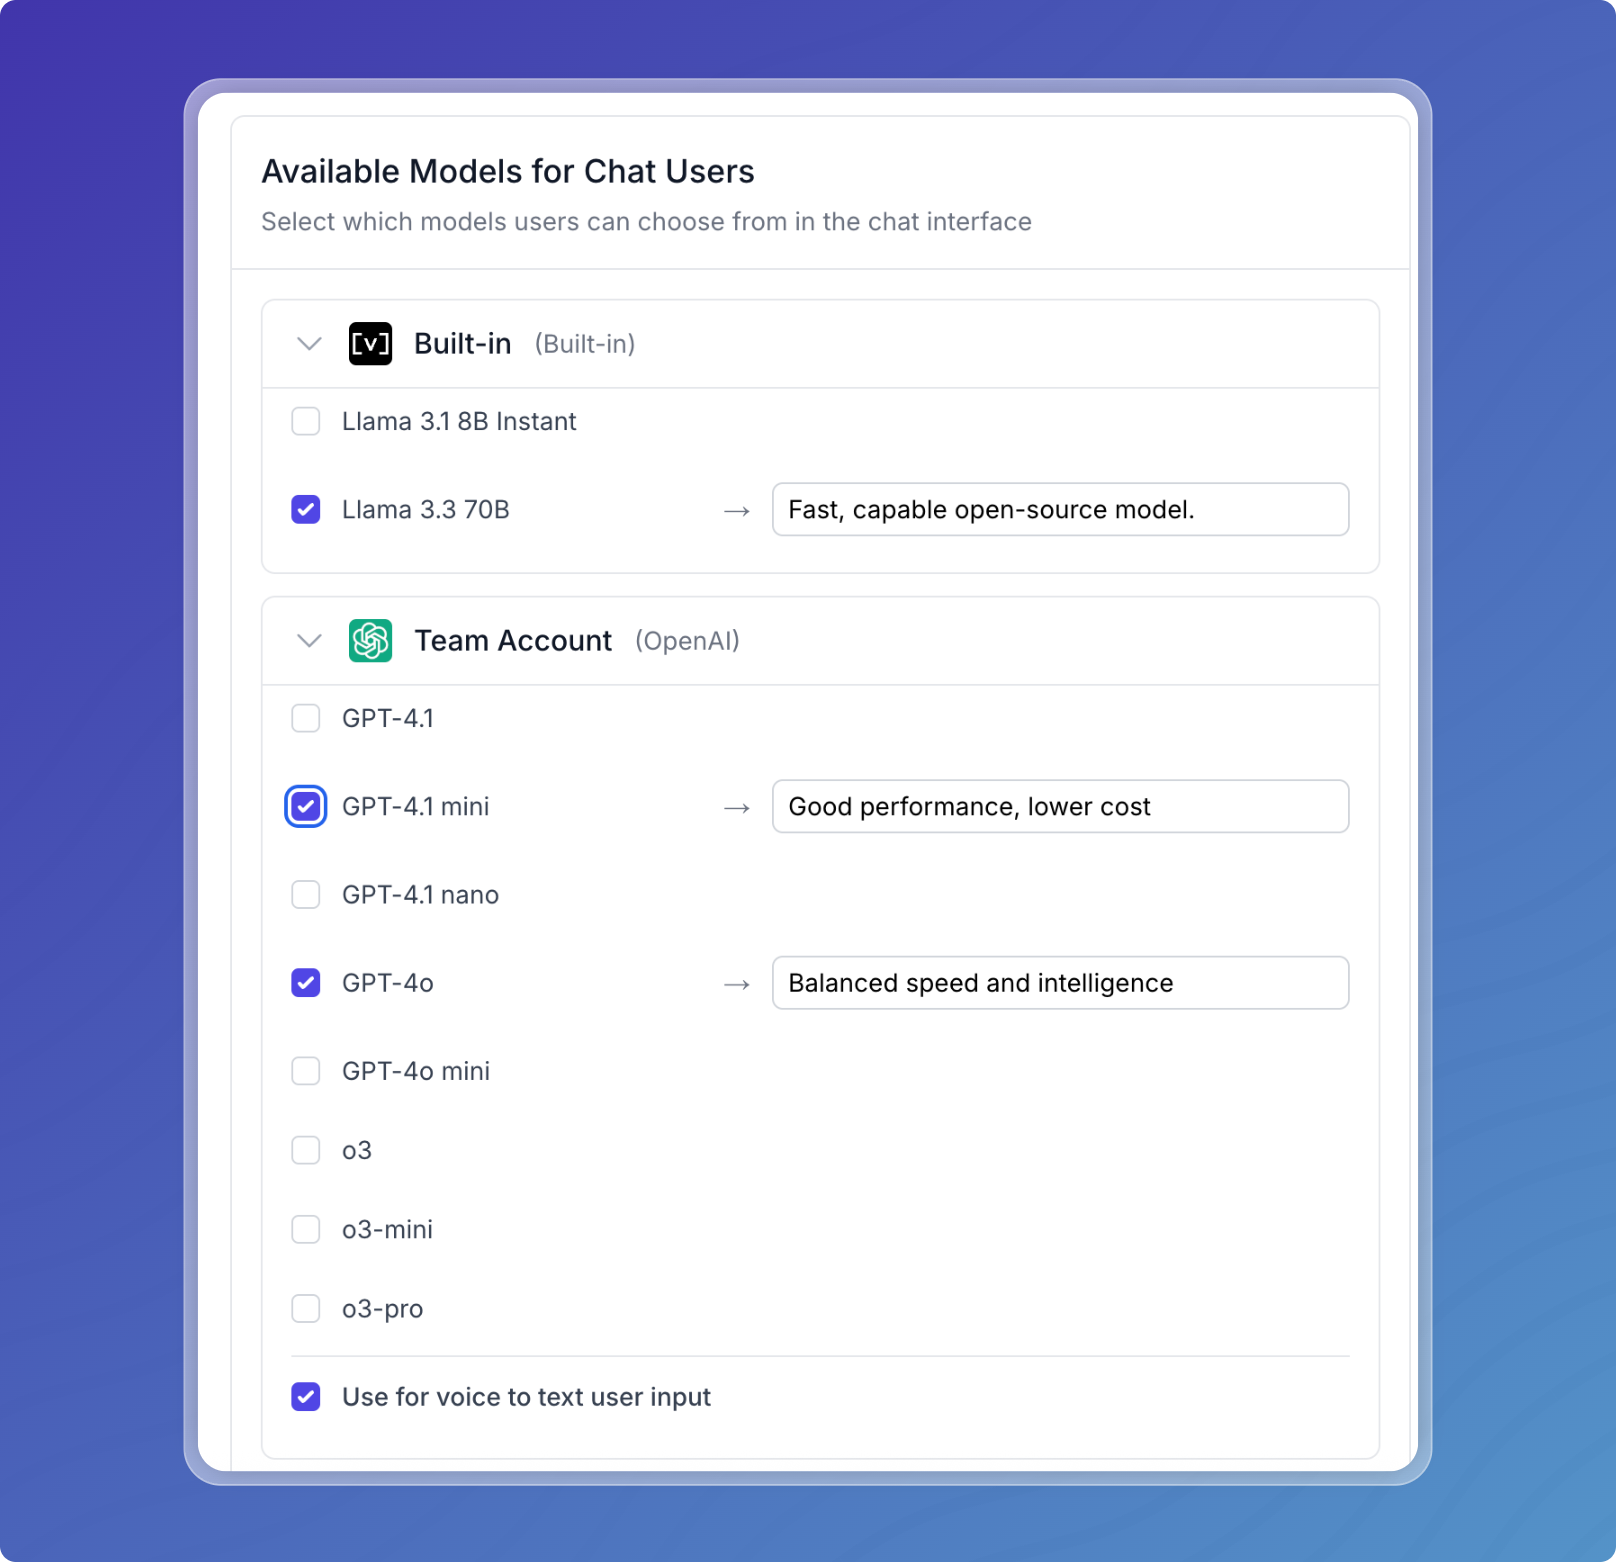
4. Configure Model Settings
Chat Applications support multiple AI models. Users can switch between models during conversations.
Available Models Configuration
-
Select Models: Expand each AI platform section to enable specific models:
- Built-in Models: Vectorize-provided models like Llama 3.3 70B (no API key required)
- Connected Platforms: Your configured AI platforms (OpenAI, Anthropic, AWS Bedrock, etc.)
- Check the models you want to make available to users
-
Model Order (Default Selection):
- After enabling models, use the Model Order section to arrange them
- Drag and drop models to reorder them using the drag handles (≡)
- The first model in the list becomes the default model for new conversations
- The default model is highlighted with a blue border and "(Default)" label
- Users can still switch between all enabled models during their chat session
-
Voice Capabilities (Optional):
- For platforms that support voice, enable the Use for voice to text user input option
- This allows users to speak their questions instead of typing
- Voice models are automatically selected based on the platform
5. Set System Prompt
In the System Prompt field, add instructions that define your agent's behavior and personality:
You are a helpful assistant that answers user questions about audit reports.
Provide accurate, concise answers based on the available documents.
Always cite your sources when providing information.
Additional configuration:
- Temperature (0-2): Controls response creativity (default: 0.7)
- Lower values (0-0.3): More focused and deterministic
- Medium values (0.5-0.7): Balanced creativity
- Higher values (1.0-2.0): More creative and varied
- Max Tokens: Maximum response length (default: 2048, max: 128000)
6. Configure Authentication Settings
Choose between two authentication types:
Public Access
- Anyone can access the chat agent without authentication
- Best for public-facing assistants
- Still requires admin credentials for management
Secure Access (Recommended)
- Requires username and password authentication for all users
- Protects sensitive data and controls access
- Admin credentials provide elevated management capabilities
For both authentication types, set admin credentials:
- Admin Username: Enter a username for administrative access
- Admin Password: Create a strong password that includes:
- At least 8 characters
- One letter (uppercase or lowercase)
- One number
- One special character
- Confirm Password: Re-enter the password to confirm
7. Create the Agent
Click on Create Agent to finalize the agent creation.
Connect Your Pipeline
Once the agent is created, you need to connect it to your data pipeline using custom tools.
1. Navigate to Tools
After agent creation, you'll be redirected to the agent details page. Click on the Tools tab or button.
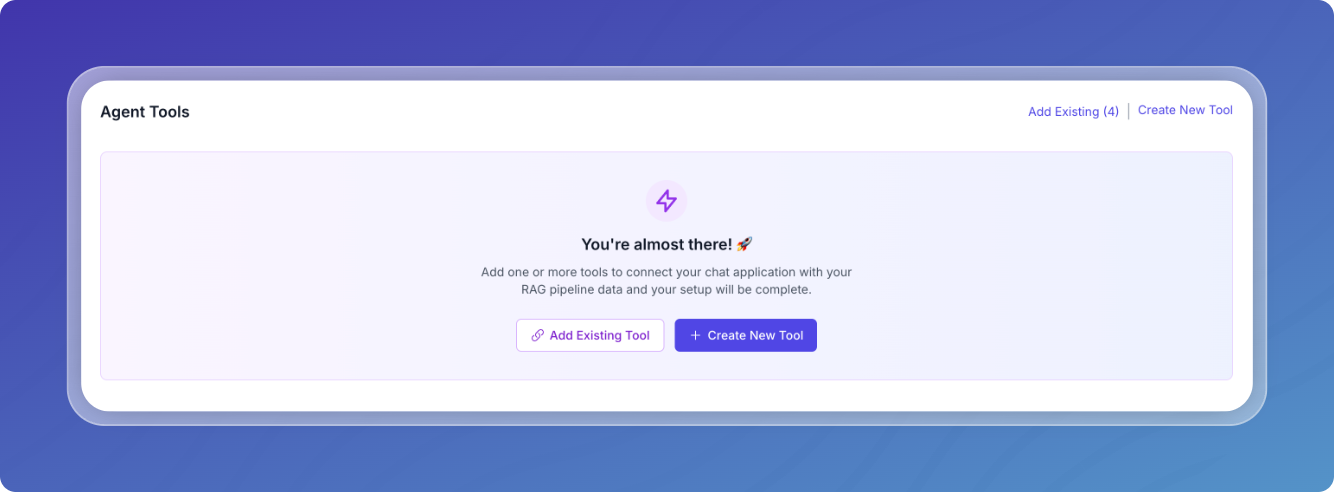
2. Add Tools to Your Agent
You have two options for adding tools:
Option A: Create New Tool
- Click on New Agent Tool
- Configure the tool:
- Tool Name: Enter a descriptive name (e.g., "search-audit-reports")
- Description: Describe what the tool does
- Pipeline Selection: Select the pipeline containing your documents
- Input Parameters: Define any custom parameters users can provide
- Metadata Filters: Set up filters to refine searches
Option B: Add Existing Tools
- Click on Add Existing Tools
- Select from available tools in your workspace
- Tools can be shared across multiple agents
3. Save Tool Configuration
Click Create Tool or Add Tools to establish the connection between your agent and pipeline.
Once at least one tool is added you application will be deployed and ready for use.

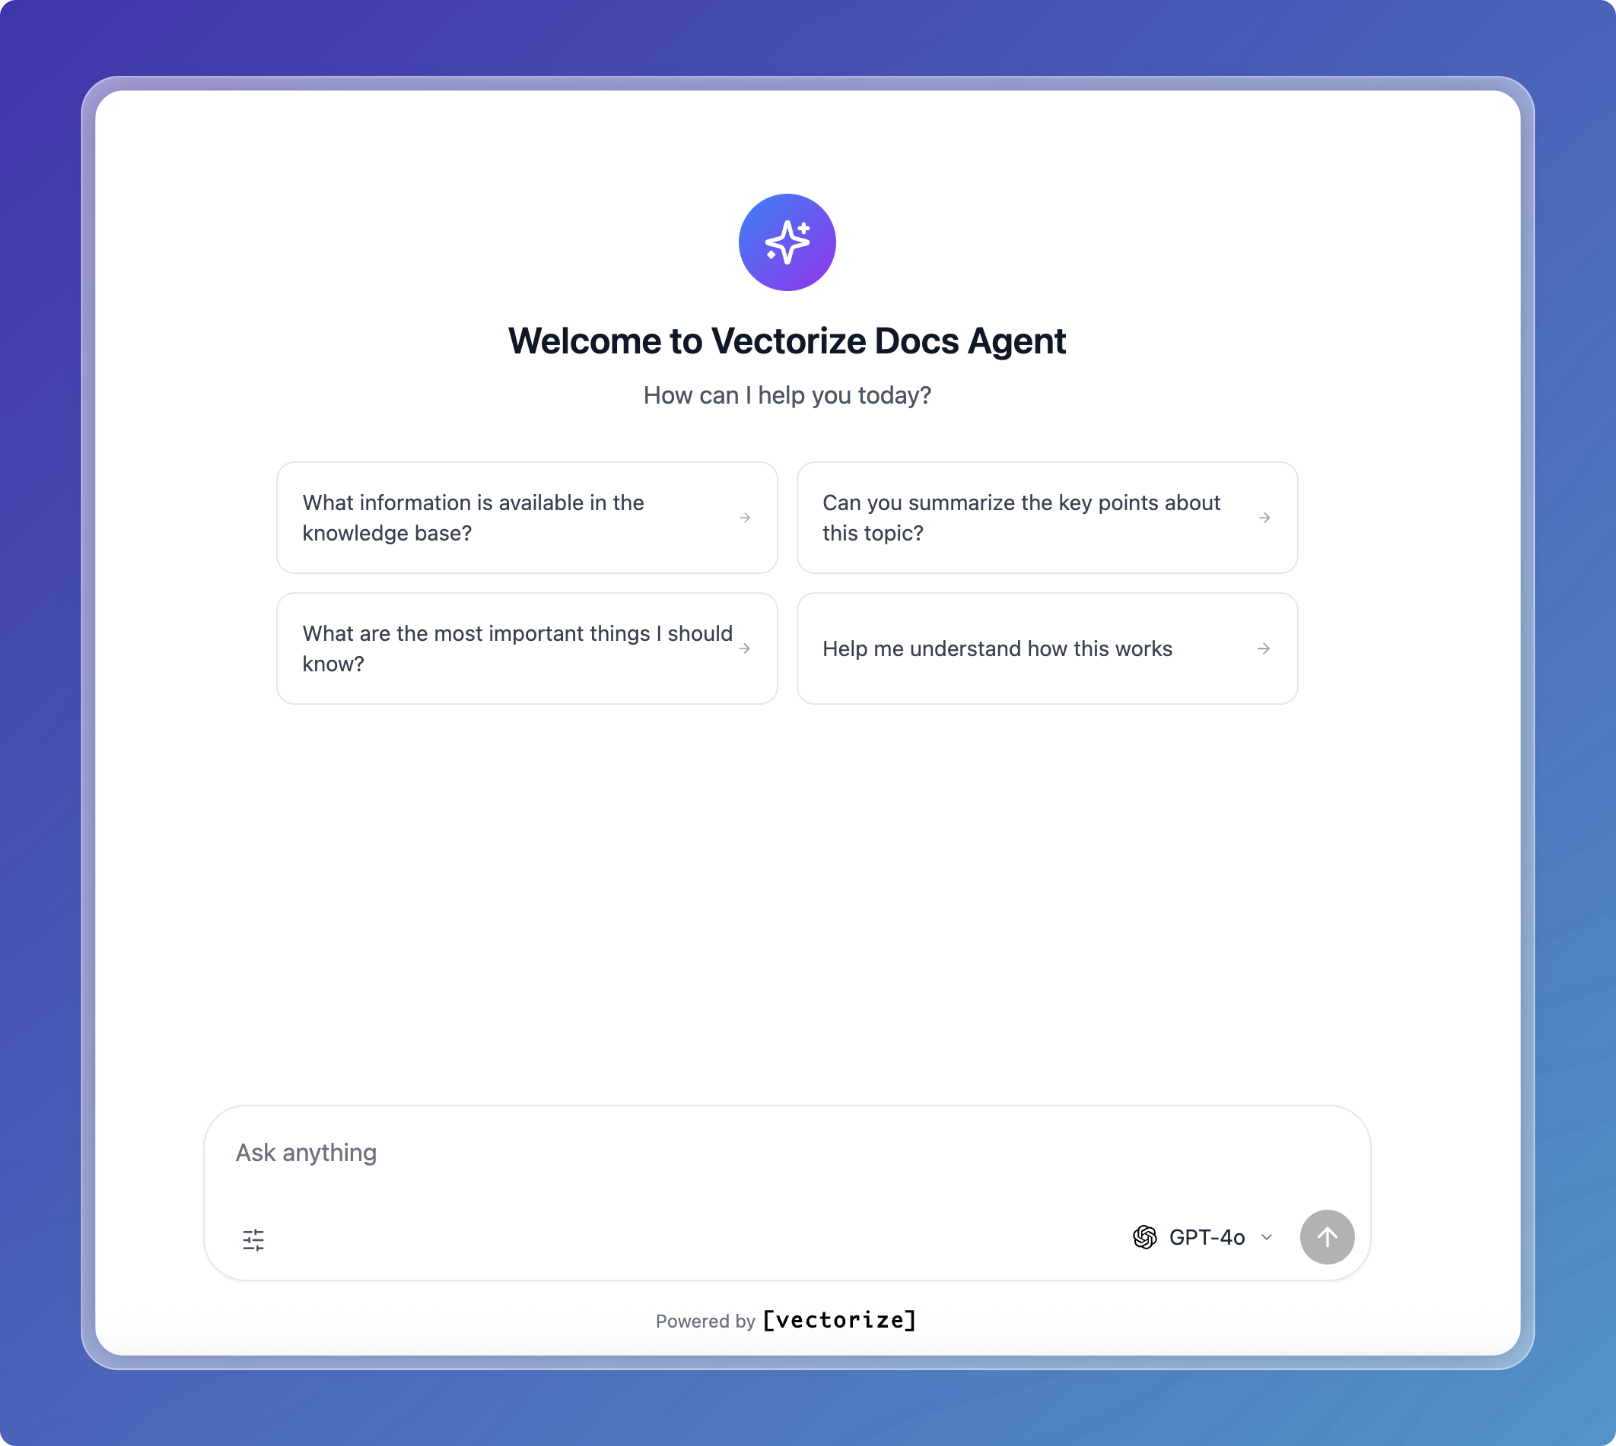
Launch Your Chat Agent
1. Access the Chat Interface
From the agent details page, look for the Launch Dashboard button.
2. Authenticate
If you configured Secure Access:
- Enter the username and password you created during agent setup
- For admin users, use the admin credentials to access management features
3. Start Chatting
You're now in your chat application! The interface includes:
- Model Selector: Switch between available AI models
- Chat History: View and manage conversation history
- Tool Indicators: See when the agent uses your connected tools
- Voice Mode (if enabled): Use speech input/output
Using Your Chat Agent
Your hosted chat agent can:
- Search through documents in your connected pipelines
- Answer questions based on the indexed content
- Provide relevant information with source citations
- Handle follow-up questions and maintain conversation context
- Execute multiple tools to gather comprehensive information
Tool Execution
When the agent searches your documents, you'll see:
- Tool execution indicators
- Search parameters being used
- Number of documents retrieved
- Source references in responses
Managing Your Agent
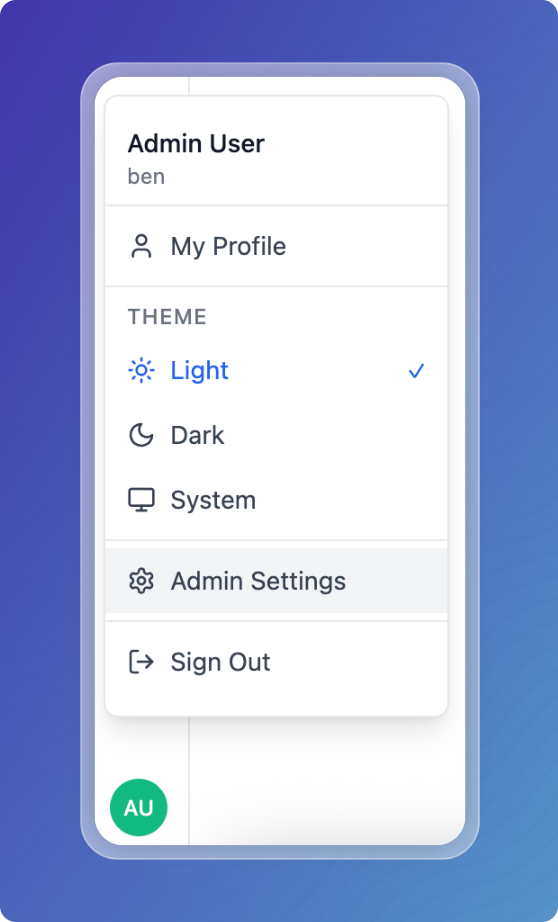
You can manage your hosted chat agent through the Admin Panel. You can access it by being logged in as an admin user and clickin on the profile icon in the bottom left corner, then selecting Admin Settings.
Admin Panel Settings
The Admin Panel provides comprehensive control over your chat application's configuration and behavior. Access requires admin credentials configured during agent setup.
Accessing the Admin Panel
- Sign in as an administrator using the admin credentials you created during agent setup
- Click on your profile icon in the bottom left corner of the chat interface
- Select Admin Settings from the menu
/images/agents/adminSettings.png
Admin Panel Sections
The admin panel is organized into multiple sections accessible via the left sidebar:
- General Settings
Configure basic chat interface settings:
- Agent Name: Update the display name of your chat agent
- Welcome Message: Customize the main greeting users see
- Default: "Welcome to [Agent Name]"
- Welcome Sub-Message: Supporting text below the main welcome (Chat Apps only)
- Default: "How can I help you today?"
- Button Text: Customize the chat widget button text (Widgets only)
- Placeholder Questions: Set up to 3-4 suggested questions that appear in empty chats
- Help guide users on what they can ask
- Users can click to instantly send the question
- Content and Props
Control AI model behavior and capabilities:
System Prompt Configuration:
- Define instructions that guide the AI's responses
- Set the agent's personality and behavior
Model Parameters:
- Temperature (0-2): Controls response creativity
- Lower values (0-0.3): More focused and deterministic
- Higher values (1.0-2.0): More creative and varied
- Max Tokens: Maximum response length (up to 128,000)
Additional Features:
- Feedback Collection: Enable/disable user feedback on responses
- Voice Input: Configure voice-to-text capabilities (if supported)
- File Upload: Enable document and image uploads
- Set maximum file size limits
- Configure allowed file types
- Set maximum files per message
- Models
Manage available AI models for your chat application:
- Select and configure multiple AI models
- Set the default model for new conversations
- Arrange model order (first model becomes default)
- Enable/disable specific models
- Configure voice capabilities per platform
- AI Safety and Ethics
Implement content moderation and safety features:
AI Consent:
- Require users to consent to AI interactions
- Display consent notices before chat begins
Threat Detection:
- Enable automatic threat detection
- Configure actions: log, warn, or disable users
- Set warning thresholds before penalties
- Configure penalty durations
Abuse Detection:
- Enable abuse and harassment detection
- Adjust sensitivity levels (high, medium, low)
- Configure automatic responses to violations
- Set escalation thresholds
- User Management
Control user access and permissions:
- View all users with access to the chat
- Add or remove admin users
- Manage user roles and permissions
- View user activity and session history
- Enable/disable specific user accounts
- Security
Configure authentication and security settings:
Authentication Methods:
- Password Authentication: Standard username/password
- SAML/SSO: Enterprise single sign-on integration
- Two-Factor Authentication (2FA): Additional security layer
- Email-based verification
- Time-based one-time passwords (TOTP)
Security Policies:
- Password complexity requirements
- Session timeout settings
- IP allowlisting/blocklisting
- Rate limiting configurations
- Appearance
Customize the visual branding:
- Logo Configuration: Upload custom logos
- Wide logo for desktop views
- Square logo for mobile views
- Dark mode variants for both
- Powered By Badge: Show/hide Vectorize branding
- Theme Customization: Adjust colors and styling
- Language Settings
Configure multilingual support:
- Default Language: Set the primary interface language
- Personal Language Preferences: Allow users to select their preferred language
- Translations: Customize interface text for each language
- Welcome messages
- Button text
- Placeholder questions
- Error messages
- Webhooks
Set up integrations with external systems:
- Configure webhook endpoints
- Select events to trigger webhooks
- Set authentication headers
- Test webhook connections
- View webhook logs and failures
- Error Logs
Monitor and debug issues:
- View real-time error logs
- Filter by error type or severity
- Export logs for analysis
- Track error patterns and frequencies