Azure Blob Storage
The Azure Blob Storage Source Connector allows you to integrate Azure Blob Storage as a data source for your pipelines. This guide explains the configuration options available when setting up a Azure Blob Storage connector.
Before you begin
Before starting, you'll need:
- Your Azure storage account name.
- Your Azure storage account key.
- The Azure container's name.
If you don't have Azure Blog Storage set up already,, check out our guide How to Configure Azure Blob Storage.
Configure the Connector
-
Click Source Connectors from the main menu.
-
Click New Source Connector from the Source Connectors page.
-
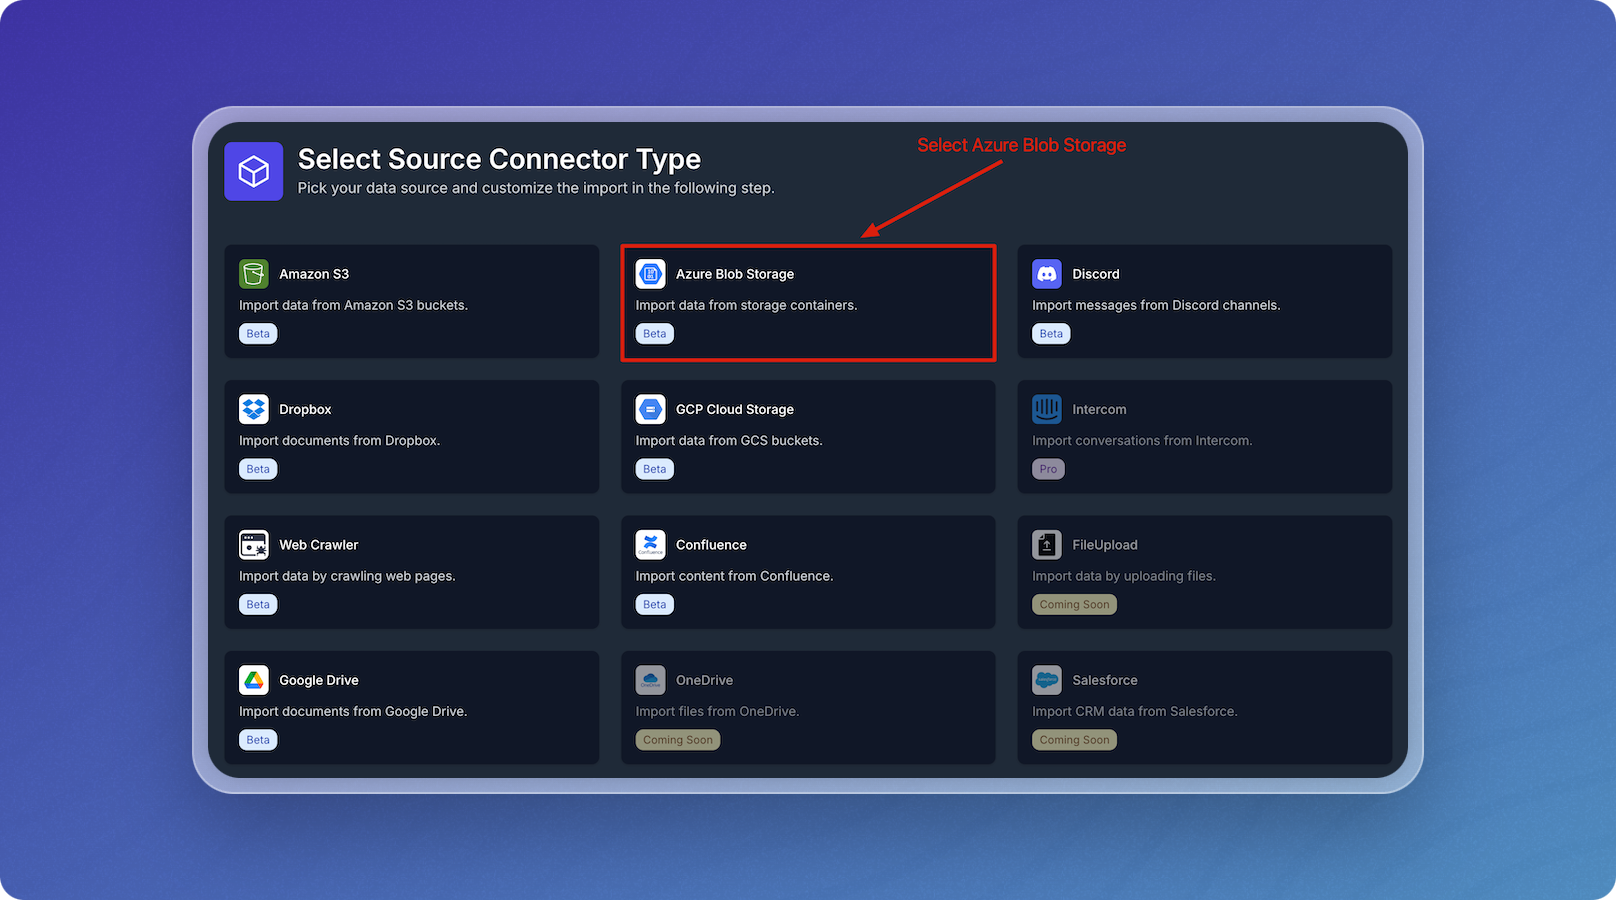
Select the Azure Blob Storage card.
-
Enter connection parameters in the form using the Azure Blob Parameters table below as a guide.
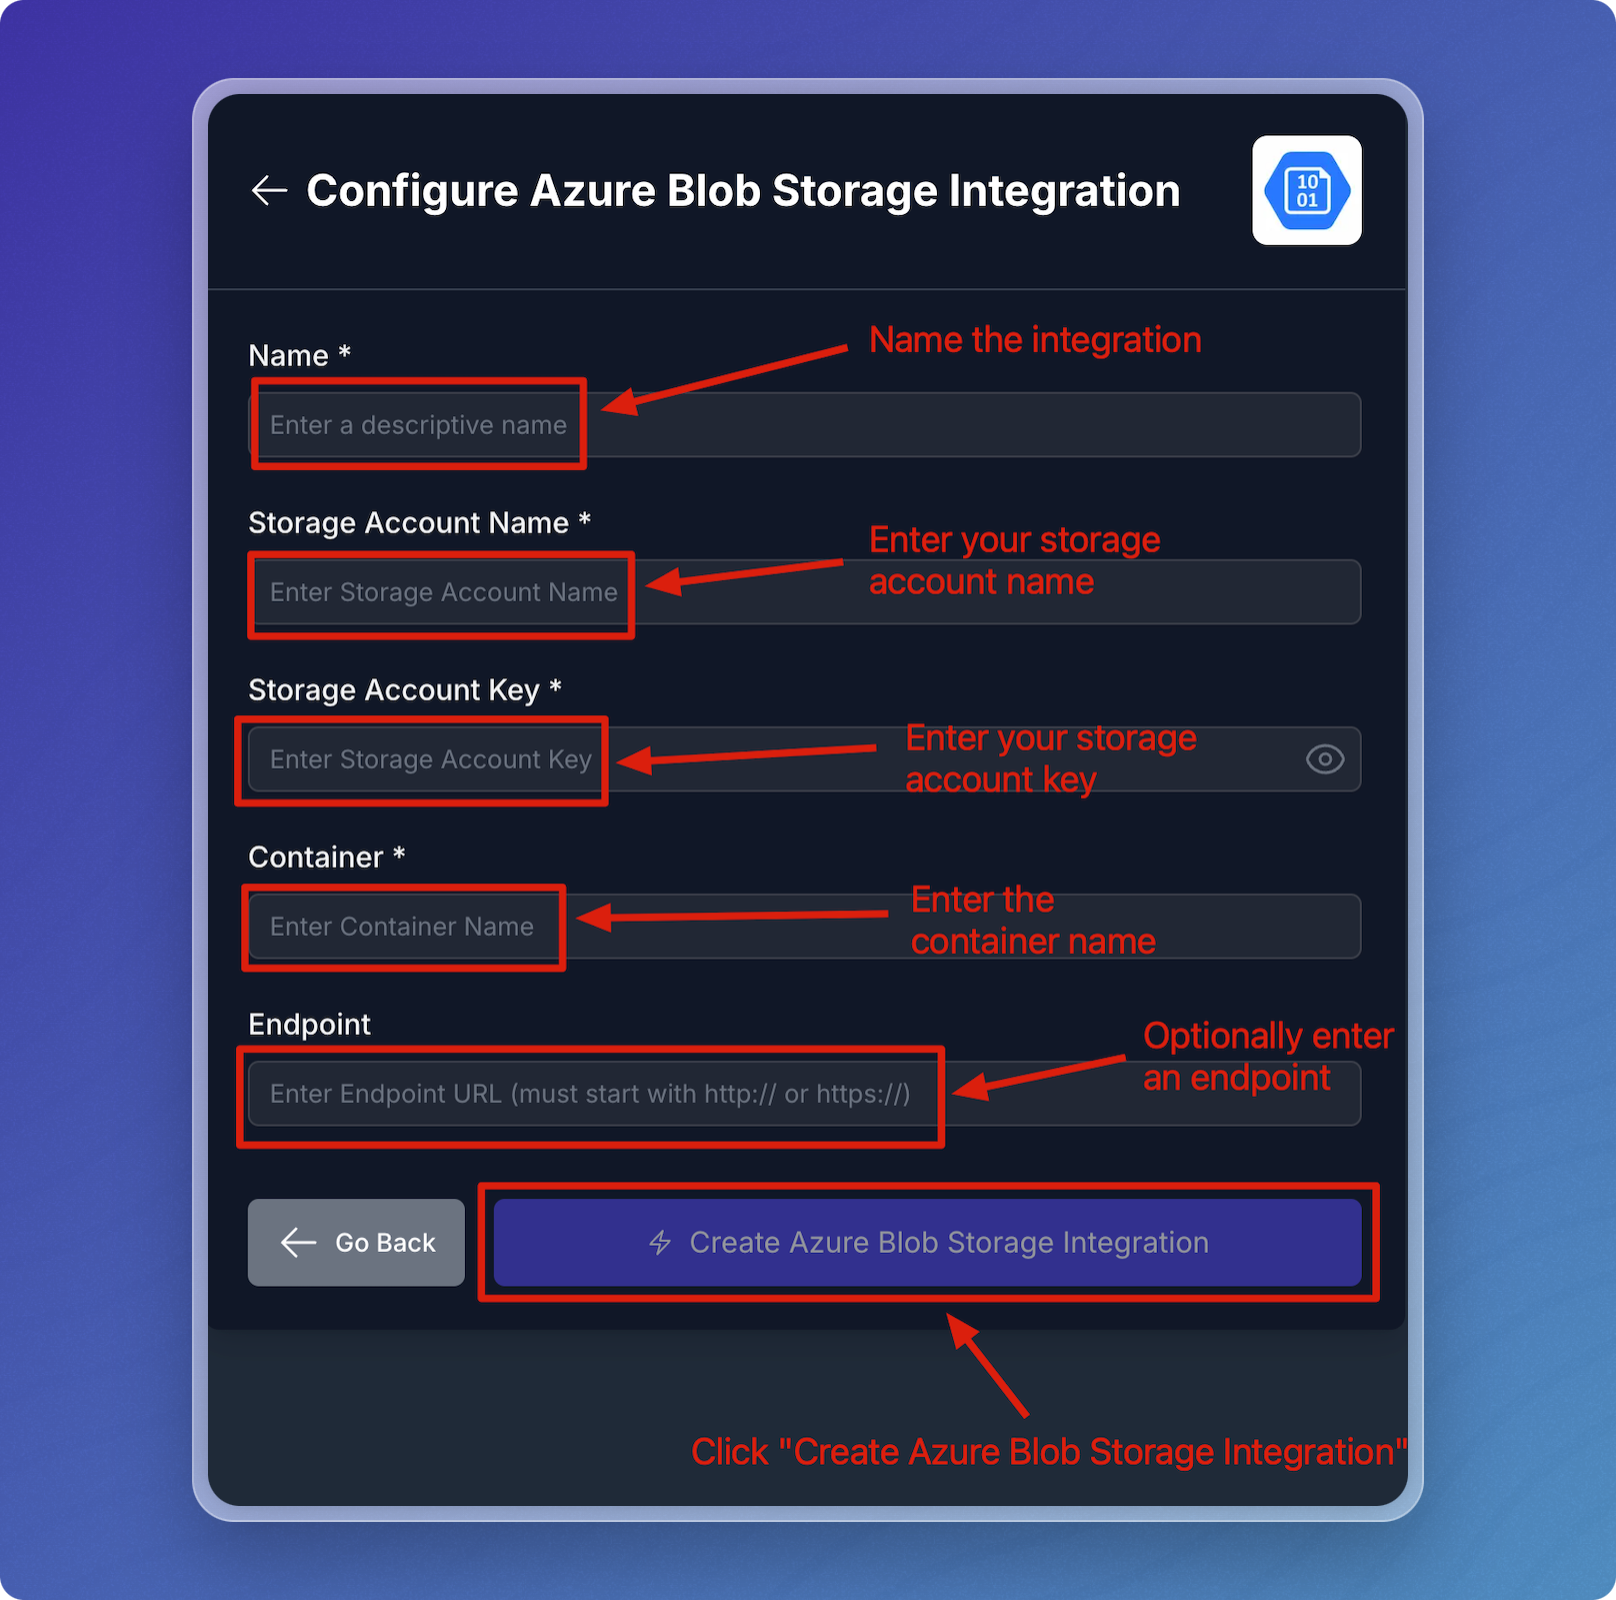
- Click Create Azure Blob Integration to test connector connectivity and save your configuration.
Azure Blob Parameters
| Field | Notes | Required |
|---|---|---|
| Name | A descriptive name to identify the connector within Vectorize. | Yes |
| Container | Your source data files must be inside a container. | Yes |
| Storage Account Name | Your Azure Blob Storage account name. | Yes |
| Storage Account Key | Your Azure Blob Storage instance key. | Yes |
| Endpoint | Your Azure Blob Storage endpoint. | No |
When you specify your configured Azure Blob Storage source in your pipeline configuration, Vectorize ingests all compatible files at the specified endpoint.
Configuring the Azure Blob Storage Connector in a RAG Pipeline
When you configure a Azure Blob Storage connector in a Retrieval-Augmented Generation (RAG) pipeline, you need to provide two parts of configuration. The first part is the general configuration that is common to all connectors, such as the name of the connector.
The second part is the configuration that is specific to your RAG Pipeline, such as which files and directories should be processed.
The following table outlines the fields available when configuring a Azure Blob Storage source for use within a Retrieval-Augmented Generation (RAG) pipeline.
| Field | Description | Required |
|---|---|---|
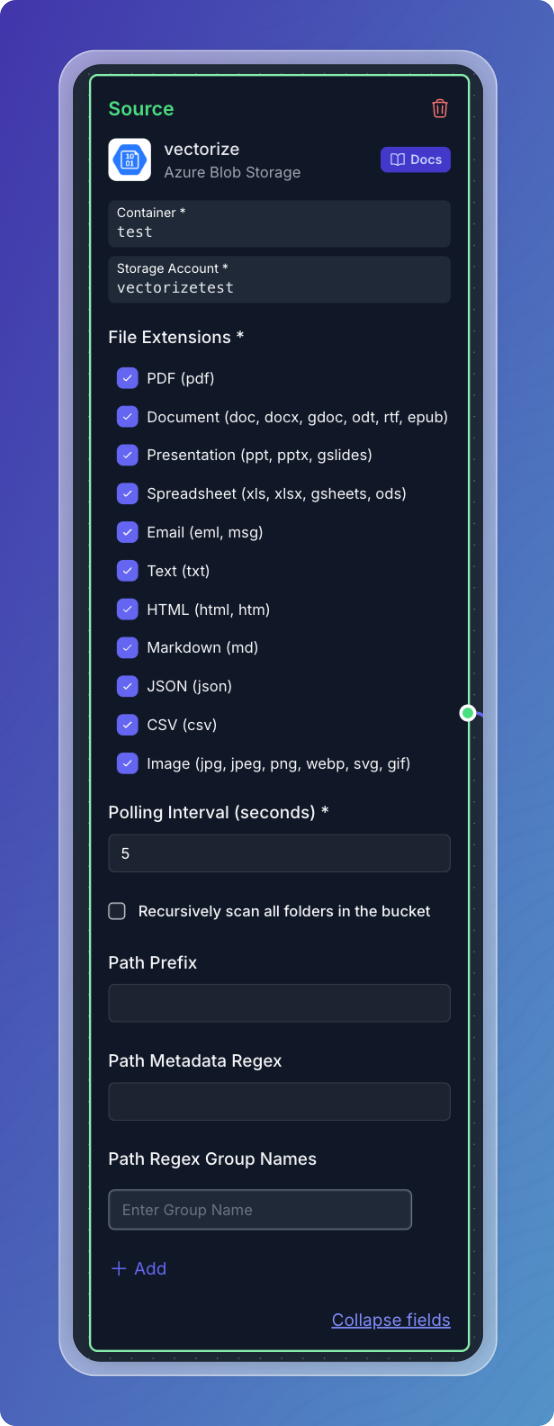
| File Extensions | Specifies the types of files to be included (e.g., PDF, DOCX, HTML, Markdown, Text). | Yes |
| Polling Interval | Interval (in seconds) at which the connector will check Azure Blob Storage for updates. | No |
| Path Prefix | A prefix path to filter the files in the Blob (optional). | No |
| Path Metadata Regex | A regex pattern used to extract metadata from the file paths (optional). | No |
| Path Regex Group Names | Group names for the regex pattern (used in the Path Metadata Regex) to label extracted metadata (optional). | No |
What's next?
-
If you haven't yet built a connector to your vector database, go to Configuring Vector Database Connectors and select the platform you prefer to use for storing output vectors.
OR
-
If you're ready to start producing vector embeddings from your input data, head to Pipeline Basics. Select your new connector as the data source to use it in your pipeline.